
Weight distribution

Weight distribution

In the world of towing there are a few safety items that everyone should be aware of before venturing out on the road. Besides the obvious such as registration and roadworthy certificates for both vehicle and towed load some other major safety concerns are :

  1. Tyre pressures on both vehicles

  2. Even distribution of loads

  3. Towball weight

  4. Vehicle GCM (Gross  combined mass)

  5. Trailer / Caravan ATM

  6. Vehicle and Caravan GVM (Gross vehicle mass)

In relation to what this article is about we will be focusing on the use of Weight distribution hitches (WDH) specifically the Andersen WDH to distribute the load between a Caravan and vehicle.

Before even considering if you need a WDH you need to do some weighing and some measuring to be  self satisfied you need to spend anywhere from $300 -$700 for a Hayman reese WDH to $900 – $1000 on a Andersen WDH.


weight distribution
           

Having too much weight from a trailer or caravan on your tow-ball makes the front of the vehicle lift as per above photos. This in turn will reduce steering and braking on the front of the vehicle but will also overload rear suspension and chassis components of the tow vehicle, as for the caravan/ Trailer  to much load at the back of the caravan and not enough at the front will cause the trailer to sway during travel which can lead to  accidents. There is  a fine line to getting it right so as mentioned weighing and measuring is well worth the effort as Guesstimating or using eyeometer is no where near as accurate when yours or someone else’s life is at stake.

Advisable steps to take

  1. Your first task is to look up your handbooks ( or the identification plates) for the vehicle and caravan to see what the maximum load is your caravan and vehicle can carry. For your van this is your ATM (Aggregate trailer mass) and includes everything your going to have in the van when travelling… water, food, beer etc. For the car it’s called GVM ( Gross vehicle mass) and is same principle, includes driver, passengers, fuel etc. ( IE: fully loaded)  Record  on paper the allowable weights based on your handbook “Car GVM” “Caravan ATM”

  2. Load up both vehicles as per #1

  3. Pick up a tow-ball weight scale from tow safe or your local Super-cheap
  4. Place tow-ball scale  under the draw-bar coupling of your van and lower the jockey wheel down so the scales take all the weight. record this weight on paper as “tow-ball weight”. Check in your vehicle handbook for maximum allowable tow-ball weight and record that as “Tow-ball max”
  5. If your tow-ball weight exceeds tow-ball max then you need to shuffle items around in your Caravan to re distribute the weight evenly. Recommendation is %10 of Van ATM on your tow-ball.
  6. Now that the tow-ball weight is within limits after re distributing the loads, Go to your vehicle while on flat ground and measure the height from centre of front wheel to the start of the wheel arch ( in the 12 o’clock position). Record that as front suspension no load  do the same for the rear and record that as Rear suspension no load.
  7. Making sure Caravan is also on flat ground back the vehicle up and reconnect the van.
  8. Re measure front and rear suspension heights now that the weight of the van is on the towball and record as front suspension loaded  and Rear suspension loaded. If rear suspension loaded dropped more then 20mm of the rear suspension no load reading then you should consider a WDH, likewise if front suspension no load is less than front suspension loaded  consider a WDH.

If you’ve performed the above and comfortable the vans not going to break in half then find your local weighbridge and get both car and van weighed independently, record those readings as Actual Car GVM and Actual Van ATM.

Legally and for safety reasons you must not exceed the recommended GVM, if you do you will have to remove un necessary items that contribute to the weight. You will have to re check tow-ball weights and suspension measurements any time you change the load of any significance.

Combine both Actual Car GVM and Actual Van ATM  to get the GCM (Gross combined mass) which should not exceed the manufacturers recommendation in your vehicle handbook.

So do you need a weight Distribution Hitch? 


By having a WDH installed, the weight that is normally transferred to the rear suspension (which takes the load off the front suspension) is once again transferred back to the front suspension making it safer to steer and brake and drive. However, having a WDH does NOT mean you can overload the van or the towball and counteract it with a WDH.

For years  most people have been using Hayman Reese WDH or similar brands and they work fine i’m sure but they do come with disadvantages such as

1. noisy when driving

2. they don’t assist in sway control unless you buy the addon parts

3. you need to remove it when backing in sharper turns

4. there is tension bars you need to lock and release which apparently hurts when you slip doing it.

Around 2011 a USA company developed a new style of WDH called the Andersen WDH. Now i don’t work for them or get commission from them but i don’t mind endorsing the product as that’s what i use and find it brilliant.

anderson weight distribution anderson weight distribution anderson weight distribution

​  The Andersen weight distribution hitch is a good design in my opinion as it has these advantages over the earlier style.

  1. Not noisy

  2. No need to remove when backing

  3. Built in Sway control

  4. Light weight compared to others

  5. Noticeably reduces trailer bounce as you go over un even roads

  6. Easy to disconnect and reconnect

Disadvantages

  1. Costs more than earlier style WDH

Overall I’m happy with the performance of it and highly recommend that the ” SHE’LL be right mate” attitude not be adopted when it comes to safety issues such as weight distribution. Me being me I’d like to go into a explanation of how the Anderson hitch works but that would be like re inventing the wheel so please check out the links below for further info.

​Here are some links to more info

Anderson hitch promo video 

Andersen Install video

Weight distribution explained 

Hayman Reese WDH how to 

Trailer weights explained 

Caravan RV Camping Discount Code

We are so happy to be able to offer you a $30 Discount Code for Caravan RV Camping. They have everything you can think of for your caravan or recreational vehicle. Weight distribution, Batteries, appliances, accessories and spare parts. Save $30 when you spend over $500. Use the codeFULLTIME“ at the checkout to receive your discount


Vehicle Charging

AGM battery not lithium

Vehicle Charging systems

 In today’s world, car charging systems use “alternators” to charge a cars battery. A car battery has different internals to the common AGM battery found in caravan’s. We can still utilise the vehicles alternator though to help charge our caravan batteries by using what is called a DCDC charger. 
 
Alternators charge lead acid batteries by putting amps back into them. For fuel economy purposes, vehicle manufacturers design alternators so they reduce the amps the more fully charged they become. As a result car batteries are often never %100 charged and at most they only ever get %80 charged.

 Trying to charge a caravan AGM battery back to %100 using only a alternator is not a efficient method. This is why when towing a caravan and wanting to charge a battery we can use DC DC chargers to assist. They work by taking a reduced supply of amps from the alternator (EG: 10 amps) and ramping that up to a constant 30 amps.
 That constant 30 amps allows 30 amps of electricity to go back into the battery per hour until it reaches %100 charged. Much better than the %80 charged like a alternator on its own would do.

A set of 240ah batteries charged to only %80 = roughly 50 amps short. This is a lot when relying on power from batteries to be off grid to keep the beer cold.


battery charging  

ctex charger

CTEK DC/DC Charger

Charging time

Charging batteries takes time. The more amps you can put back into it the quicker it charges (but not too much that you overheat the batteries).

 Example: When we were using AGM batteries if our batteries got down to %50 flat, that means its 180amps short of being %100 charged.
 
So if our batteries are 180amps short of being full and we can charge it at a rate of 15amps, the maths would be as below ..

 180a / 15a = 12 hours to charge at 15 amps or 6 hours at 30 amps.
 

 This could mean the difference between running a generator for 12 hours to charge batteries, or 6 hours to achieve the same thing dependent on the charger.
 

 DCDC chargers are only one way of charging the batteries and it should really not be relied on if you only do small trips (like 200km or less). The preferred way and easiest way in my mind is to add solar panels. We have solar on both the caravan and the ute. That way both ute and caravan batteries get charged during the day even when we don’t travel.

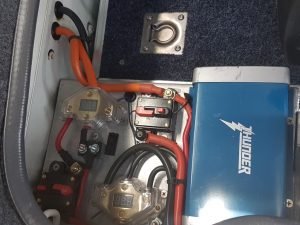
PS: the thunder brand dcdc charger pictured below i would not recommend. It charges the battery at 16volts and tends to cook the battery instead of simply charge it.


DC/DC Charger

charging devices

Our DCDC charger set up in the back of the ute


Caravan RV Camping Discount Code

We are so happy to be able to offer you a $30 Discount Code for Caravan RV Camping. They have everything you can think of for your caravan or recreational vehicle. Batteries, appliances, accessories and spare parts. Save $30 when you spend over $500. Use the codeFULLTIME“ at the checkout to receive your discount.


Solar

How Does Solar Work?

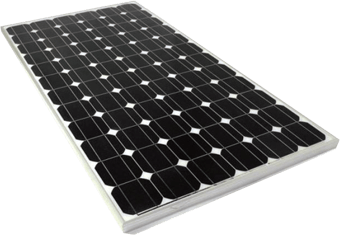
The basic principle of solar charging is the same as any battery charger (see the Charging page), except instead of plugging in, you rely on the sun. This means free energy—and the more solar panels you have, the better.

Contrary to popular belief, you can’t have “too much” solar—if your batteries are full and you’re not using the excess power, it’s simply wasted as heat. So if you’re thinking about adding more panels, go for it!


Factors That Affect Solar Charging

The amount of power your solar setup can generate depends on a few key factors:

1️⃣ Solar Panel Wattage – The more watts, the more power generated.
2️⃣ Solar Regulator Size – Regulates how much power goes into your batteries (typically 15A–60A).
3️⃣ Cabling Quality & Size – Undersized cables can cause voltage drop, reducing efficiency.

Sounds great, right? Well, there are a few things that can reduce your solar efficiency.


The Downsides of Solar Power

🔹 Panel Angle & Placement – Laying panels flat (like on a caravan roof) reduces efficiency to about 70%. So, a 300W panel will effectively generate 210W in real-world conditions.

🔹 Cloudy Weather – Clouds significantly reduce power generation, meaning your charging speed depends on the day’s conditions.

🔹 Regulator Limitations – Your solar regulator determines how much power can flow into your batteries. A 15A regulator will bottleneck a large solar setup, while a 30A or 60A regulator allows for better charging.

🔹 Sunlight Hours vs. Daylight Hours – Just because it’s daytime doesn’t mean you’re getting strong solar power. In Mackay, QLD, the average usable sunlight hours is around 5.8 hours per day.

Let’s break that down:

  • A 300W solar panel at 70% efficiency generates around 210W.
  • With 6 hours of full sunlight, that’s about 105Ah of charge per day.
  • If you use more than 104Ah daily, your batteries will slowly drain.

For reference, our Waeco fridge alone draws 3.5A per hour, so hitting 104Ah in daily usage is very easy.


Real-World Example: Our Setup

Here’s what we’re running:

600W of solar on the caravan roof
Redarc Manager 30 with a built-in 30A solar regulator (double the size of Jayco’s standard 15A)
3 x 120Ah lithium batteries = 360Ah total (180Ah usable at 50% depth of discharge)
1 x 120Ah battery in the ute (for power-hungry appliances)

Overnight Power Usage

By 7AM, our Redarc Manager shows our batteries at 87%—meaning we’ve used about 13% (24Ah) overnight.

What’s using power overnight?

  • LED lights (on until ~10PM)
  • 12V TV (~4 hours)
  • 218L Waeco compressor fridge (biggest draw)
  • Occasional water pump usage
  • Charging phones & laptops

The fridge is the biggest consumer, averaging 3.5–4A when running. The 12V TV draws 2A, while LED lights are about 1A each.

Since the fridge runs less at night when it’s cooler, overall power usage is low between 10PM and 7AM.


How Long Does It Take to Recharge?

By 7AM, our solar setup starts generating small amounts of power. By lunchtime (1PM), we’re usually back to 100% charge.

Between 1PM and 5PM, any power we use comes directly from the solar panels, meaning it doesn’t impact our battery levels.

So, as long as it’s sunny, we never worry about power.


Why So Many Batteries?

You might be thinking:
“If you’re only using 13% overnight, why bother with 3 batteries?”

Here’s why:

🔹 Cloudy Days – Reduced solar input means more stored power helps.
🔹 Shade – Parking under trees? Your panels won’t charge as well.
🔹 Dust & Dirt – Dirty panels reduce efficiency.
🔹 Extra Capacity – More batteries mean less stress about power usage.

We also have a 4th 120Ah battery in the ute, charged by a DC-DC converter and a dedicated solar panel. This battery powers:

  • Our 2000W inverter
  • High-draw appliances (like our 1100W coffee machine, because… priorities!) ☕😆

Final Thoughts

Our setup works perfectly for our needs. We don’t stress about leaving lights on, and we can relax knowing we have enough power to run everything comfortably.

If you’re setting up your own caravan solar system, think long-term:

☀️ More solar = better
🔋 Extra battery capacity = peace of mind
A good solar regulator = efficient charging

And always remember: coffee comes first. ☕😜

Batteries Used In A Common Caravan

Lithium's are so much lighter than AGM batteries.

Batteries – The Lifeblood of Off-Grid Caravanning

Pack up the caravan, hit the road, and park up by that stunning seaside view you’ve always dreamed of. Sounds perfect—until the sun sets, and you realize you’ve got no power.

That’s where batteries and solar come into play. Almost every caravan relies on them, even those parked up in caravan parks with 240V hookup. But what type of battery should you use? And how much power do you actually need?

Let’s break it down—without getting too technical—and take a look at our battery setup over the years.


Our First Setup: AGM Batteries

For the first 2.5 years, we ran AGM deep-cycle batteries, which are the most common type used in caravans. Unlike your car’s starter battery, AGM batteries are designed to provide steady power over a long period rather than short bursts.

Our AGM Setup:

3 x 12V AGM Deep Cycle Batteries
Each battery: 120Ah
Total capacity: 360Ah


Understanding Amp Hours (Ah)

The Ah (Amp Hour) rating tells you how long a battery can supply power before going flat.

For example:

  • A 100Ah battery can supply 1 amp per hour for 100 hours before being empty.
  • If you run a 5A device, the same battery will last 20 hours.

When connecting batteries, you have two options:

🔹 Series Connection → Increases voltage, keeps Ah the same.
🔹 Parallel Connection → Keeps voltage the same, increases Ah (how most caravans are set up).


The Catch: You Can’t Use the Full Capacity

Deep cycle batteries don’t like being discharged below 50%. If they drop too low, their lifespan plummets.

So even though our AGM bank had 360Ah, only 180Ah was usable before we had to recharge. That meant:

🔹 Max daily usage: 180Ah
🔹 Hourly limit: 7.5A per hour

Go below that? Say goodbye to battery life.

🔍 Want to get nerdy with the science? Check out Battery University.


How Much Power Do You Need?

It’s different for everyone. Someone running three fridges, six inverters, and 20 laptops is going to chew through way more power than someone who just runs lights and a TV at night.

To get a rough idea of your needs, try using a solar & battery calculator.

Our Power Consumption:

💡 Daily average: 72Ah per day
🔌 Appliances we run regularly:

  • 218L compressor fridge
  • Inverters, phone & laptop chargers
  • TV & LED lights
  • Smart home network (router, 16 WiFi switches, 2 x Raspberry Pis, and more!)

The Lithium Revolution

In early 2019, we made the switch to lithium batteries—and it was a game-changer.

Sure, they’re not cheap, but prices have dropped significantly, and the benefits far outweigh the cost.

Why Lithium Beats AGM:

More usable powerLithiums can safely discharge down to 20%, unlike AGMs (50%).
Consistent voltage – They hold voltage until nearly empty.
Faster charging – Less downtime waiting for a full charge.
Longer lifespan – Last years longer than AGMs.
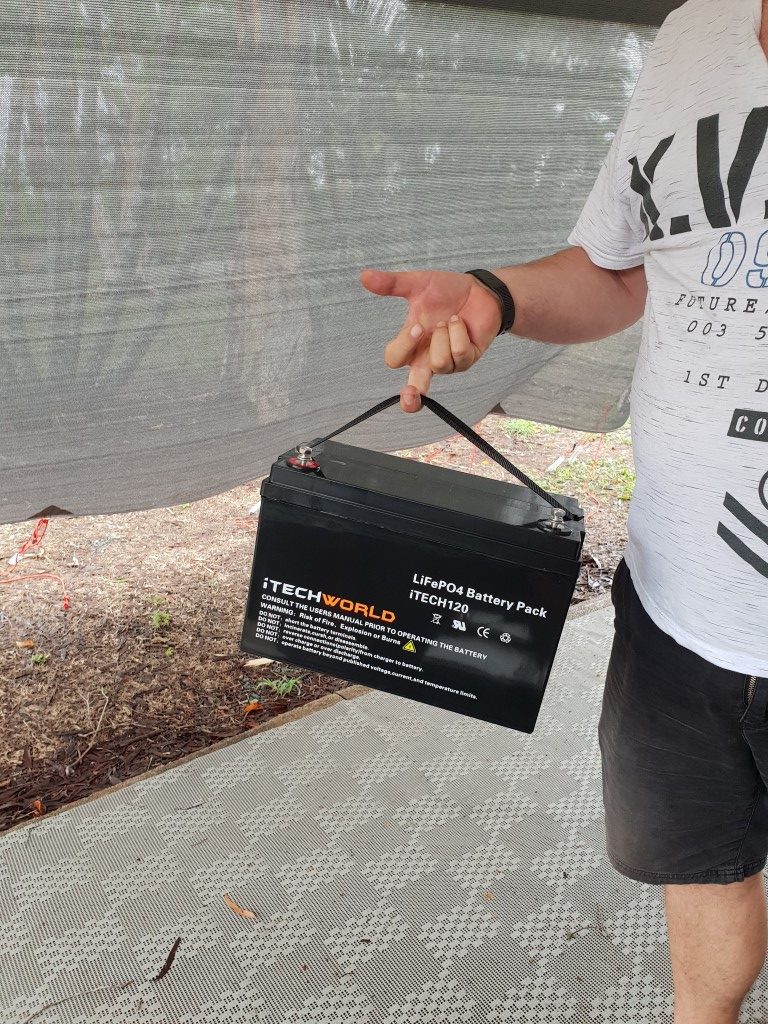
Lighter weight – Our AGMs were 32kg each, our lithiums are 11kg each!

For full-time caravanning—especially when camping off-grid for weeks—lithiums were a no-brainer.


Our Lithium Setup

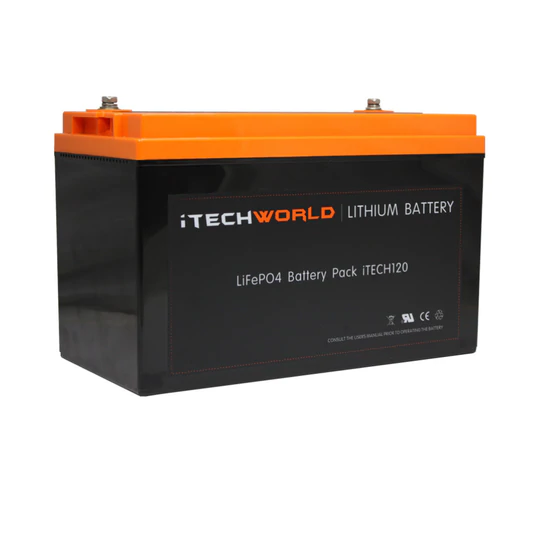
🔋 Batteries: 3 x 120Ah iTechWorld lithium batteries
Total usable power: 288Ah (since we can use up to 80% safely)
☀️ Solar: 600W on the roof

Since upgrading, we never run out of power. Even if we get zero solar, we can last four days before needing to charge—though I still obsessively check the battery meter (because that’s just who I am 😆).

Oh, and yes, I can now lift a lithium battery with one finger—which is a big upgrade from those back-breaking AGMs.


Final Thoughts

If you’re just starting out, AGM batteries will get the job done. But if you’re serious about off-grid living, lithium is the way to go.

🔹 More power.
🔹 Lighter weight.
🔹 Faster charging.
🔹 Longer lifespan.

For us, switching to lithiums completely changed how we use power on the road. Pair that with 600W of solar, and we’re basically energy independent.

And no matter what setup you choose, always enjoy a happy and fully lit-up life! 🔋☀️🚐

outback Equipment

Handy tips

Tips And Tricks For Caravanning –

As time goes by and we learn new things we’ll be adding those tips and tricks for the caravanning world on this page. If you have any good tips to share feel free to add to the comments and we can add them to the page .

Please note : A lot of these tips and tricks may relate more to someone who aims to free camp more so than caravan parks on power sites with endless water.

  • Wrap meat, You’ll gain so much more space in the freezer if you  un package meat bought from the store and wrap it into sizeable portions with Glad wrap. or get a vacuum sealer and use that instead.

tips for storing meat in your freezer

Remove packaging

  •  

  • Beer, Buy cans instead of bottles. Saves on space when disposing and you can squeeze more cans into some random storage spaces.

  • Grease your balls – OK that probably come out wrong but…. put a little bit of grease on your towball before hooking up, reduces wear on the ball and helps it pivot and reduces squeaking.

  •  WikiCamps – The best $7 or $8 you’ll ever spend is getting the wikicamps app from google play store. It marks out all the paid and free camp sites around Oz with user reviews and pricing and hints and tips. Well worth it.

  • Levelling blocks – DO get yourself some levelling blocks and a level spirit. Most places you stay aren’t perfectly level and the idea is to make your van sit level so your three way fridge works properly if you have one and also so that sinks drain properly and when doing dishes the run off water doesn’t head off down the back of the bench top. Our Drawbar is hard to find a consistent smooth place for the spirit level (bubble gauge)  to read properly so we base it on how level the sink top is.

  • Gas fitting – If you have a option to get a gas bayonet fitted to your van before purchase then do so, it’s a convenient option for plugging in the BBQ for the snags and steak.

  • Mirror bag – If you buy a set of Milenco extended mirrors ( which incidentally i recommend as they have a good strong mounting system, easy to look through and don’t shake like a naked eskimo) then use it to carry your 15amp, 20 metre long power cord in as it fits nicely 🙂

  • Oven temperatures

  • 140C = 275F = Gas Mark 1

  • 150C = 300F = Gas Mark 2

  • 160C = 325F = Gas Mark 3

  • 180C = 350F = Gas Mark 4

  • 190C = 375F = Gas Mark 5

  • 200C = 400F = Gas Mark 6

  • 210C = 425F = Gas Mark 7

  • 220C = 450F = Gas Mark 8

  • 240C = 475F = Gas Mark 9

  • Stabilizer legs – Try and aim to point your stabilizer legs towards the back of the van when travelling that way in the event that you haven’t locked them in place properly they are more likely to bounce off the road than dig into the road and catapult the van 🙂

  • Power cord rubber band – Put a rubber band around your 15 amp power lead. Reason being is when it gets windy the flap that usually covers the power point when not plugged in starts bouncing on the power cord and bangs all night long. Putting a rubber band around the power cord allows you to stretch it over the flap to stop it knocking in the wind.

About Fulltime Caravanning

fulltime travel around australia with laz and sue
Sue and Larry


About Laz and Sue

Larry and myself Suzie have always had a passion for adventure. We decided in 2013 to save for a caravan and go fullltime caravanning around Australia. We also decided the best way to do this was to move to and work on Hayman Island, in the Whitsundays, Queensland, Australia.

Larry was initially the Mechanic and then worked his way up to became the Utility’s Manager. Eventually returning to the island as the Engineering Manager.

I started doing whatever I could, to get on the island. Starting out in the laundry (you got to do what you got to do). I also worked in housekeeping and as resort gardener, a bit different from my job as an Assistant Nurse.

In July 2016 we bought a Jayco Starcraft. Larry, being a man of many talents, started to install what we needed to free camp and be fully self contained (see here). After building a trike and Hovercraft from scratch this came easy.

We started fulltime traveling in November 2016. There’s currently no end date planned. Working when needed to top up our funds. So far working on a WA Cattle Station (see here) and tropical island. With so much to see and do around this beautiful country we wanted to document our journey in this travel blog and on Facebook (see here). We share our travels as we keep doing laps and zigzags. We have been to every state and territory including Tasmania. Our hope is to inspire and encourage anyone thinking about travelling Australia to do it now.
 
We would be happy if our journey can help others to “live the dream and not just dream it”.
Follow our travels around Australia and drop us a message if you’d like to see something feature on our site. 
We look forward to meeting some of you on your travels.  
 
Remember…. “Don’t just dream it…. do it”.
 

Posted on

Cowra Showgrounds – NSW $20 pn

Cowra Showgrounds NSW

Cowra Showgrounds

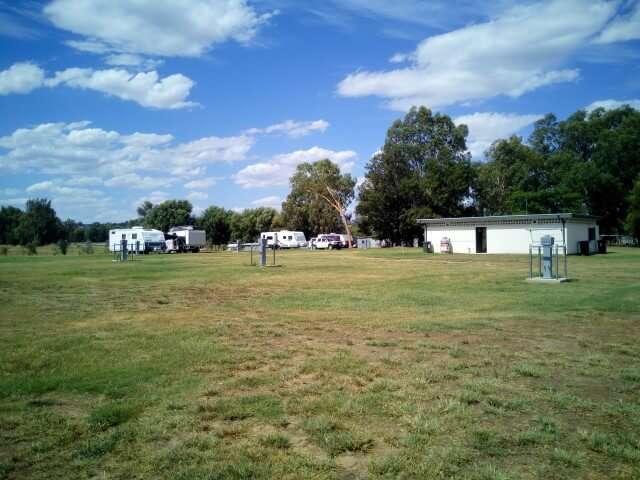
We pulled in to Cowra show grounds and it looked large and clean. All the power and water points looked brand new. On three sides of the grounds are horses and on the fourth as is a petrol station.

I had a walk around the toilet/shower/laundry block and noticed on the wall the phone number to ring the caretaker. I rang and left a message. The caretaker arrived a little later but said he would be back to collect the $20.

Cowra Showgrounds

Local pub

We had read the pub was only 5min walk away and it was a stinking hot day so we headed to the pub. Unfortunately as it was a hot day the walk seemed to take twice as long and it was meant too, 10 min seemed like 20 min We walked over the bridge to the first pub, closed! 🙁 🙁 Noooo…. But behind it was another. Yipeee … aircon and a nice cold beer 🙂 Beer x2 $10

When we came out of the pub we noticed a small bridge over the river, under the bridge that we had crossed… a short cut 🙂

Someone had painted art on the columns of the larger bridge with cool art work which was nice to see. Kids were playing in the river and people sitting on the banks.

Cowra

We walked back past the information centre and MacDonald and the large park/rest area full of roses and eagle statue. We must have missed the caretaker while we were out but he came around in the morning before drove over the road to top up on fuel and head to Yass.

If you like staying at showground, sports and recreation grounds you might like our post on the ones we have stayed at. Updated each time we stay at one. With over 17 in 5 states at this time. You can read them all in one place here

More Information

  • Location : Cowra
  • Click for Google map location
  • State: New South Wales
  • Pets: Yes
  • Camp type : Showground
  • Price : $20 –
  • Water ? : Yes
  • Power ? : Yes
  • Will suit – All sized vehicles
  • Is it on Wikicamps ?: Yes
  • Drive time to nearby shops:    – 5 minutes to Cowra
  • WIFI (tested with boost): Yes
  • Amenities : Toilet and shower block
  • Other :
Posted on

SPREADSHEETS – Budget/Solar/Battery

spreadsheet

Budget SpreadSheets

We often wondered how much money we would need to travel full time around Australia. And how long we could live on our savings before finding work again.
I like to plan and keep lists and Larry likes his spreadsheets. We decided to start calculating what we buy and what we spend and what we spend it on.
Check out our Free budget spread sheet and do your own calculations.

Solar/Battery Spread Sheet

Larry also love’s his tech/gadgety stuff so looked into what solar/battery set up we needed. He found a solar calculator which is highly configurable to help judge what you might need for free camping.
You can also change this spread sheet for your own use.
You can click on the Spreadsheets link, under Tips and Tools or click the link in this page.

 Want to find out some other solar calculator resources ? 

The Australian business Redarc have a great page with online calculators etc.

Can you think of a cool spreadsheet that would be handy for the Aussie traveller ?

Posted on

GPS Navigation

Navigation 67LMT

Navigation using GPS

Whether you’re a full time caravanner or travelling around your own City/Town, chances are you’ve used a GPS navigator. There will come a time if not already that you will possibly need to update your GPS navigation system. I’ve tried a few over the years and like anything they all improve as time goes by. So i wont dive into a novel on versions that I’ve had 10 years ago and will focus on the more recent.

Our First Units

At the start of our journey we had just been driving around local areas not venturing to far abroad so our previous in car units have sufficed. A couple of years ago we had a in car entertainment unit with a built in navigation system. It did the basics and also drove me insane with constant beeping if ever we were near a rail way track. We used to live in the Whitsundays amongst a gazillion cane fields. Cane train tracks are everywhere. You could imagine how annoying that got after a while, Beep beep beep from the GPS unit.​
 
Next i bought a in car entertainment unit that was a android based platform. The principles of an android unit + two android phones made sense. They could talk to each other with little effort. Not forgetting the compatibility of being connected when in the car should improve. Well that was fairly true as the phones connected well to the unit but the GPS app that came with it was a bit average so i downloaded and installed……

Sygic app

Now usually I don’t get super persistent with apps. If it’s rubbish I normally ditch it pretty quick cause of the vast amount of options out there. For some reason though I really wanted SYGIC to work. Sygic it self had potential and when you read on the net about it a huge amount of people use and love it. For us though it was painful to enter destinations into. The sound kept dropping out along with other minor annoyances.
 
As i mentioned i was persistent on this one much to Suzies dislike. Her frustrations with the unit would show every time she went to go add or look up a point of interest (POI).
 When we started on our big adventure of full time caravanning and started to use the vehicle more than once a month it became apparent that SYGIC was about to get a hammer through its *cough * point of interest if we had to put up with it for the big lap so finally i gave in and uninstalled it and went onto testing other options.

CoPilot

CoPilot from google play

CoPilot showed a little bit of promise when compared to SYGIC. Entering destinations was a lot easier and it did live traffic updates. Also, like SYGIC, it did offline maps ( which is the reason I didn’t just go with google maps). Unfortunately the first test drive with it didn’t show speed limits and many POI’s for a common holiday area. Places like South West Rocks in NSW showed very little POI’s and speed limits. So after only three days  of testing it that made the redundant also.

navigation Garmin

Choosing a Garmin

With Full-time driving to new locations, we decided a factory built navigation unit is a better choice. I did a couple of nights researching and reading reviews. It turns out the top players in the market are still Garmin, Navman and Tom Tom. The top seller and most positive reviews seemed to be for Garmin. So off we went for a drive to Coffs Harbour to locate a Garmin GPS unit.
 
As we currently living off our savings we didn’t want to buy the super duper model. Although bells and whistles are always nice we decided on a 6 inch Garmin 67LMT model. The LMT means it has lifetime maps and traffic. It was on special from $237 to $167 at Harvey Normans and $220 across the road at JBHIFI so we picked one up at Harvey’s.
Navigation 67LMT

My opinion of the Garmin 67LMT

After installing this unit and giving it a test drive to Kempsey, we went searching for “Slim dusty centre” thinking even though he’s not something we are interested in he was a Aussie icon in the country music world surely that’s listed as a POI… but no it wasn’t and had to revert to google maps to locate it.
 
Then we thought OK the building was only erected December last year i’ll give Garmin the benefit of the doubt and say it’s too new. So we continued cruising in Kempsey, (the home of Akubra another Aussie icon). We went searching for the location of the iconic Akubra. Garmin didn’t even know the street for Akubra existed let alone the company. Strike 2 of 2 and we had to google map that one as well.
 
Overall it’s a dedicated GPS unit, comes with Updates and a Australian voice. It has features that work and a hell of a lot more POI’s than sygic or co pilot so i can’t go condemning it this early on. I think we happened to pick two places we thought should of got listed that weren’t.

It’s a pity Wikicamps is not a GPS unit as well, as that would be awesome for travellers like ourselves. Who knows one day they might and that would give the expensive Hema some competition.


Update - 2017

We’ve been using this Garmin 67LMT for a while now and to be honest i’m not that impressed with it. If however they brought out a model that took into consideration the size of the caravan that would help alot and be a different story perhaps.

Here are some of the key things that we’ve found to be frustrating with this model.

  • As above the maps seem to be out of date. IE : Some long time existing main roads still have no speed indicator on them despite being able to update over the net to the latest maps.
  • Often being sent around the block instead of the direct route and in some cases can be a 1 hour drive so we found out in NSW.
  • Small things like asking us to do u turn in the middle of a motorway for at least 30 minutes gets annoying
  • POI’s seem to be out of date

I could add more to the list but overall in our experience, We would rate the Garmin 67LMT as 5 stars out of 10 , the functionality and potential is there but the maps they use let it down dramatically and after all a GPS regardless of the brand name is just a chunk of plastic if it has no maps.

Update 2022

So with the previous Garmin out the window we then tried a specific RV780 model.

This particular model (The RV780) we have used for a couple of years now and although it’s not brilliant, i can say it’s better than previous models. This model has a setting for telling the unit the size of your caravan or trailer. With that knowledge the unit will not direct you down roads you can’t turn around in and also won’t direct you down roads with bridges lower than your caravan.

That concept is good but, that feature only works if actually navigating, not if you are just driving somewhere. Also she (the GPS voice) has tried to take us on a shortcut across the Mooloolaba river and has taken us on some un necessary journeys.

Conclusion

Navigation units are only as good as their maps. In my experience it’s usually the maps that let the units down. It’s also my experience with various models and brands that they all suffer from Map issues. This could be as simple as taking you the long way to thinking your a submarine and trying to take you across water.

Google maps and Waze (also owned by google) are always a good fall back for accuracy. However i still like to have a dedicated unit on my windscreen. And as such our current Garmin with its HEMA maps and loads of POI’s will suffice despite it being limited by the accuracy of the maps.

Who ever is responsible for constantly updating maps used by all navigation units, has a big job confirming and updating roads, speeds and the likes. However i suspect its like Australia post tracking system… the technology is there to track your parcel but it often doesn’t work because the person who is surposed to scan the delivery never does.

Suspect it’s the same principle Garmin, Tom tom etc all get a hard time for not working properly but the buisness dedicated to updating map data probably just has a underpaid student who is too busy on their phone to care 🙂

Want to read some more articles like this ?

Anderson weight distribution review

DJI phantom Drones

Dash cams 

Posted on

Dorrigo – Danger Falls Lodge and Campground, NSW – $20

Dorrigo – Danger falls

 
Our GPS took us the wrong way to start with, for some reason it took us up some tiny back streets, up a hill. Thankfully there was a large garbage truck ahead of us, so we new we would fit through, phewwww….
 
Larry found the way to get there. Eventually, we got there after waiting for enormous trucks to cross tiny bridges, road works and not very good signage leading up to it.
 
As we drove in and parked on the small hilly verge everyone else was packing up to go. A bus load of teenagers, a couple camping in a tent and a camper van at the end ( something we said? Or is that why the fly’s were on us at the last camp hmmmm …)
 
We moved to where the campervan was as it was flatter and had the best views.
 
I checked out the toilets, two of, and same with showers. There was also a bin and a sink for washing up if needed.
dorrigo
dorrigo hill top

Walk to the Falls and Labyrinth 

Cows were in the next field and birds were hopping around. We went for a walk to the opposite field which had a Labyrinth made out of steeping stones. We had to have a go, and I had to finish it.

After that we then headed down to the waterfall only a 10 min stroll (if that) down hill (remember you have to walk back) Its well worth it to see the waterfall. Neither of us took our swimmers but others did. It’s just beautiful. People started to turn up that were on day trips so we headed back up (slowly!)

Labarinth at dorrigo
Signage to waterfall

Nature all around us

Bill, the owner came around to collect the camping fee, Bill seems a lovely guy. He gave us some tips on the roads ahead and chatted about his cows.

I loved the view of the field, cows, trees, greenery (a beautiful thing when you have been living in dry north Queensland)

Dorrigo caravan parking
Scenic hill top camp

I recommend this place for sure, the waterfall really is lovely

Waterfall
 

  • Location : Dorrigo danger falls
  • Click for Google map location
  • State: New south wales
  • Pets: Yes
  • Camp type : caravan parking
  • Price : $20 – unpowered or $25 power and water
  • Water ? : Yes
  • Power ? : Yes
  • Will suit – medium sized vehicles
  • Is it on Wikicamps ?: Yes
  • Drive time to nearby shops:    – 10 minutes to Dorrigo
  • WIFI (tested with boost): yes
  • Amenities : toilet and showers and seating
  • Other : views of hills and farm scenery, waterfall