
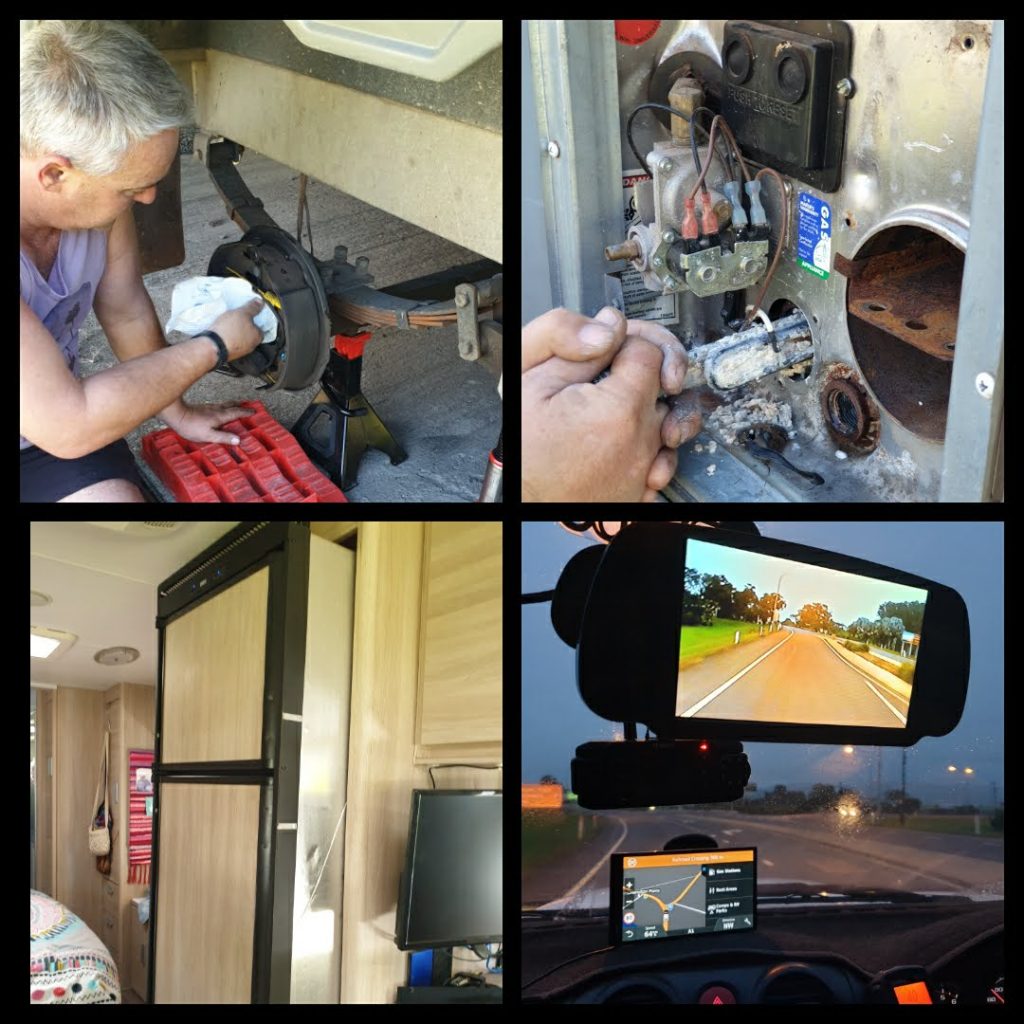
Things had been quiet on the travel front over 2020 due to Covid 19. This however gave us the opportunity to do some preventative caravan maintenance.
Here are some of the things we worked on
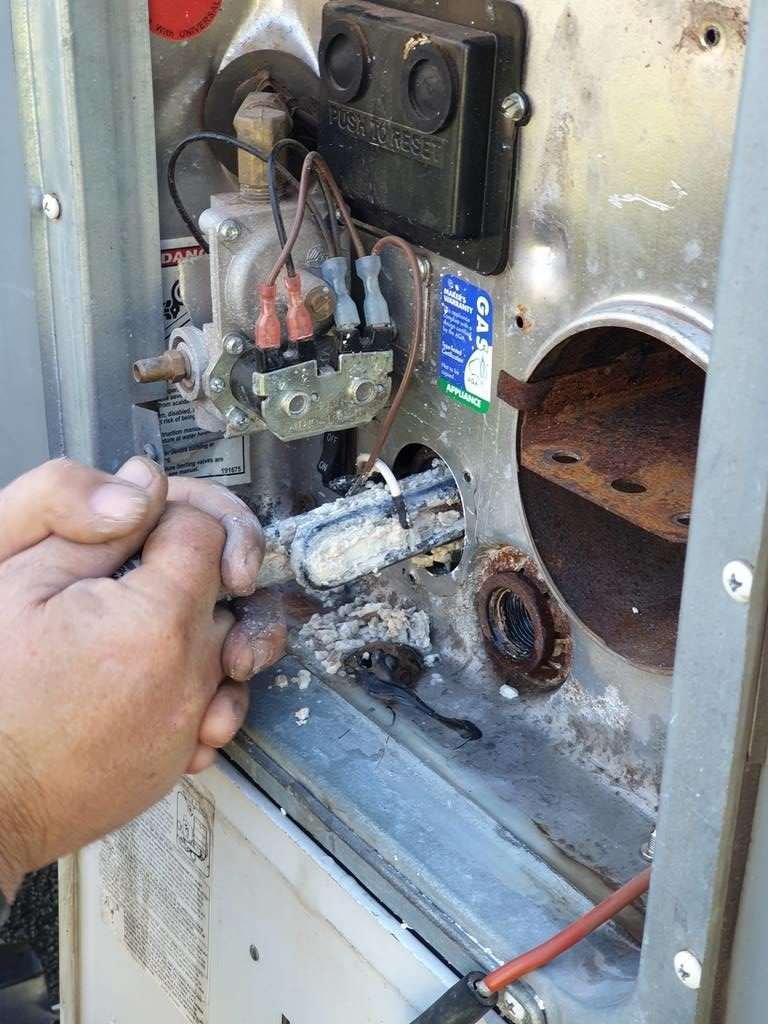
Caravan Hot Water System Element Changed Due To Calcium
Living in our van full time for the last 4 years we were bound to get calcium build up. We change the Caravan Anode regularly as part of our caravan maintenance routine. Larry had noticed the build up of calcium in the Hot Water Cylinder.
After seeing a constant drip from the hot water system for a while and then starting to hear a strange noise (like a hissing you get in a noisy kettle) Larry turned off the power, water and gas and drained the hot water system.
After that was taken out he could see what was meant to be the element, thick in a build up of calcium.


[sapce]
The hot water tank was flushed with water. Scraping as much calcium out as we could. Chunk after chunk came out.
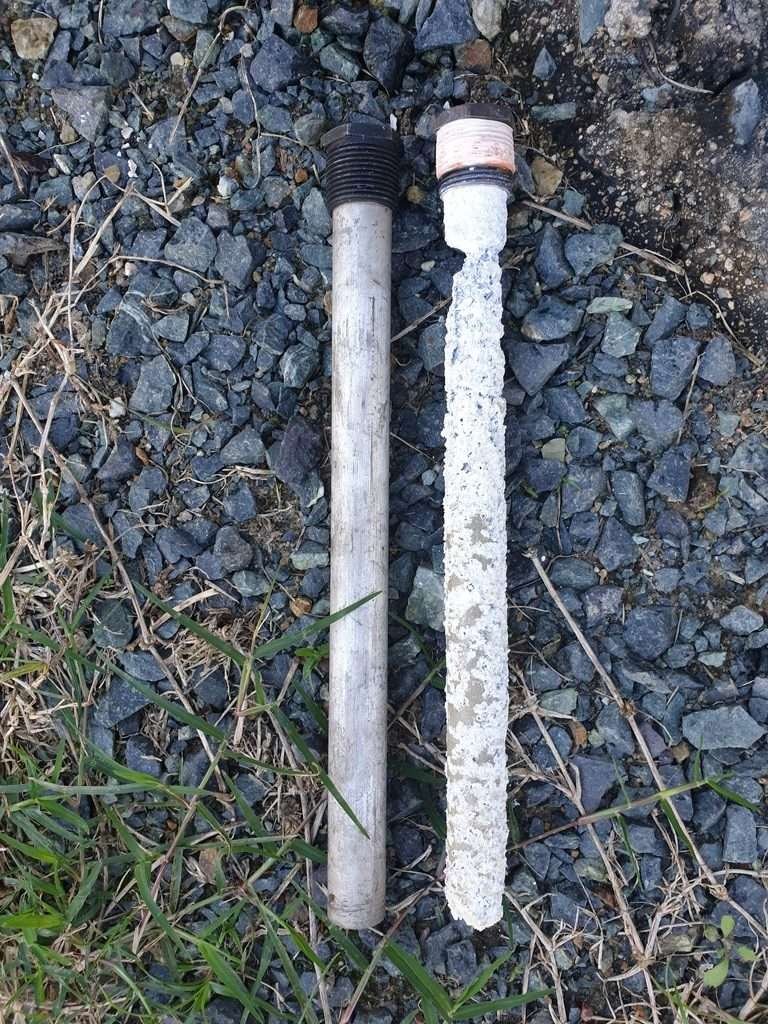
The Hot Water Element
The element was so chokers full of calcium, it was hard to pull out of the hole, as the element was now bigger than the hole. Pulling and wiggling it out meant that a lot of the calcium build up was left in chunks, in the tank. Large chunks of calcium were broken up in to smaller pieces so we could remove them.

The hot water pressure release valve
We soaked this in white vinegar and a little bicarb of soda. That got rid of almost all of the calcium.

Before & After Our Caravan Maintenance
The Anode
As we were giving the hot water system a good clean out I wanted to change the anode as well as replacing the element. It didn’t need changing, it had plenty of use left. I just wanted to start a fresh.
There is still build up that we can’t get to. I have read you can put bicarb and vinegar in the tank over night to help get rid of it, we chose not to.
We might now check the hot water element each time we check our anode to see how that’s going as well.
The hissing noise and dripping have gone and the water is even hotter now and last longer in the shower
Caravan Maintenance – Wheel’s
Larry, is always doing a bit of caravan maintenance. Mechanic’ing for 27 years, has served him well while on the road. Thankfully no major issues have occured. But tinkering here and there to keep things in check gives us peace of mind.
After putting some new Bushes on the ute, this week he bought a wheel bearing packer, to do the caravan. This is to help stop the bearings wearing out as we travel a lot.


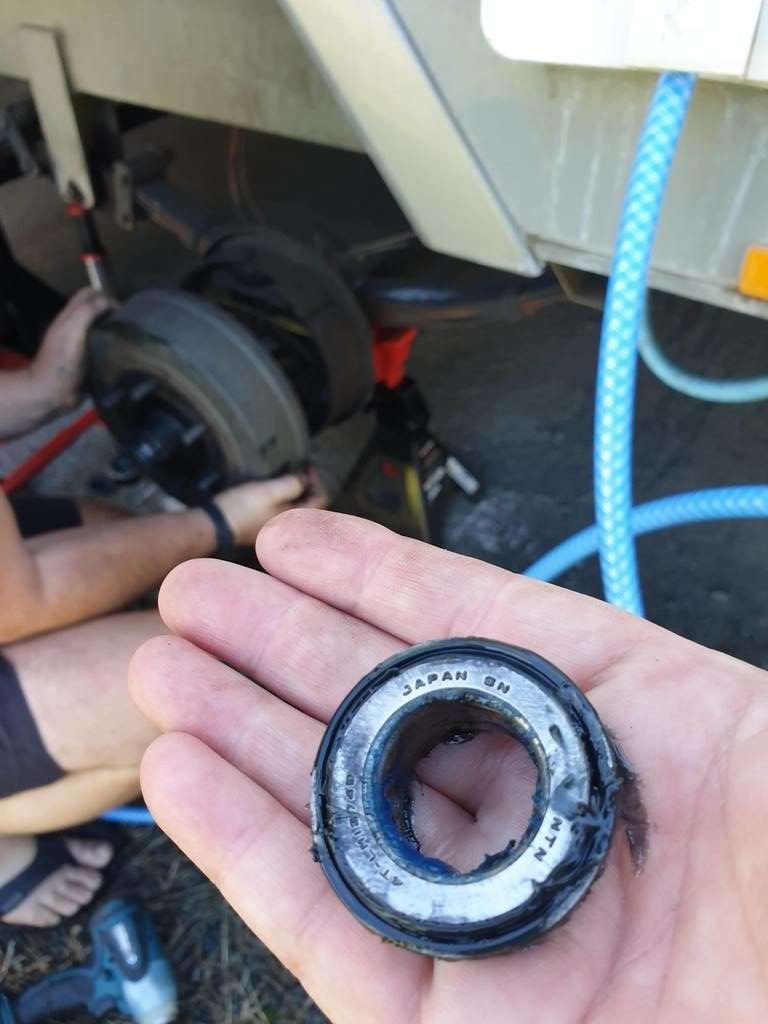
As you can see from the photo below we had bought a 8 tonne hydrophilic jack. As well as using it to do our wheel bearings it cam in handy when one of our caravan tyres blew out while travelling. We were so glad we had it!


When We Blew A Caravan Tyre While Traveling
Caravan Fridge Issues – Re-Gas & More
Our fridge is a 218 litre Waeco RPD218 compressor fridge (On a side note, we recovered the doors when we did Our Caravan Makeover)
We noticed a few months ago that the fridge wasn’t cycling as much as it used to. Only turning off for short periods over night.


Caravan Make Over
Having freedom camped most of the time we were noticing our batteries were dropping a lot more than usual. As we have 3x 120ah lithium house batteries and 600W of solar we knew something wasn’t right
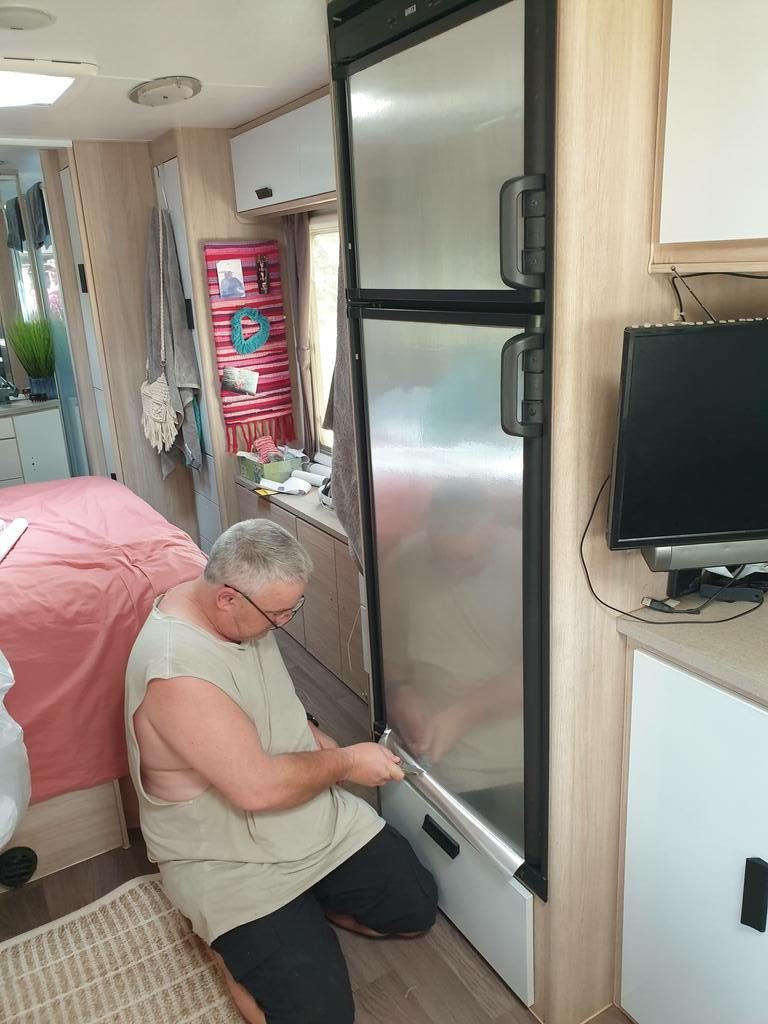
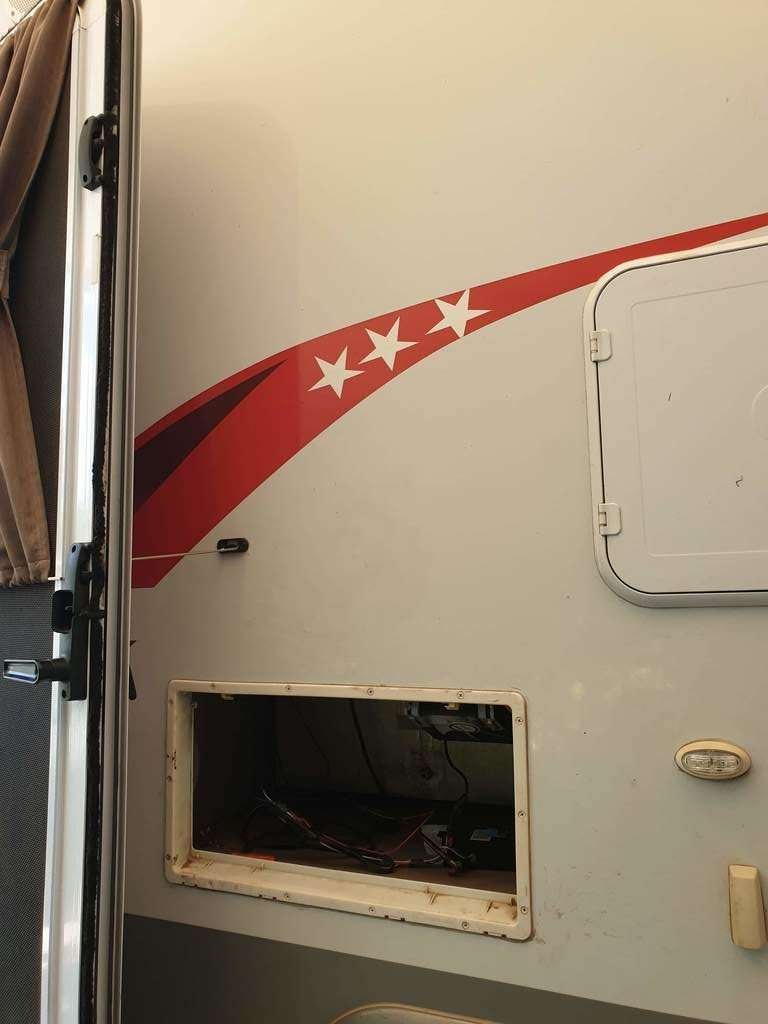
Take Out The Caravan Fridge
Due to Covid19 affecting so many businesses we had to take the fridge out ourselves. Taking it to a Dometic service agent for repair.
Wow! The B&S8 12v power cable was clipped to the top of the back wall. This meant we couldn’t just take the fridge out, Larry had to cut the wires. Good one Jayco :). The condenser was also full of dust. You can’t get to any of the main refrigeration components as they are at the top. The vent holes are at the bottom and on the roof.

Larry always thought the wire for the fridge wasn’t heavy duty enough. When he traced where the wire went, it wasn’t a direct route to the battery. Instead of being around 5 meters long it was more like 9 meters. This could also have given a voltage drop
Upgrading The Fridge Wiring & Insulation
On looking on the Waeco website it states the wire should be at least B&S6 in size for the distance required. Larry decided to re-wire, with the correct size wire, directly to the batteries.
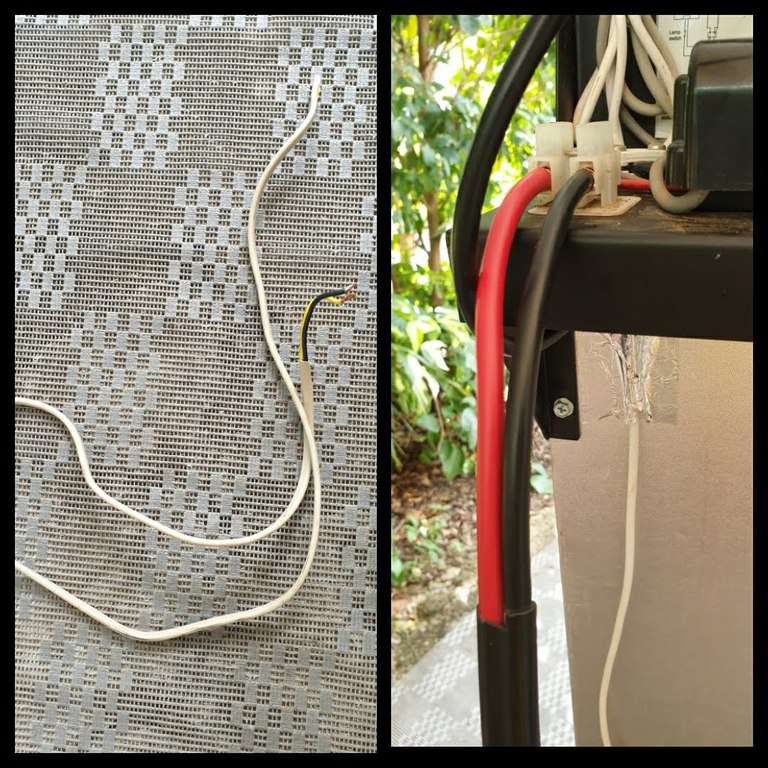
Larry also decided while we were doing some caravan maintenance, he would connect the wires with a couple of Anderson plugs. This way if it has to be taken out again it will be simple!


Lastly he bought some insulation to wrap around the fridge just to be double sure .


Fridge Conclusion
The repairman re gassed the fridge to the correct level and checked for leaks (none were found). After a few days we noticed the freezer temperature was not getting cold enough. After phoning Dometic they said that some gas may need to be taken out, even 1g of gas can make a difference.
So we returned to the repairman for him to take out some gas. The freezer is now better although we haven’t tried it on battery’s yet
Turning Our Rear View Mirror Into A Rear View Camera
Not quite caravan maintenance, more a tip for some. Our caravan like most these days has a rear view and reversing camera. They came with a Sphere LCD screen that clip’s on to the utes rear view mirror. This way, when towing, as well as the extended side Milenco Mirrors, we can see behind us. Reversing is also so much easier.
Unfortunately each time we unhook the van, we have to unplug the screen and take it off the rear view mirror. And that’s a pain when doing it frequently!

The ute has a canopy on the back so it can be hard to see what’s behind us. So, until now the ute’s rear view mirror on its own has been somewhat useless.
Larry has been searching for a rear view camera for the ute. One that we can use without removing the large clip on LCD screen.
It was quite hard to find as most stores only stock reversing cameras. We already have one of those on the ute as well which is priceless for backing up to the caravan!
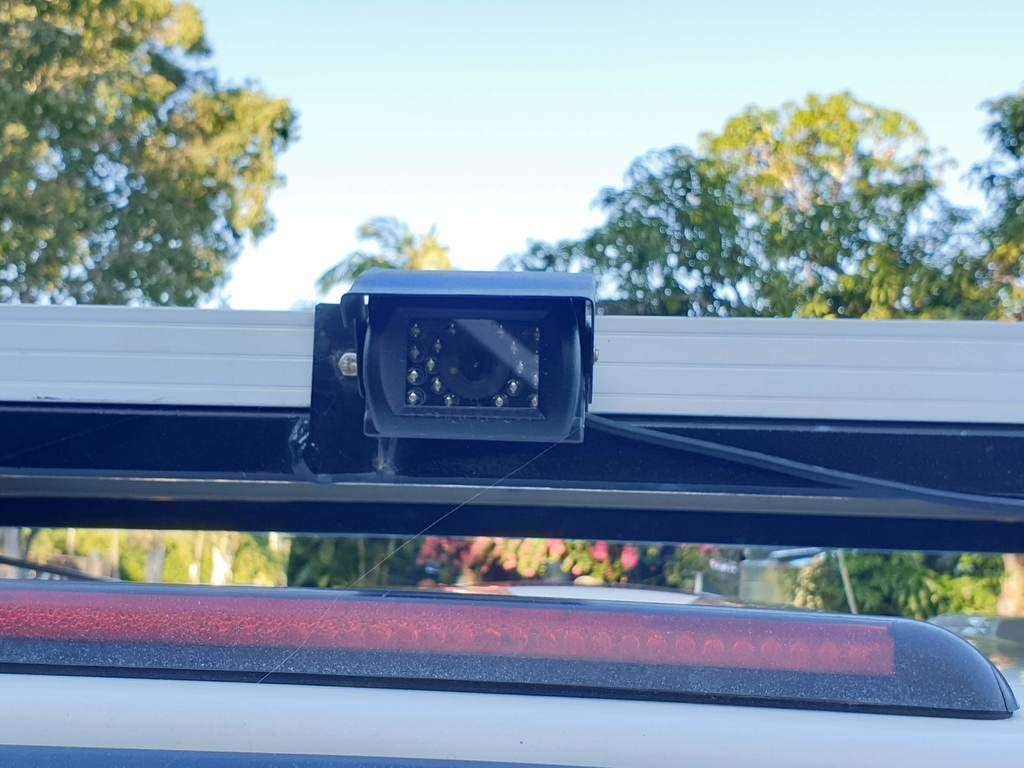
Larry has installed a new rear view camera with night vision that he’s mounted on the ute. The view from it is fantastic. Not only is it clearer than when we hook it up to the van cameras, but it’s night time view is perfect. It looks like daytime (in dusk and dawn situations), even showing up colours and details.

As full time travellers we hook up and disconnect the van often so this is very handy for us.
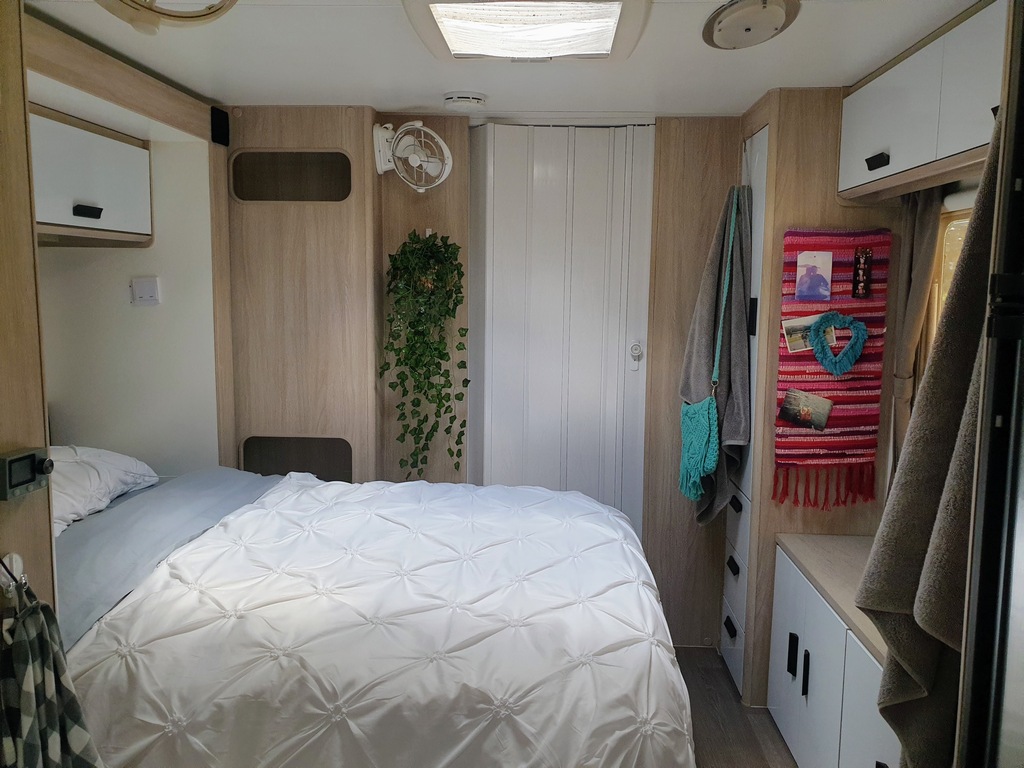
How To Keep Your Caravan Doona On The Bed?
Another tip (not caravan maintenance) … Like others who live in their van full time, we had trouble with our doona slipping of the end of the bed. The van is level and we use cotton sheets.
What’s the go? Why? Whats the difference between a house bed and a caravan bed that makes it want to slip slide away?
I have no idea!
But…. If you’re having the same issue, we have found a way to keep it on the bed at night. Without constantly getting cold, struggling to pulling it up and almost knocking myself out.
Other people had suggested one of those bed rails at the end of the bed. I wanted something a bit more discreet.
Just to note, I do not put our doona in it’s cover. The cover sits on top of the doona.

What we have done….
1. buy some elasticated sheet clips (we had already had some form a cheap shop) or you could use some old suspenders 😉
2. Sew a loop to your doona at an appropriate location on either side . You could sew the loop on to your doona cover? (our doona already has ties so tied them in to a loop)
3. Thread the elasticated sheet clips through and next to one of the your bed lattice.
4. Clip this on to your doona loop


Voila! your doona will stay put.
Caravan Toilet Cassette Sliding Flap Broken & Cleaning of Toilet
So after 4 years of using our toilet, it S**t itself a little
The part you slide back before you do your business had stopped in the open position and would not close. Needless to say the van was not smelling the best.
When we emptied the toilet we noticed the half moon/sickle shaped bit underneath had broken off. Thankfully the toilet was still usable! ?
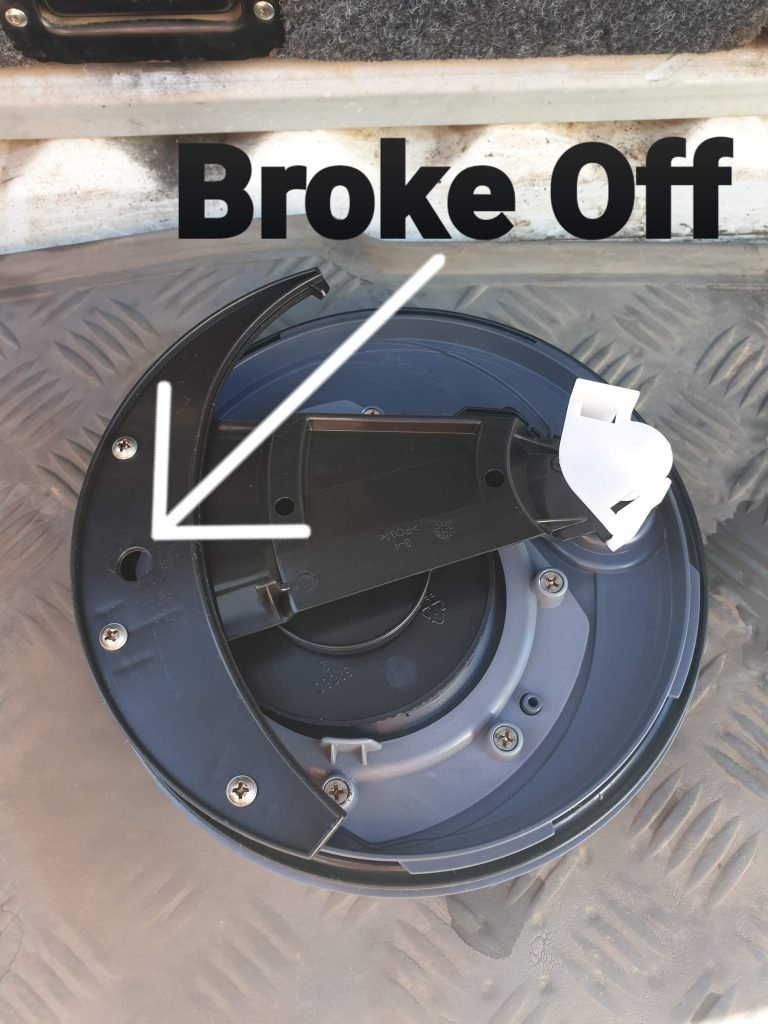

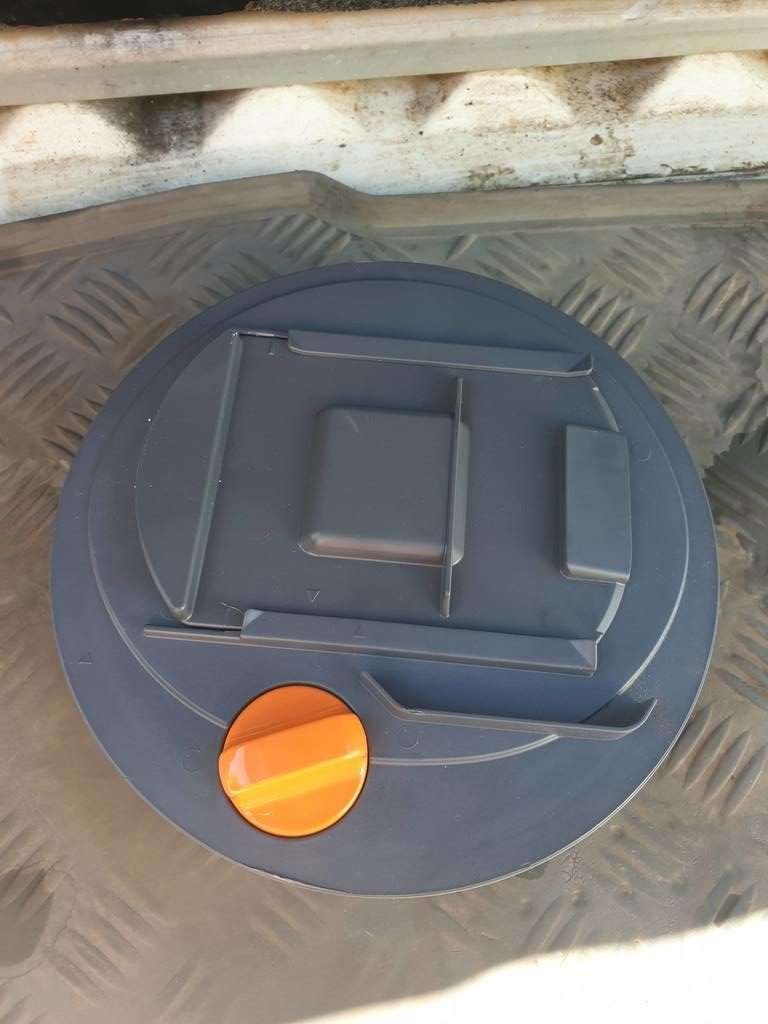
Larry ordered the new top mechanism from Caravan Plus for about $80, better than paying for a new toilet
As we were fixing the toilet up we decided a good internal cleaning was in order. The method I love the idea of, and my usual go to, is vinegar and bicarb. I didn’t want to be emptying this down a dump point though.
Anyway…. instead we bought the proper Thetford cassette tank cleaner. You only use a about a quarter of the bottle and hot water.

We left the cleaner to do it’s thing over night, shaking it around every now and again. It did take of all the years of poop off the sides. The cassette did have a coating of calcium. If I had done vinegar and bicarb I recon that would have come off to ![]()
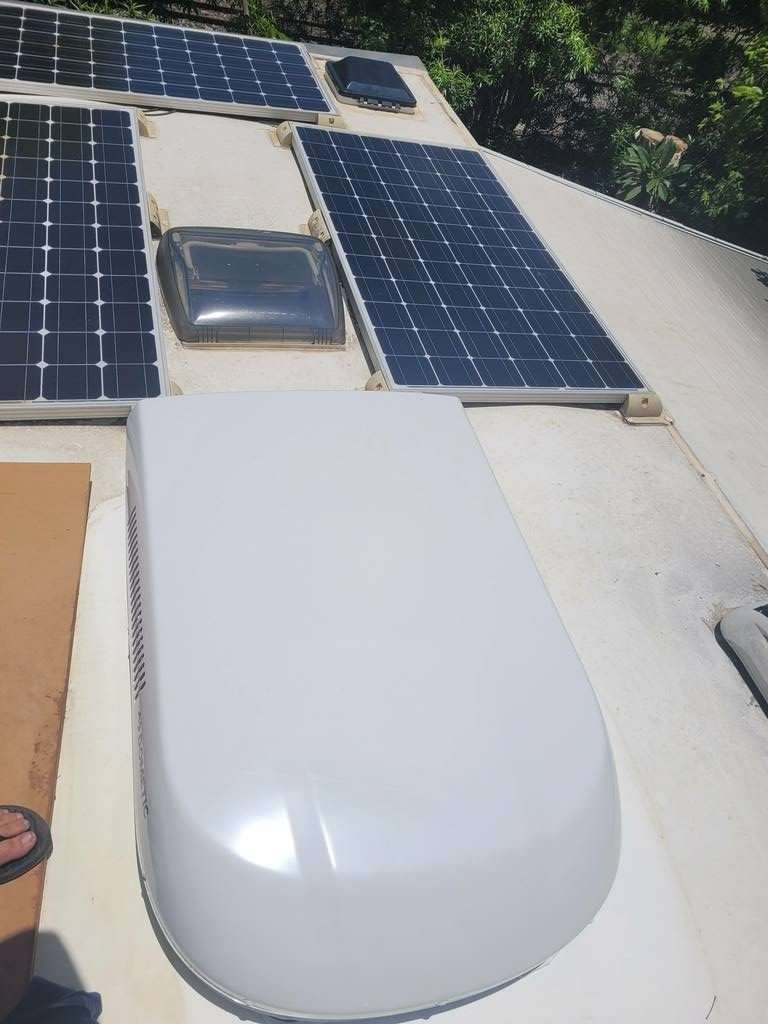
Installing New IBIS 4 Air Conditioner
Our old aircon decided it wasn’t going to work properly. It stopped and started by itself. Larry unplugged it which seemed to reset once he plugged it back in. Then we could only turn it on and off, the filter needed cleaning every couple of days and Larry found the circuit board was corroded and damaged by condensation.
We decided to get an IBIS 4 after reading how quiet it was. Caravan RV Camping have them, with a discount and free delivery .
Save $30 at Caravan RV Camping when you spend over $500. Use the code “FULLTIME“ at the checkout to receive your discount.

From Caravan RV Camping
How we installed our IBIS 4
- Larry bought some wood to spread the weight while on the roof.
- Straps were put around the box ready for lifting. The Aircon was lifted on to the roof of the ute so it didn’t have far for it to go.
- Larry got on the roof and pulled the box up while our friend Muzza helped push the box up the ladder to the roof.
- The old inside fascia was un-bolted and taken down.
- Time for the old aircon to be pulled gently away from roof using a hammer handle as leverage. Separating it from the silicon under it.
- Cleaning of the disgusting area under the old aircon. Unfortunately a cute green frog had made it’s home under there, we had to evict it
- Self-levelling sealant was applied to the roof base plate before it was placed in the roof opening.
- The roof aircon was then put in place and lined up with the base plate
- Inside, the old plug was taken off and connected to the new wires.
- It came with extra duct connections to stack if you have a thick roof, we added a couple.
- The air distribution box was then fastened through the ceiling to the roof air conditioner with 4 long bolts.
- Last was attaching the centre cover and “voila” we have a spanking new, sleek and quiet aircon .
Using it most days, it really is as quiet as people say. The extra quietness, in it’s night time mode, is amazeballs! Our last AC unit sounded like a jet plane compared to this. An added bonus is that we don’t have to have our TV as loud.. I made this short video to give you an idea of how we did it.
Other Post You Might Like
- How To House Sit Around Australia
- Installing Our Caravan Diesel Heater
- 15 Lessons Learned Full Time Caravanning
- Jayco Slide Out Re Syncing
- 10 Caravan Kitchen Must Haves
- Security Tips When Free Camping
- 22 Water Saving Tip For Caravanners
- 10 Toilet Tips & Tricks
- Travel Budget Tracking Spreadsheet
- Discounted Camping Products
- Our Caravan & Camping Shop
- Off Grid & Self Sufficient Caravan
- Free Camps Around Australia
- Camps Under $20
- Crossing The Nullarbor – Our 7 Camps
Aussie House Sitters are our choice of house sitting sites. Use our Coupon Code “AHS15%off” for 15% off your joining fee

Head to Adventure Awaits for this laminated map and heaps more camping and gift ideas