

Upholstering our caravan lounge is part of our caravan makeover. I’ve been wanting to change the material for a long time. After several years of full time use, travelling in dusty areas and Larry working in dirty jobs, our club lounge was looking a bit worst for wear.
Upholstering Our Caravan Lounge – Why?
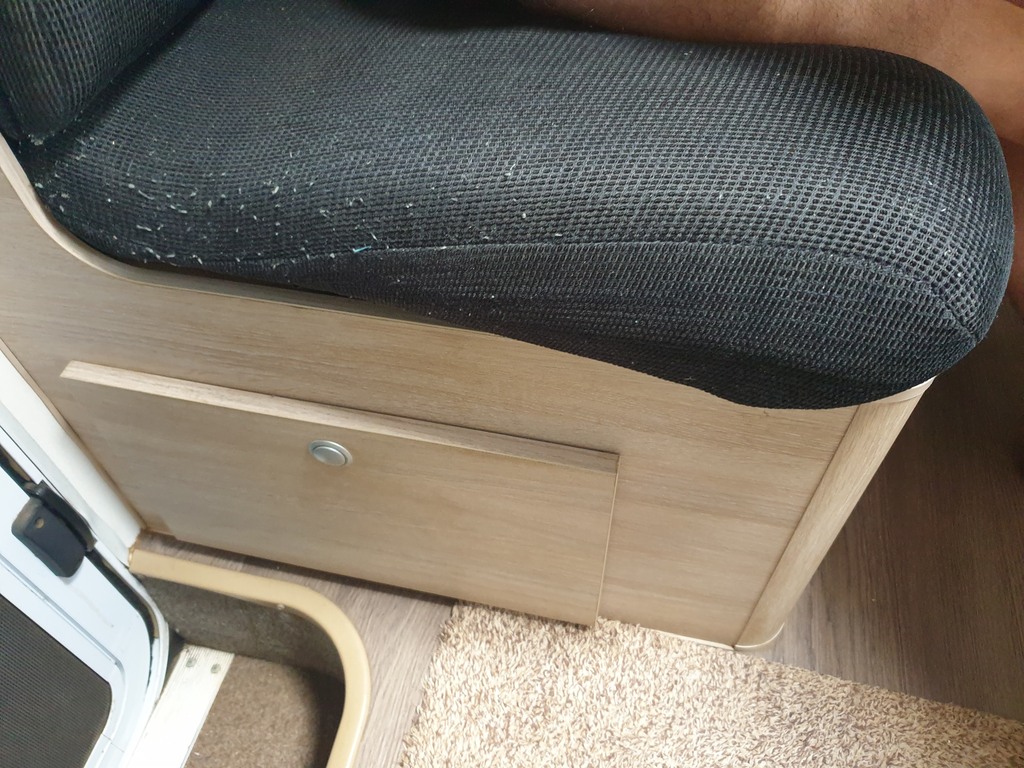
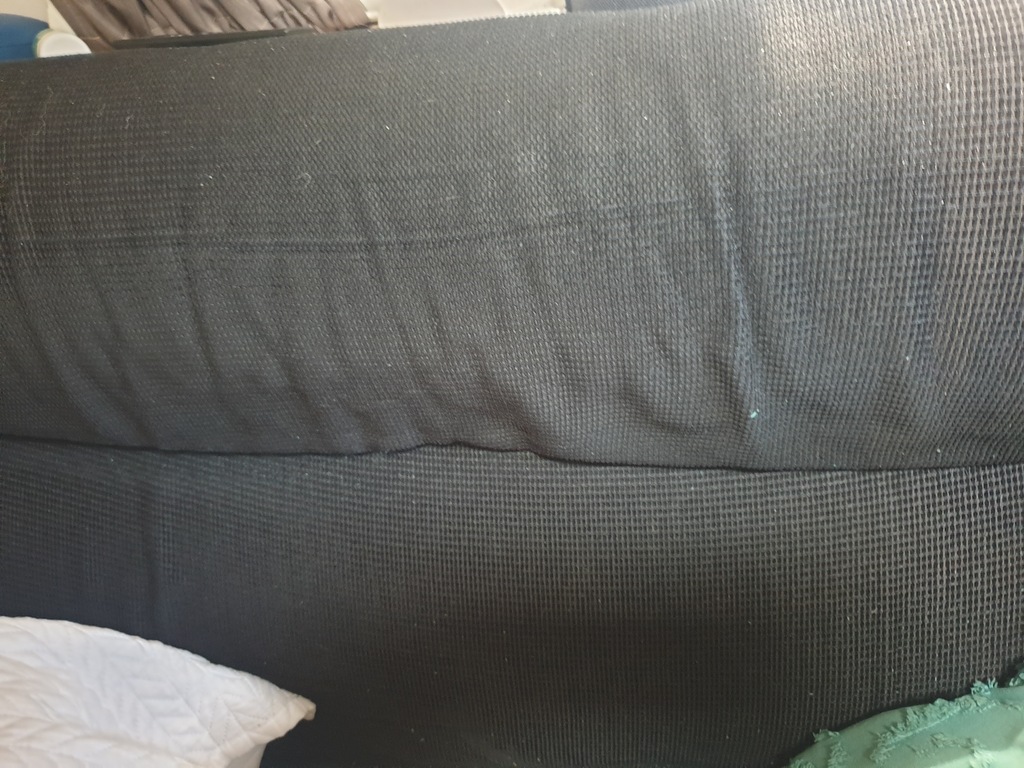
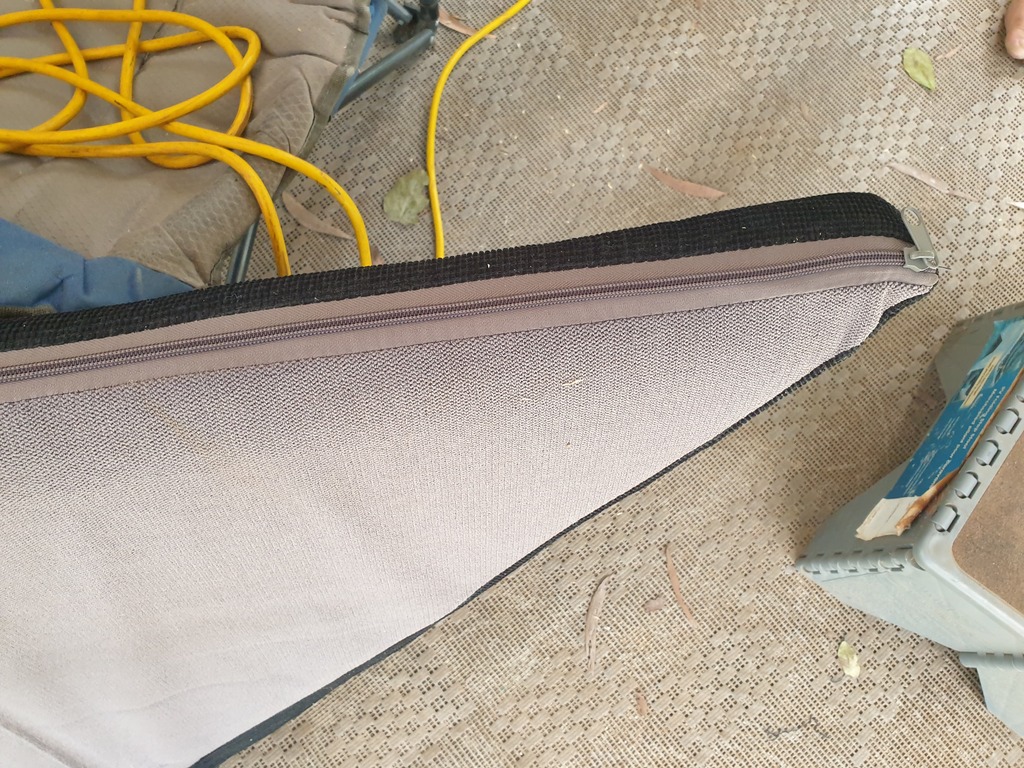
Over the years, our club lounge couch has had a few spills, like tomato sauce over the seats. Also, parts had become loose, as well as pilling with little balls of lint. I had taken the bottom seat covers off to be washed at one stage but they still looked dishevelled.
When we first bought the van it was meant to come with leather seats. They would have been great to wipe down anything that landed on them. Although, having had leather couches before, I knew they would be to hot in the summer. Especially when we’re off grid with no air-con.
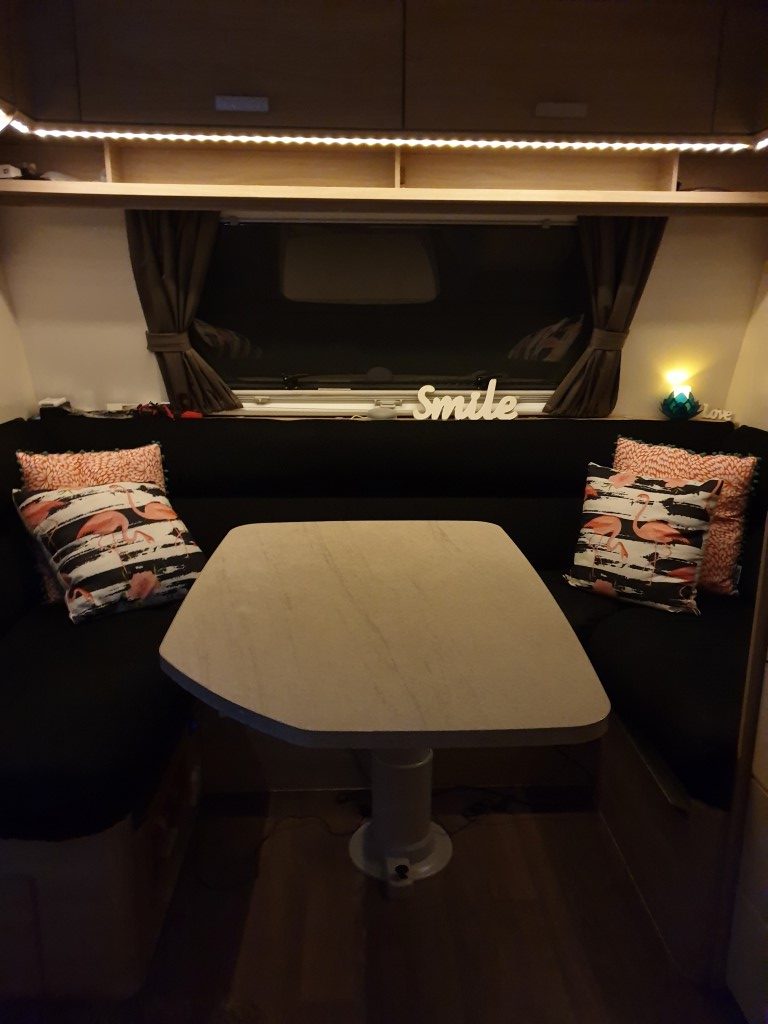
We had a chat about what new colour and what fabric to buy and decided on sticking with black. Black hides a multitude of sins which is good for (shall we say) the laid back approach our couch puts up with.
Items For Upholstering Our Caravan Lounge
- A Good Staple Gun – Larry already had a great stapler from adding carpet to a box he made for one of our inverters.
- Loads Of Staples – We had a few hundred staples but bought a thousand more just in case.
- Upholstery Material – Our fabric is from Spotlight. After looking for upholstery fabric in store on two separate occasions, we chose our upholstery fabric. I had joined the Spotlight VIP club online for free, as you can get big discounts as a member. I think they also had a sale on at the time. AND I received another $10 welcome discount for my first purchase. At the checkout the price was reduced to $189, saving us $103. Upholstering our caravan lounge was cheaper than I thought it would be!
- Wading/Stuffing – Was also bought from Spotlight to fill out our bottom seats
- Stretched Wire– for added security. To put between the cushions and keep them in place in case the staples came out. We should have more faith in ourselves, I don’t think we needed to add it.
- Ply Wood – for bottom seats as we were not using zipped cushions any more. We purchased a 2440 X 1220 X 3MM Piece of Ply wood from Bunnings.
- Jigsaw – To cut the wood for the bottom seats (Larry already had one).
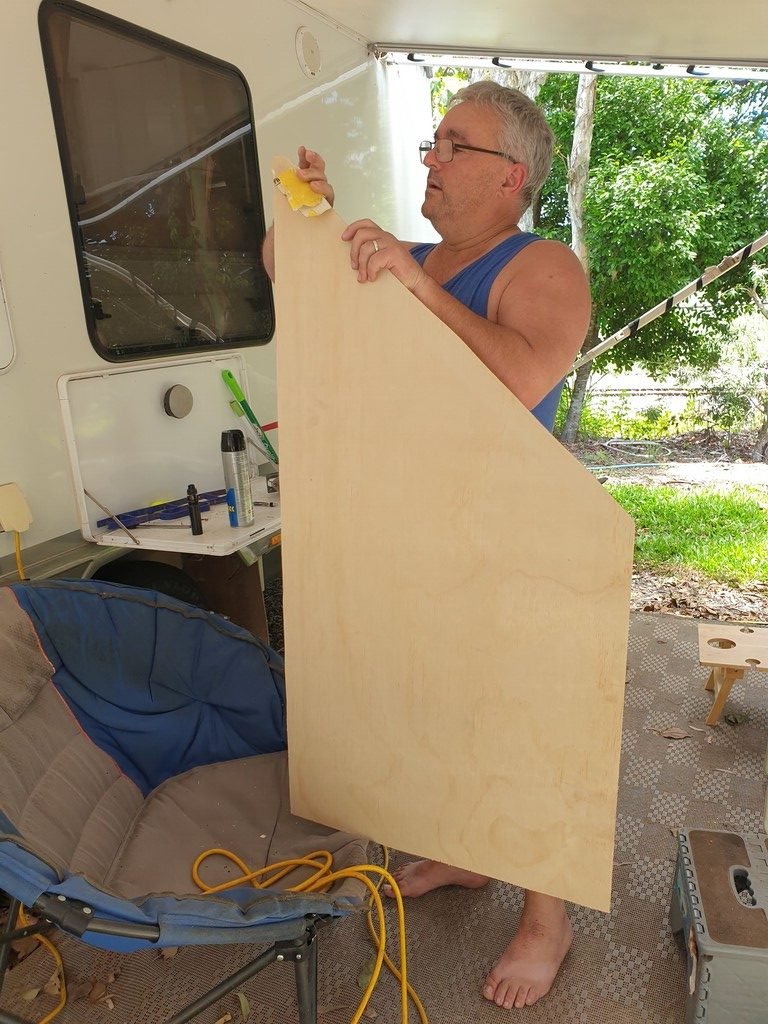
- Sand Paper – To rub down the wood once cut.
- Fabric Protector – to help keep it nicer for longer
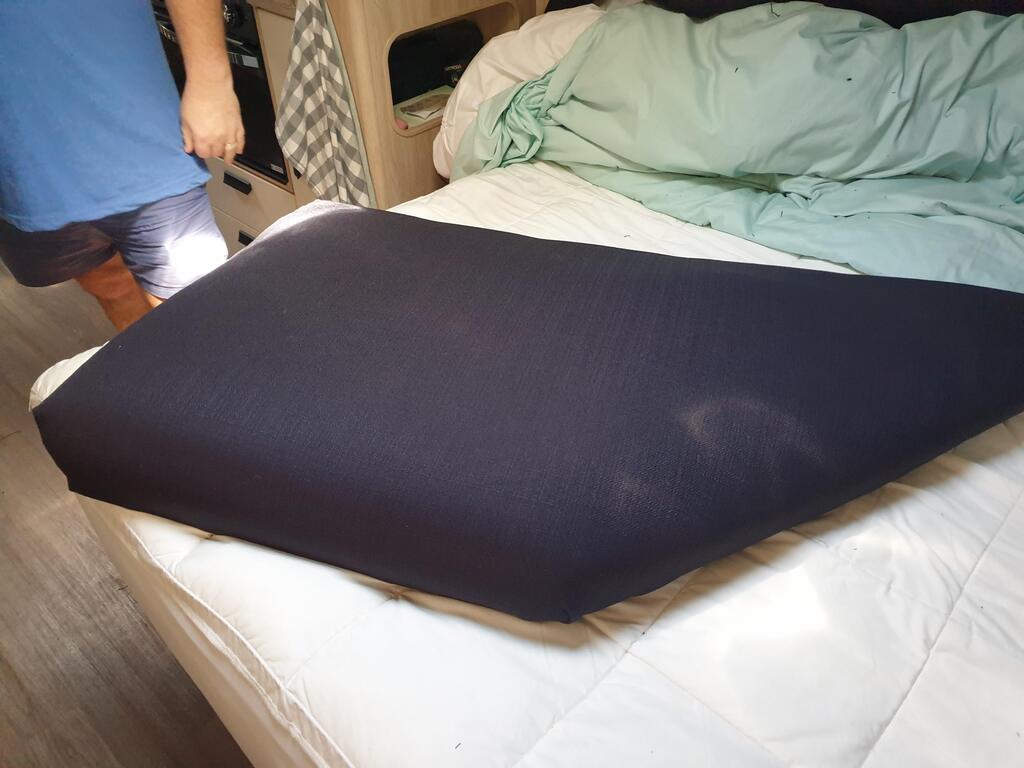
- Space To Work – Our bed was our workshop for doing this project. You might have a better option.


Upholstering Our Caravan Lounge – Back
We started with the back cushions of our club lounge as we thought they would be the easiest. They already have wooden backs which we could just staple the fabric to. Starting with one of the side back cushions, we striped the old black material off. This took more time than I thought as it had literally hundreds of staples we had to remove.
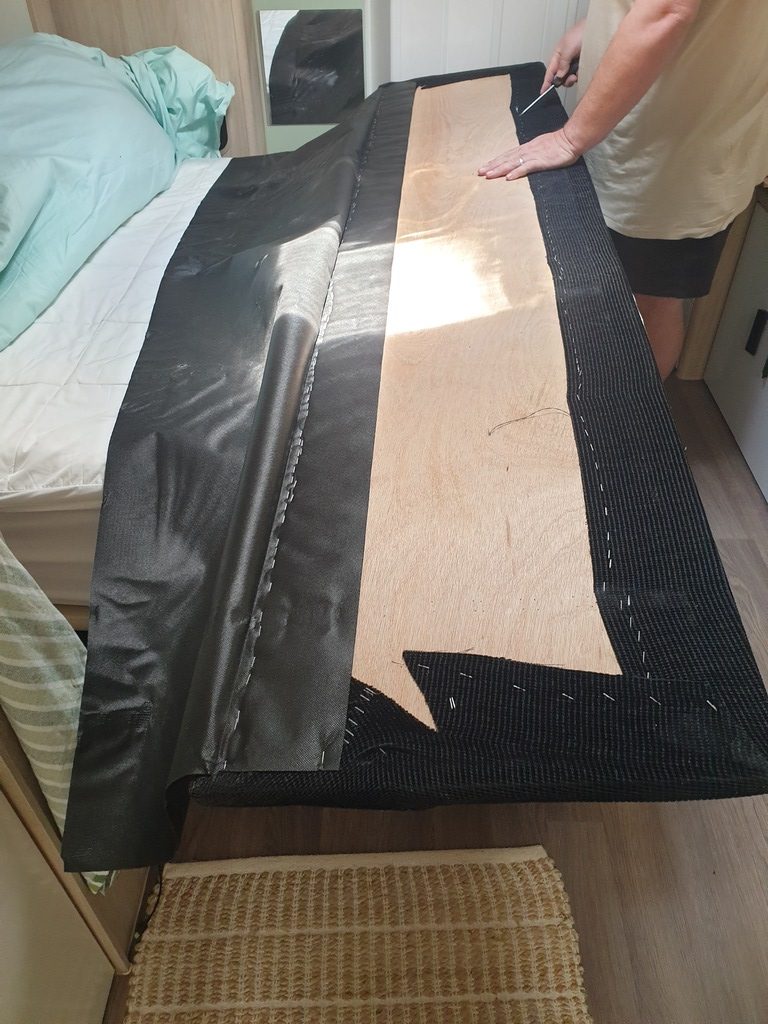

After removing the old fabric the two cushions could be separated. Then stapling began to attach the new fabric to the top of the wood. The top cushion was then stapled in place under the new material, followed by the bottom cushion.


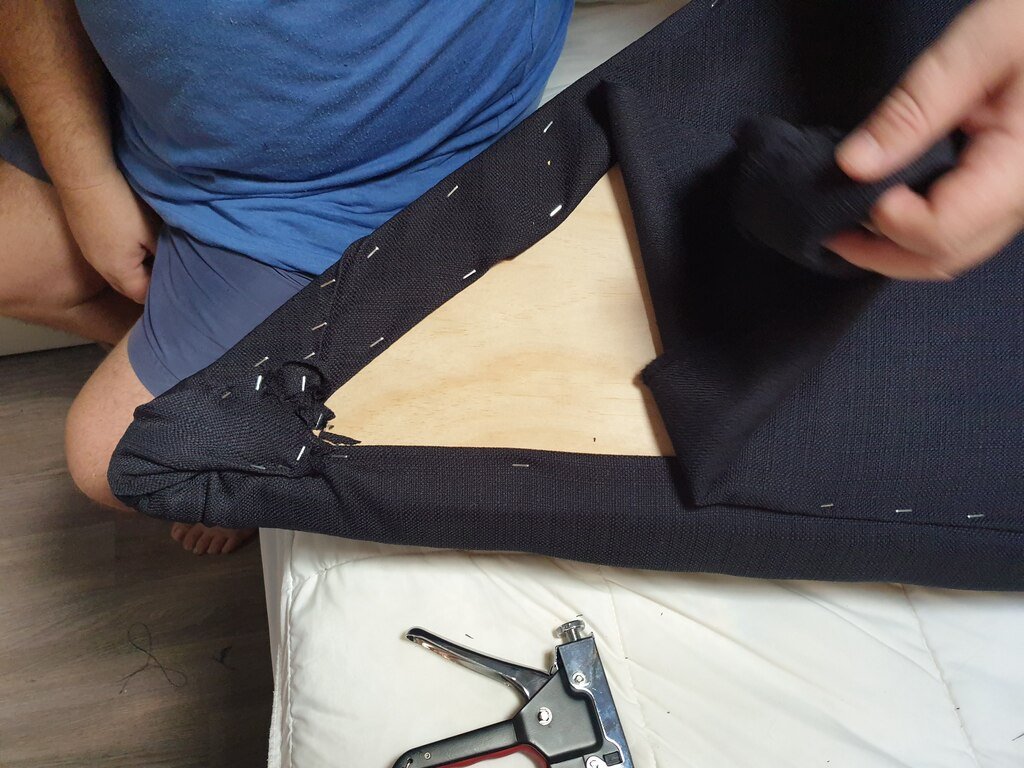
The sides/corners were the hardest parts to do while upholstering our caravan lounge. Trying to get no creases was a challenge. A few staples we had put in, got taken out, until we were happy with it. At the end of the day, you can’t actually see most of the corners of our club lounge. The other corners are out of site, behind framing or hidden next to other corners.
Larry wanted to add some stretch wire (kind of like washing line wire) between the two cushions, to make sure it was secure. Previously the material had become loose in this section and he thought this would be a second layer of protection after adding the staples.

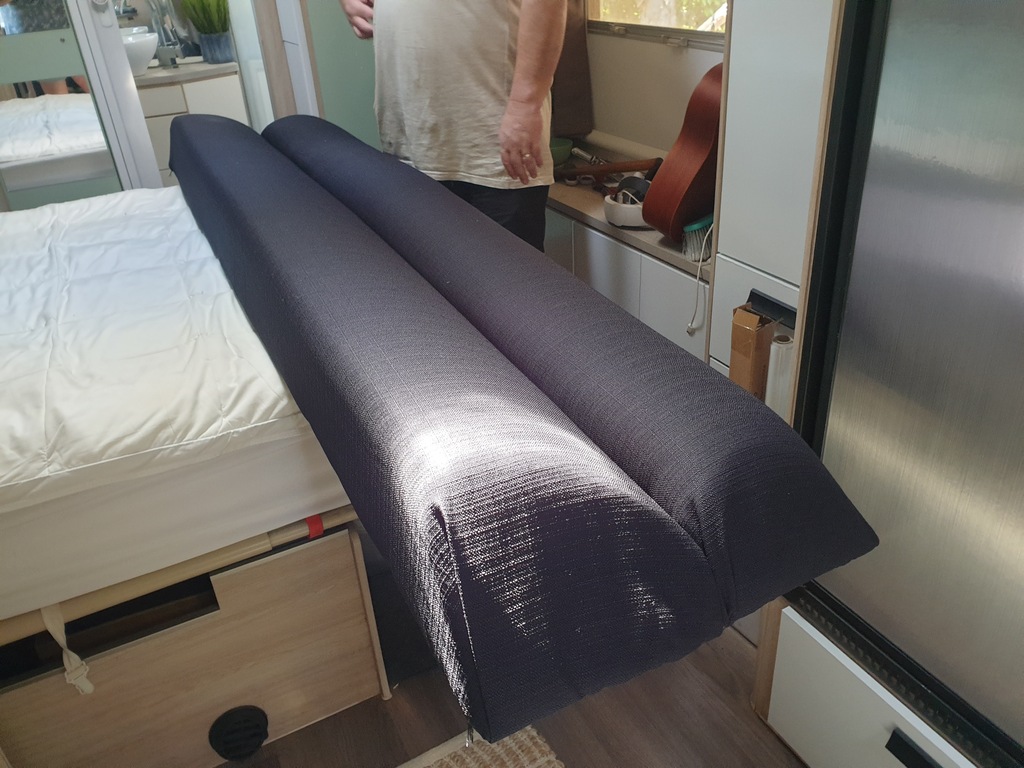
Lastly, the back of the wood was re covered in the backing material and had Velcro it originally had. Once we finished the three back cushions it was on to the seats.

Upholstering Our Caravan Lounge – Seat’s
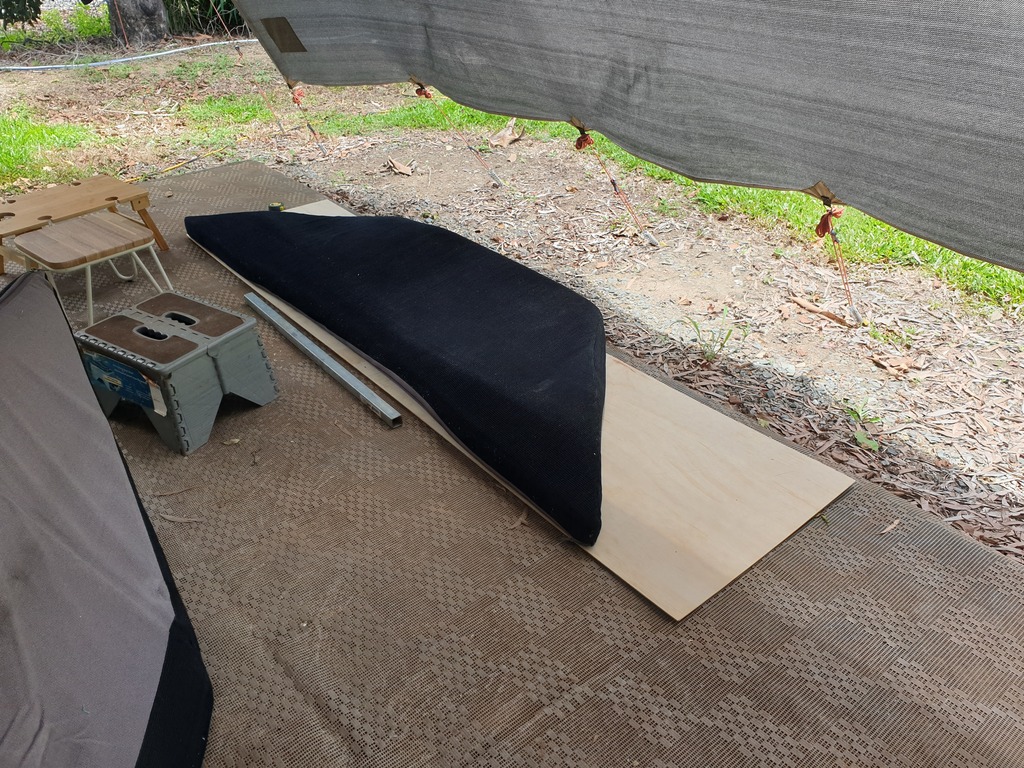
As mentioned, our bottom seats had zips on. Not having a sawing machine and not wanting to pay someone to make cushion covers, we came up with a cunning plan 😉 Deciding to buy some 3mm ply wood from Bunnings and repeat what we had done to the back cushions. The amazing owners at Gunna Go Caravan Park were heading to Bunnings and brought the long piece of wood back for us.
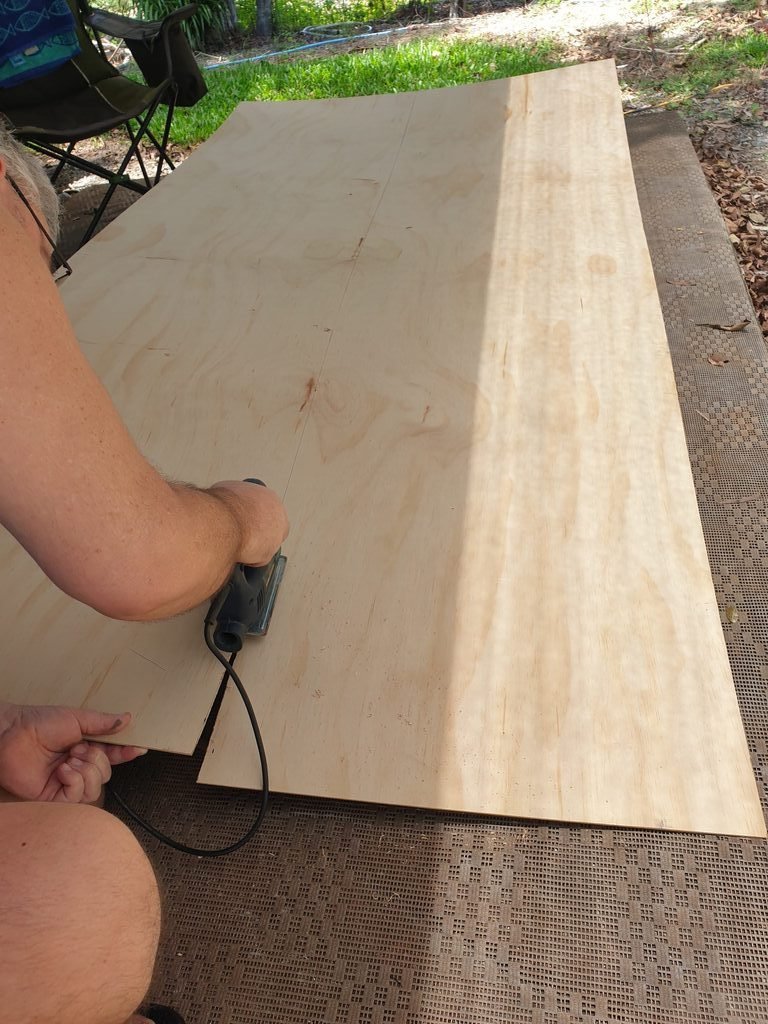
Under our awning we put the wood on top of a couple of small tables. I held the wood still and Larry made light work of cutting it in half with his saw. One long piece was used for the back bottom seat of the club lounge. The other half was cut for the two bottom sides.

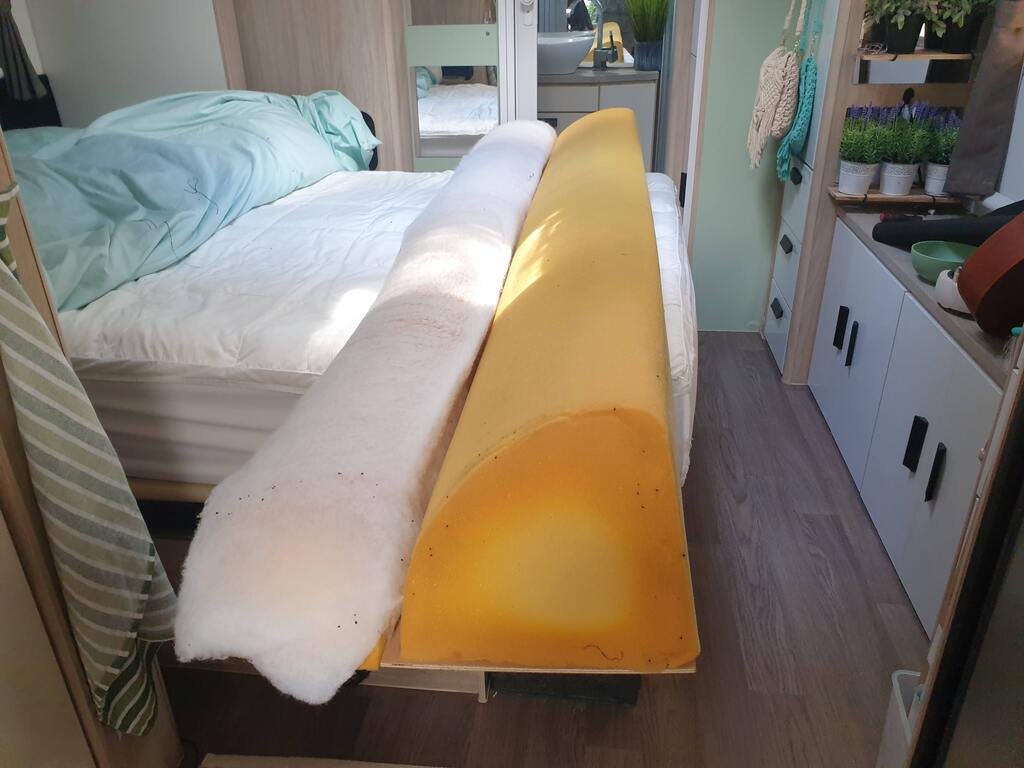
Stuffing The Bottom Seats
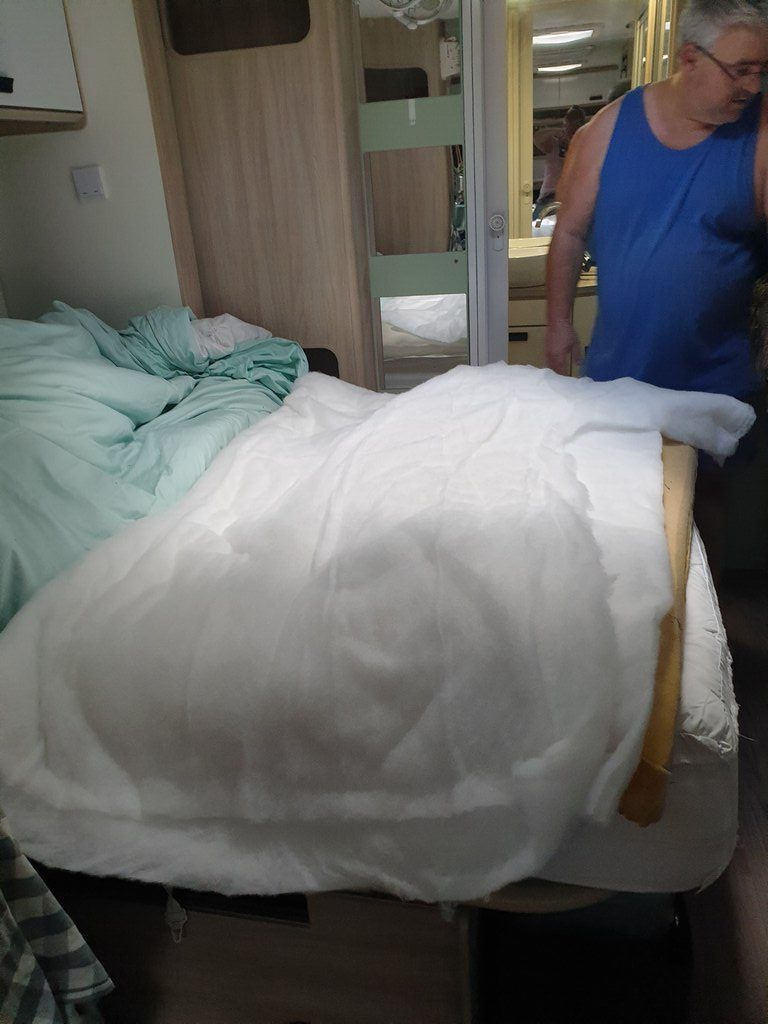
One of the main reasons for upholstering our caravan lounge was the fact it was lacking in padding in some spots. After sitting in the same spots for several years we decided to stuff it and add some wadding. Considering caravan couches are not meant for full time use it had done well.
An afterthought was that we could have gone to Clark Rubber and got some foam cut to size. Oh’ well maybe next time.


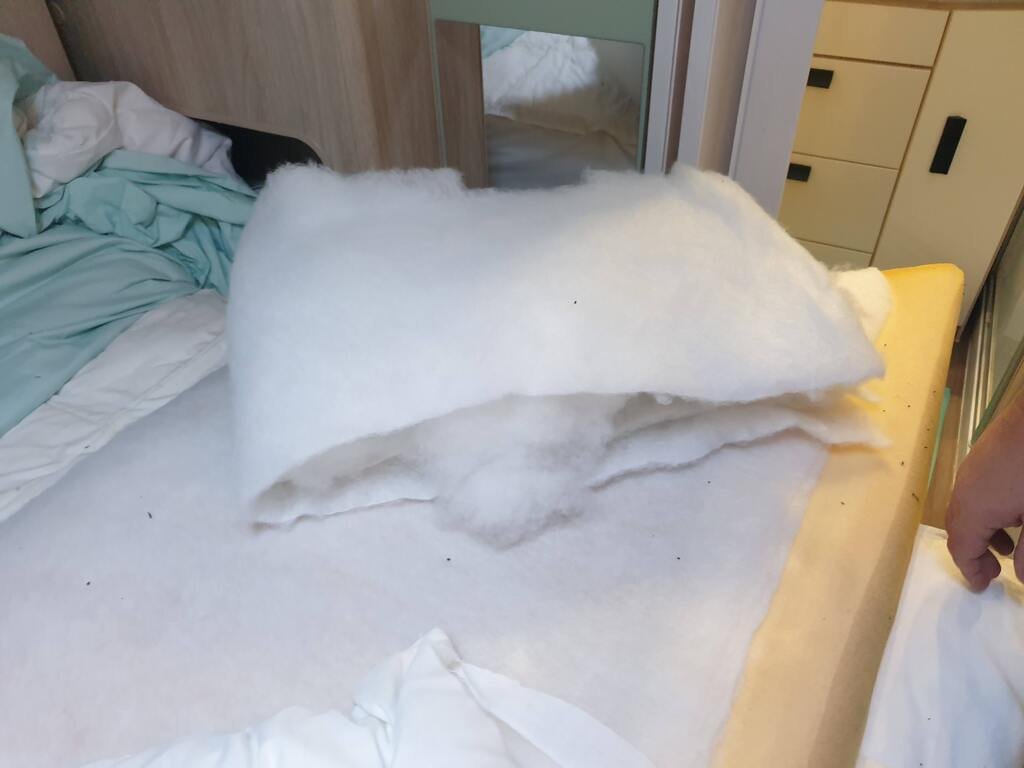
Wadding was placed in parts we sit most. Stuffing from an old pillow was also used between the wadding. Then we stapled the new fabric to the new wood, as we did with the back seats. At first it didn’t look so good as the cushions looked like they had humps. However, once they were put back in place, they look great and the humps are not seen 🙂

Measuring The Wood
Being our first time upholstering our caravan lounge, we had to learn along the way. Cutting the length of the wood needed was fine, but cutting the angles was a case of trial and error. First, we put the seat cushion on top of the wood and marking where we wanted to cut it. After laying the old cushion on top of the wood, both ends were marked and cut at an angle.
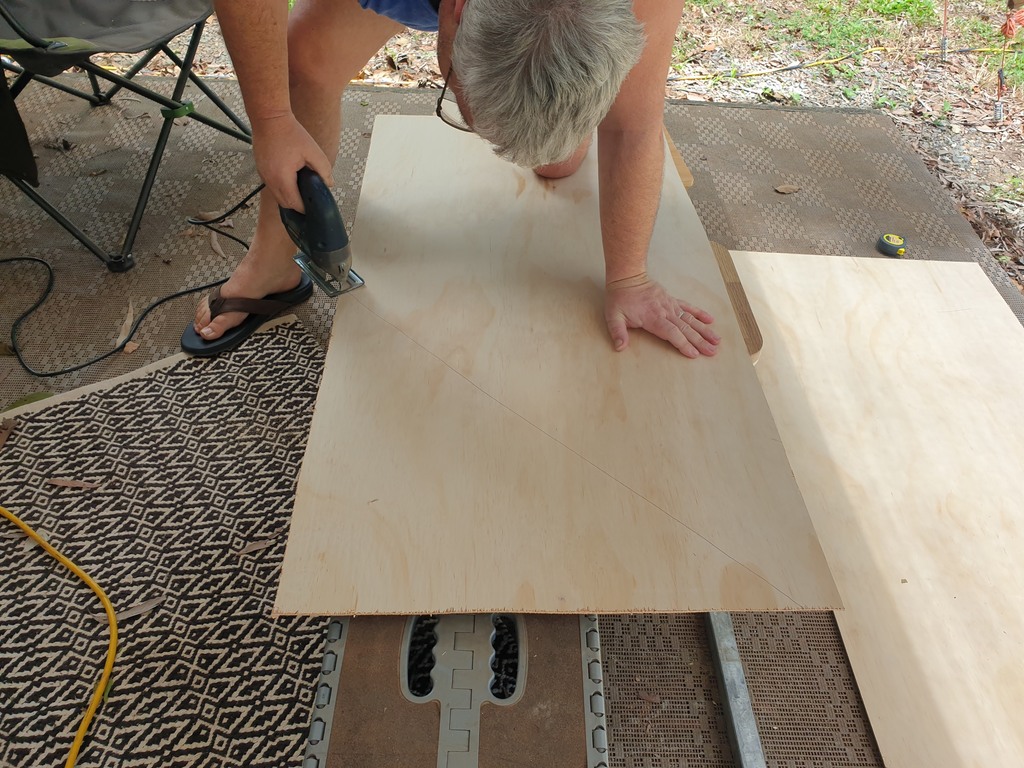
Then, after cutting the wood, we put each piece of wood in place to see if they fit. A couple of pieces of wood overlapped a little when putting them in place so we cut more off until it was right.

Upholstering Our Caravan Lounge – Tips
- Buy upholstery material as this should last longer then other fabrics.
- Get extra fabric if you can, in case your measurements are a bit off.
- Buying plain black fabric meant we didn’t need to match a pattern. Therefore making it easier to do. As well as costing less as we didn’t need extra material to match a pattern.
- Buy a good staple gun and a couple of packs of staples for it.
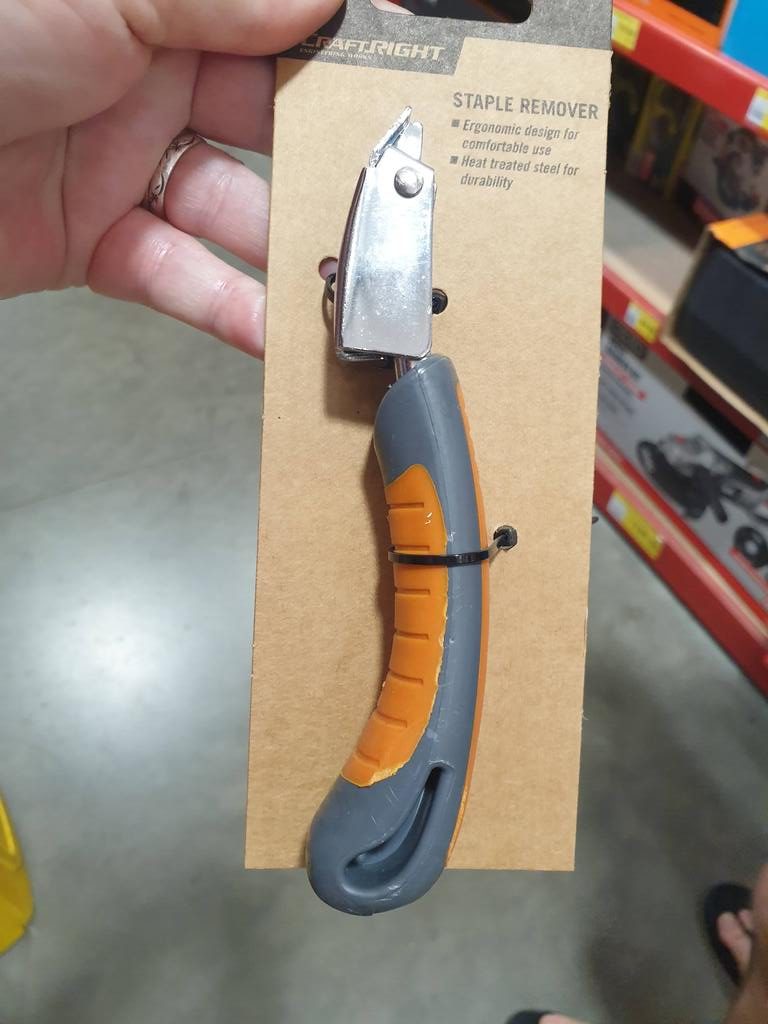
- We bought a staple remover tool to help remove the hundreds of staples holding the original fabric on. A small screwdriver did the same job.
- Be prepared to be sweeping/vacuuming up bits of cotton that you find everywhere when finished.
- Think about how you’re going to fold the corners as this can be the hardest part.


To conclude, would we recommend doing it yourself? Heck yes! We gave it a go and are extremely happy with it. Much like Our Caravan Makeover, we’ll see how it wears over time.
If you liked this Upholstering our caravan lounge post, you might also like:
- Our Caravan Makeover
- 15 Lessons Learned Full Time Caravanning
- Installing Our Caravan Diesel Heater
- Jayco Slide Out Re Syncing
- Caravanning Questions & Answers
- Security Tips When Free Camping
- 22 Water Saving Tip For Caravanners
- 10 Toilet Tips & Tricks
- Travel Budget Tracking Spreadsheet
- Discounted Camping Products
- Our Caravan & Camping Shop
- Off Grid & Self Sufficient Caravan
- Free Camps Around Australia
- Camps Under $20
- Crossing The Nullarbor – Our 7 Camps

Aussie House Sitters are our choice of house sitting sites. Use our Coupon Code “AHS15%off” for 15% off your joining fee
Hi guys, and thanks again for this informative session…Well done, and do hope Larry enjoys his ‘Staple Diet’.
We have sold or caravan (rapidly) as $price too low, but am sort of content until my medical happenings diminish, then maybe reload into a motor home.
Your blogs have been kept in a travel diary to keep that fire warm under my bum and keep my travel venture thoughts warm.
Cheers guys, and as usual, many thanks for the time and expense with keeping us entertain with travel knowledge.
Cheers
Trinh & Dennis
Hi Trinh & Dennis. You guys always crack me up with your comments 😂 “staple diet” 😂
I hope your medical stuff improves sooner than later, before that fire under your bum starts to burn 🤠
Stay well guys
Great job !!!! You should be so proud ♥️ Maybe the white cushions are a brave move 😂
Thanks Gail 😀
I agree, the white cushions were a brave choice 😂 I found it hard to get European pillow cases that didn’t look like they belonged on a bed. We’ve had them for a few years now and they actually wash up well, considering the colour they go in the wash 😂