
Posted on

Our 3 Month Farm Sit

3 month farm sit around Australia Aussie house sitters

Our 3 months farm sit was with Aussie House Sitters

At the beginning of February 2023 we started a 3 month farm sit in the South Burnett region of Queensland. We were still finishing off our wonderful farm sit in the Mackay region of Qld, when we got a message on Aussie House Sitters. The messaged was asking if we would be interested in a 3 month farm sit.
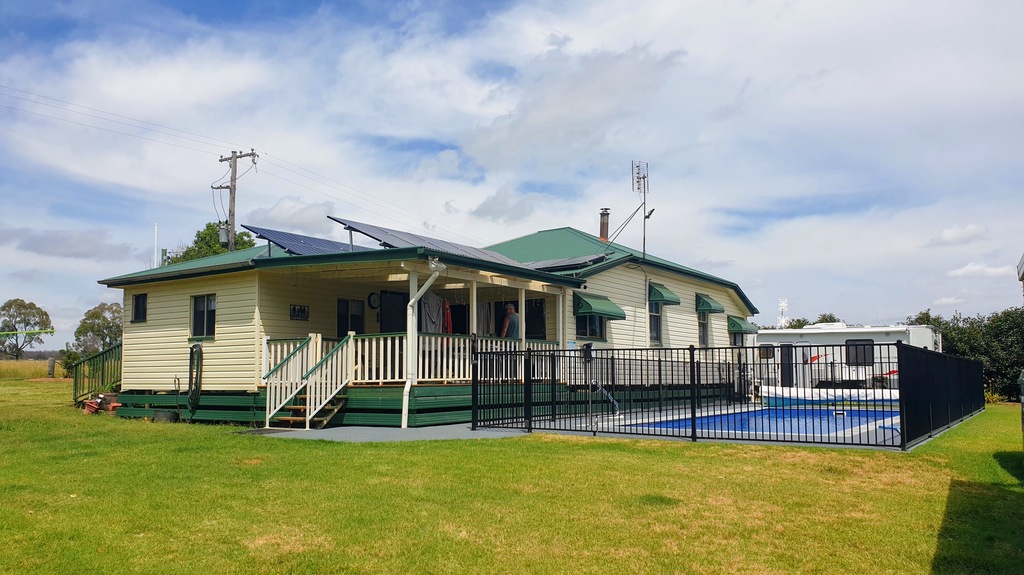
3 month farm sit around Australia Aussie house sitters
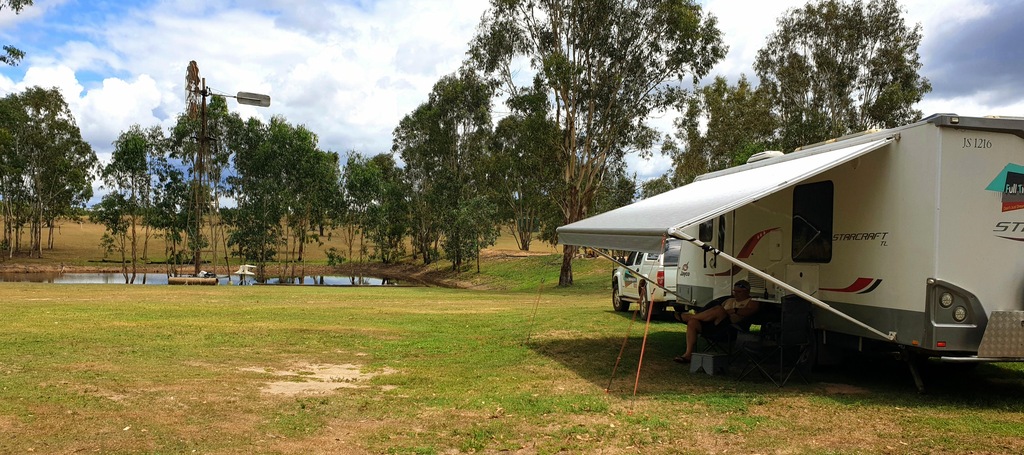
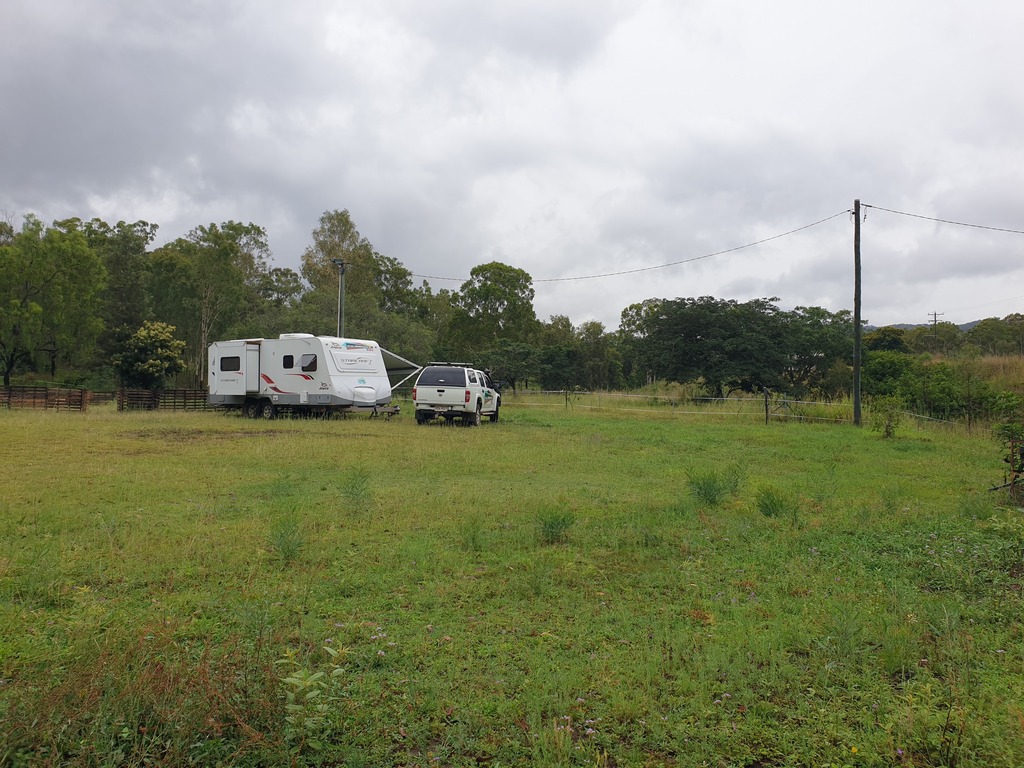
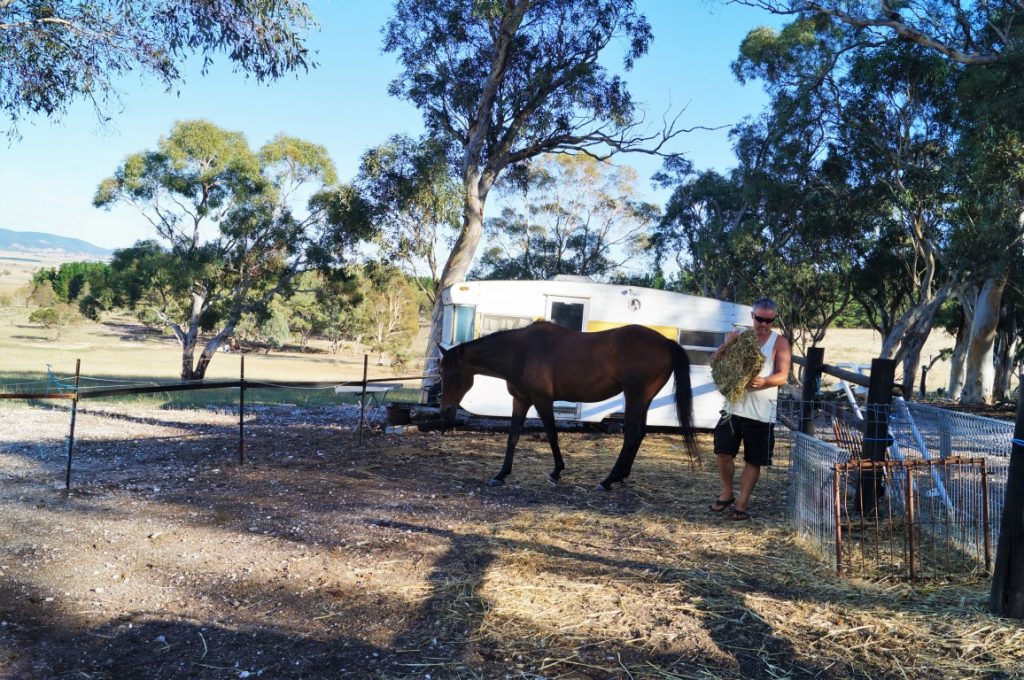
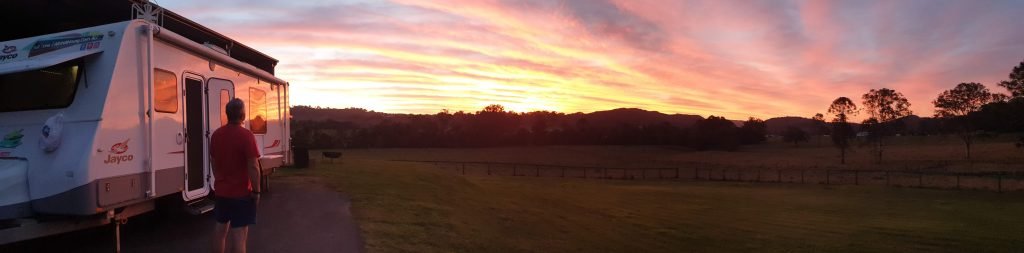
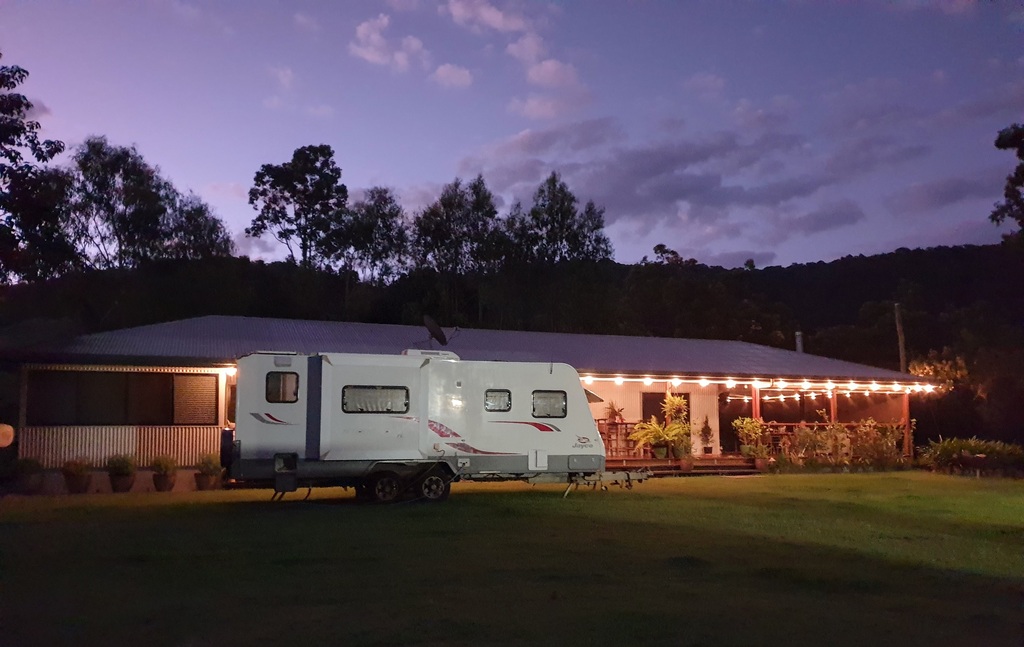
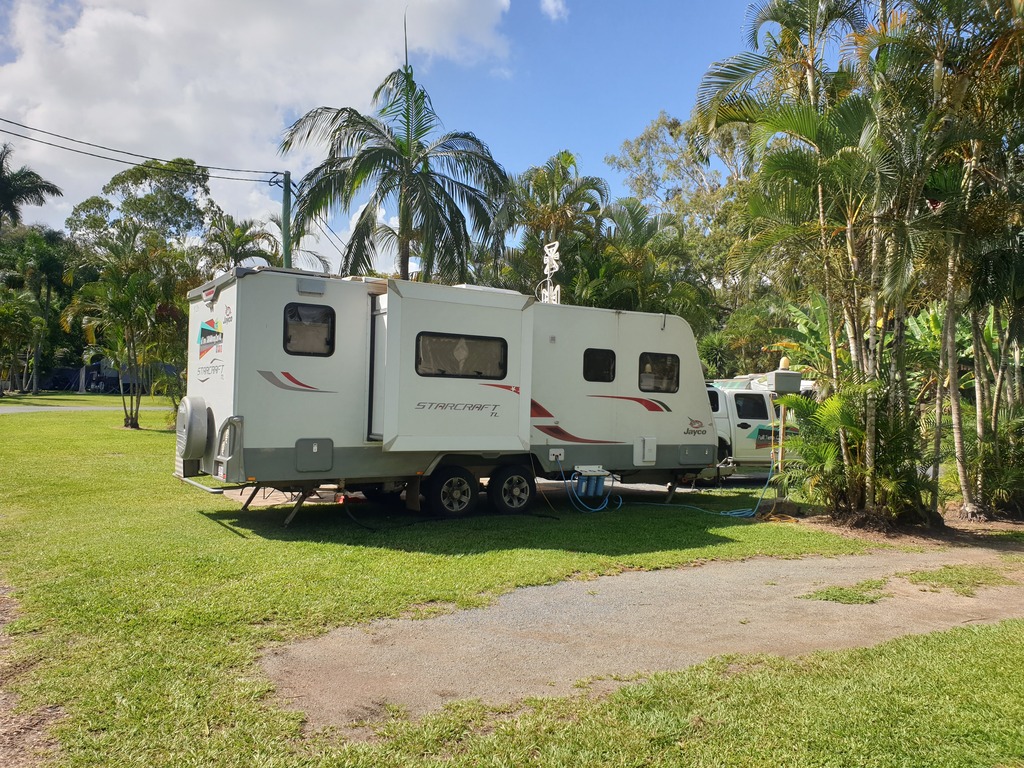
Photo: Our Van Parked At Our 3 Month Farm Sit

Not having done such a long house sit before we messaged back and forth with the owners, making sure we were clear what they wanted, as well as clarifying a few points from our side. For instance, we could use their internet but we wanted to know if we had to pay for it. Just a few details that are always good to get out of the way before each party confirms they are happy with the other. After we covered all we wanted to know and they were happy with us, we decided to go for it, our 3 month farm sit was locked in.

What Did The 3 Month Farm Sit Consist Of?

As with almost all of our house and farm sits, we chose to live in our van rather than the house we are taking care of. That’s our personal choice! With this particular farm sit, the owners were happy for us to use their washing machine, toilet and shower. I did use the shower once but as I often say, I prefer my own on-suite. Having a larger washing machine to use is always a bonus.

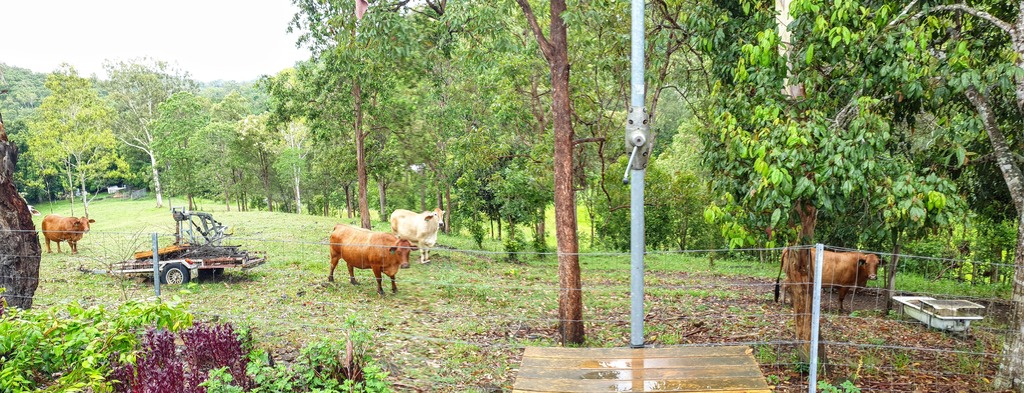
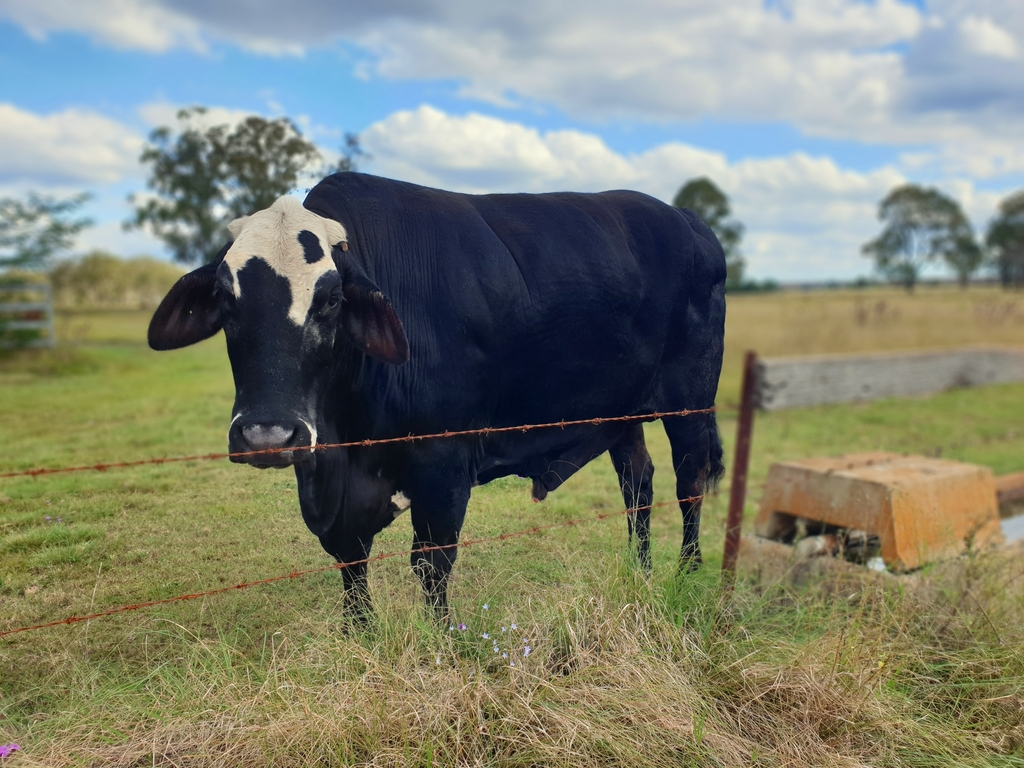
Animals – The add said there was a dog and a cat that would need feeding as well as horses and a bullock that would only need their water checking. Fences would also need to be checked after bad weather (they didn’t expect us to deal with broken fences though) as well as keeping an eye out to make sure they were ok.
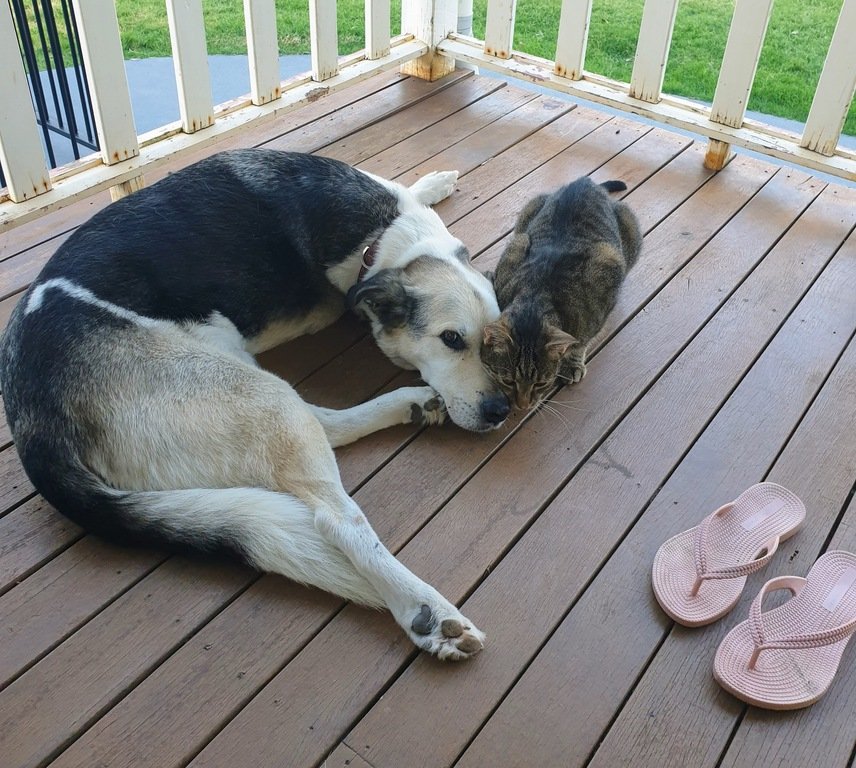
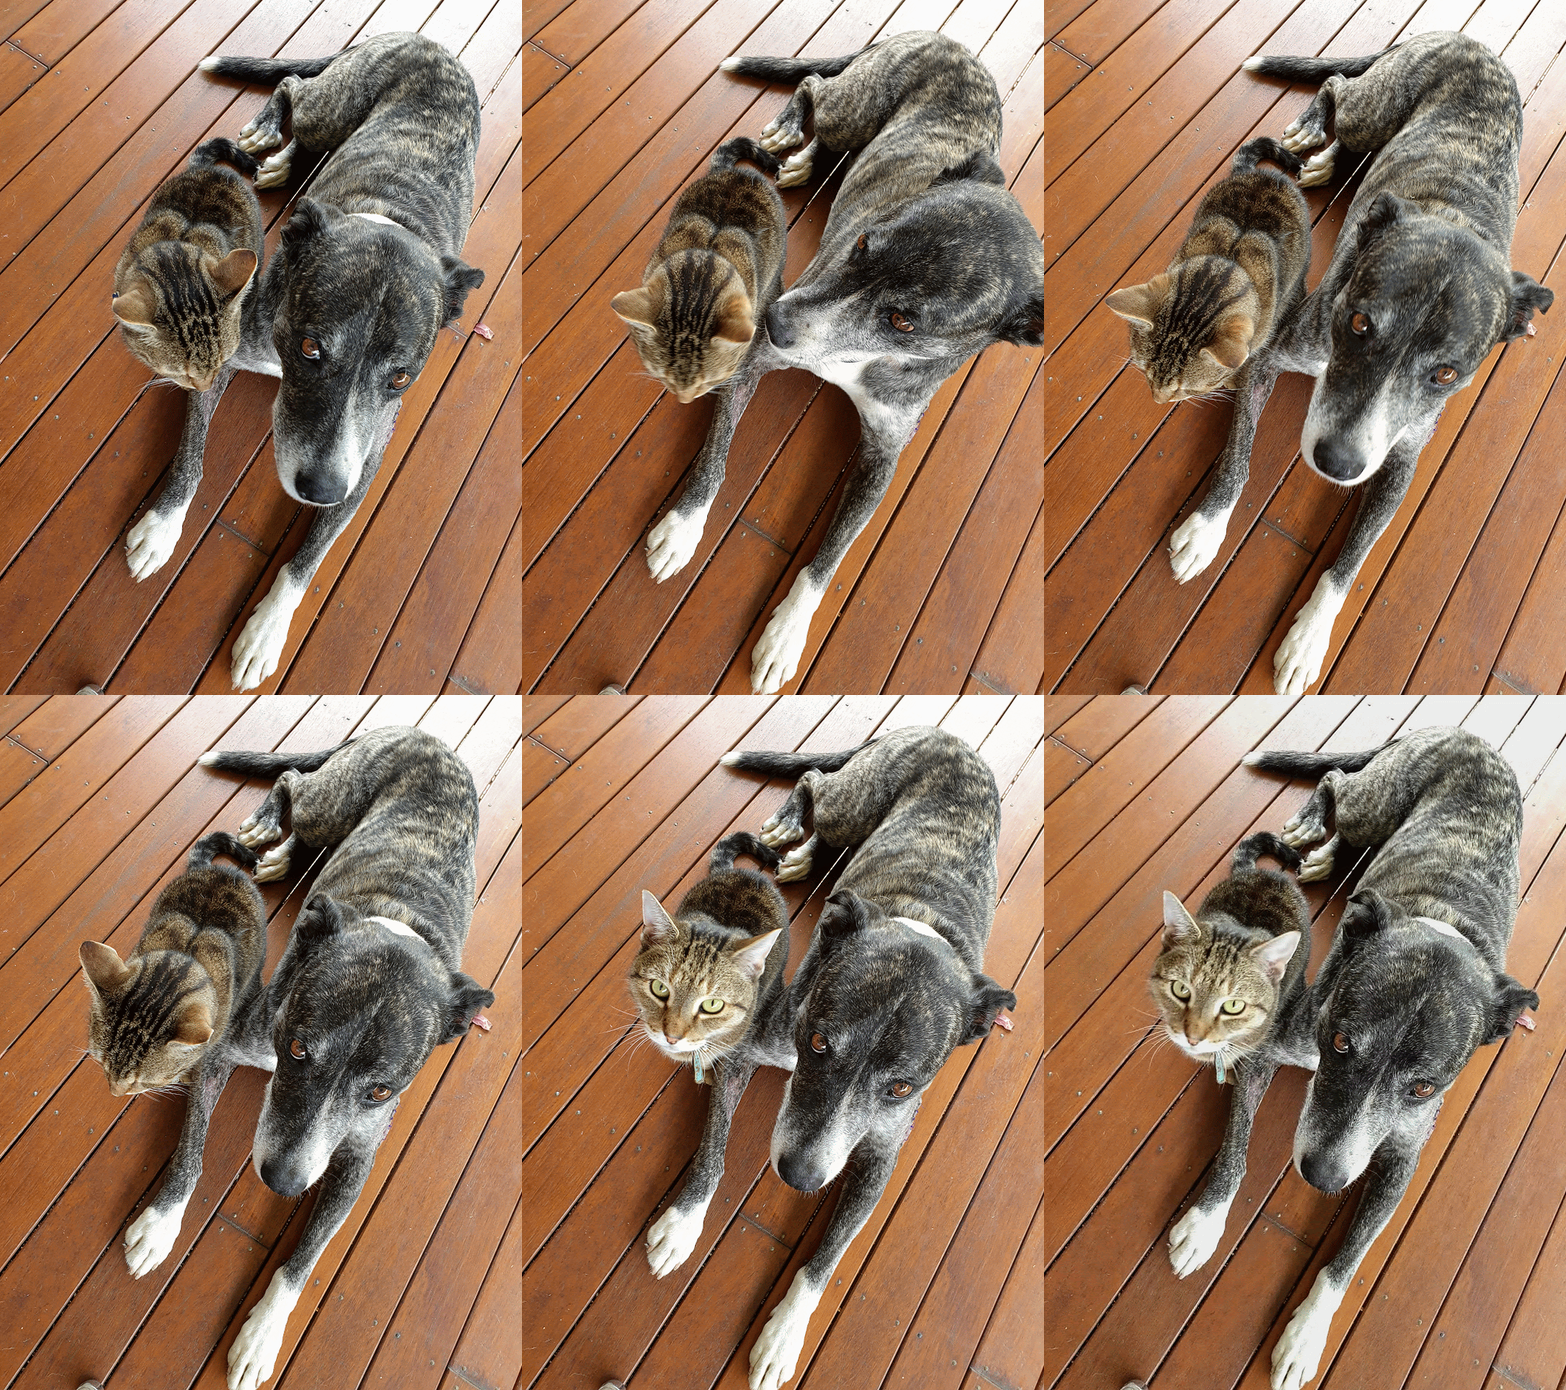
cat and dog snuggle  at 3 month farm sit around Australia Aussie house sitters
Photo: Angus & Nala

Bull at sunset at 3 month farm sit around Australia Aussie house sitters
Photo: The Huge Bull

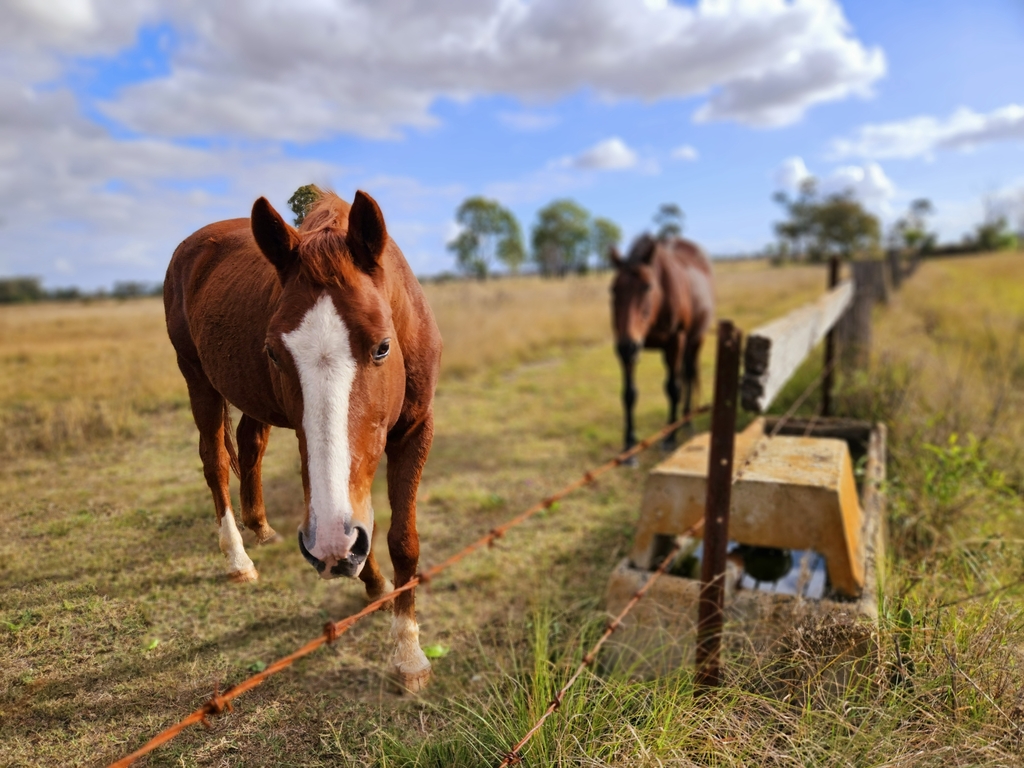
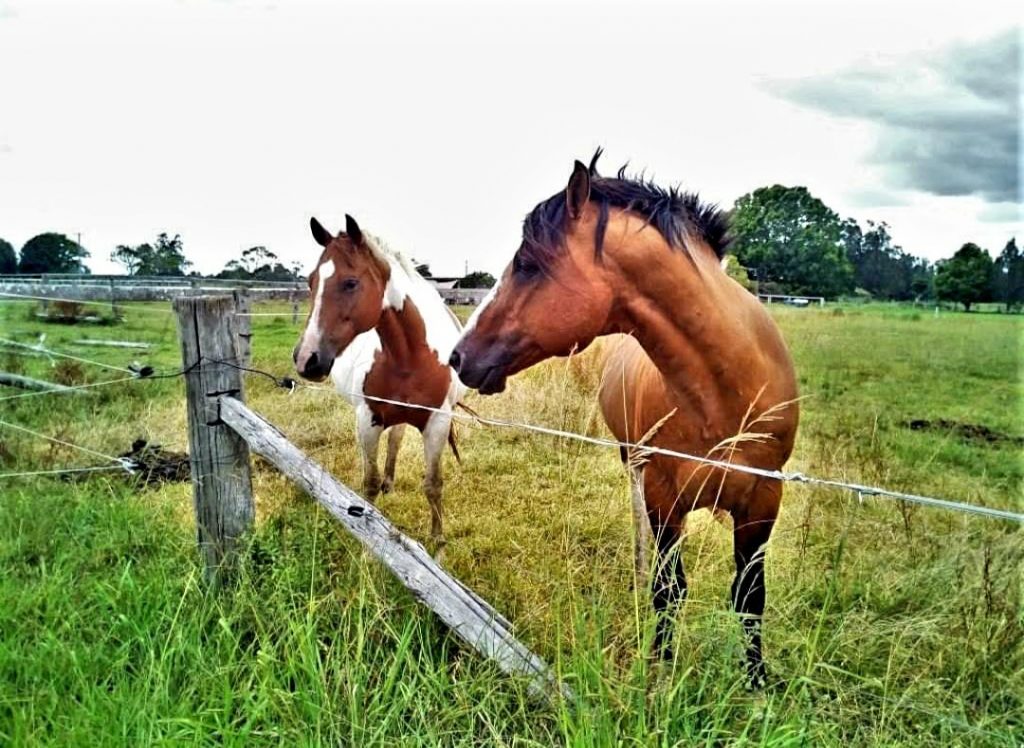
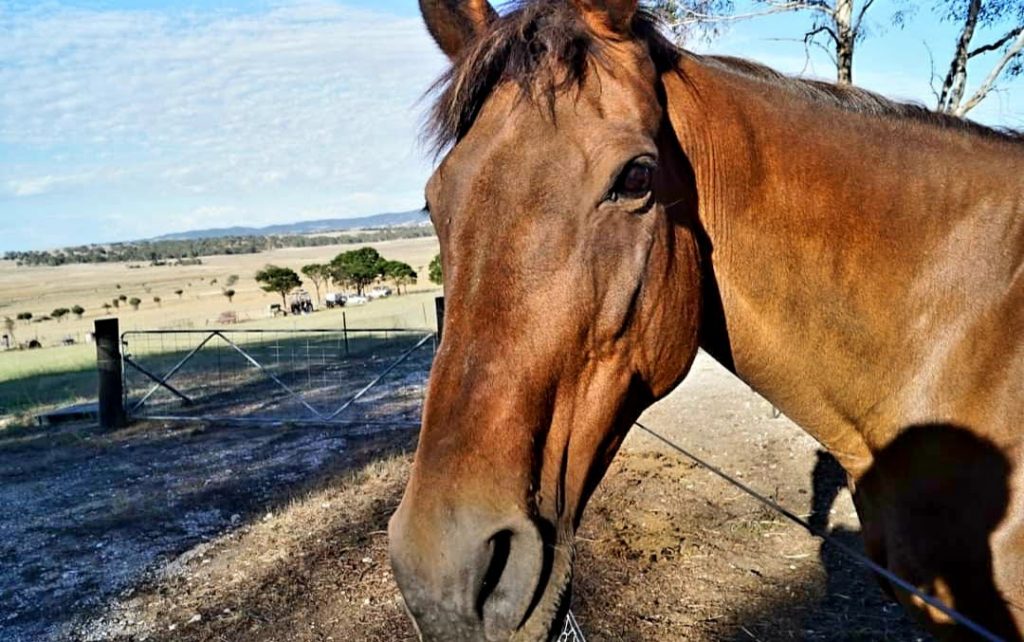
horses at 3 month farm sit around Australia Aussie house sitters
Photo: The Farm Horses

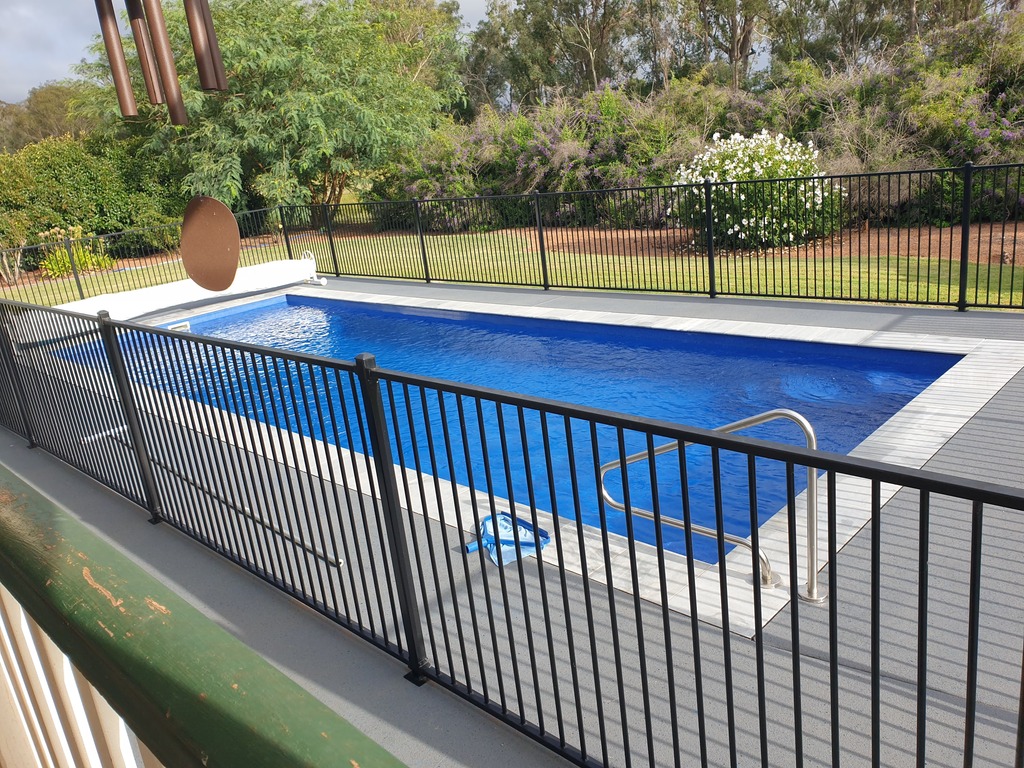
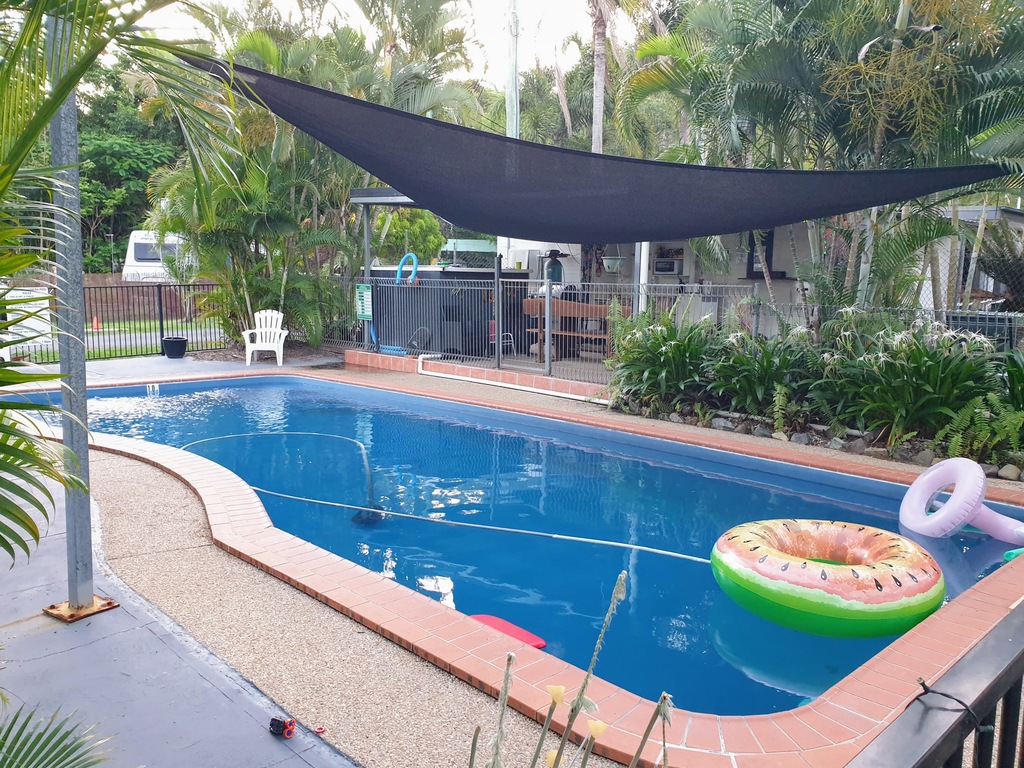
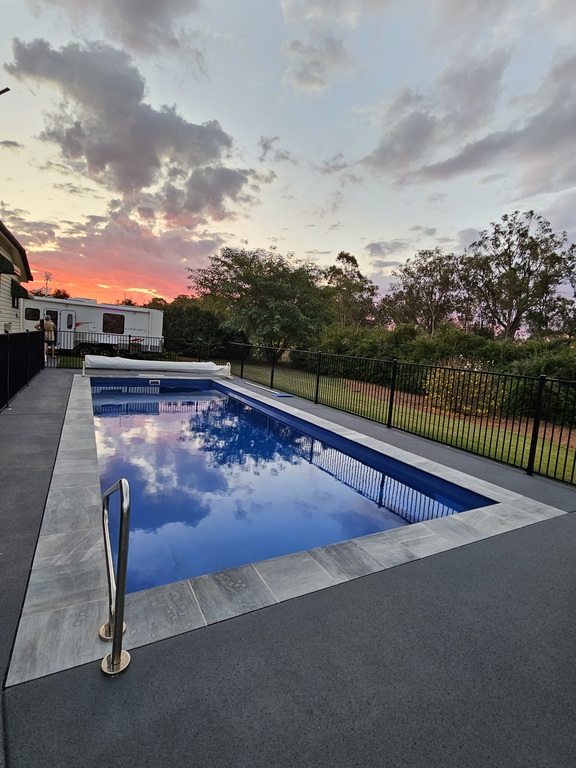
Swimming Pool – There was also a heated swimming pool which basically looked after itself. We just needed to do regular water tests, cover it at night when the weather cooled down and remove leaves etc.
3 month farm sit Aussie House Sitters pool
Photo: The Beautiful Pool We Had Use Of

 Use our Coupon Code “AHS15%off” This will give you 15% off your regular membership
3 month farm sit Aussie House Sitters pool, farm house, and animals 3 month farm sit Aussie House Sitters pool
Photo: The Easy To Maintain Garden

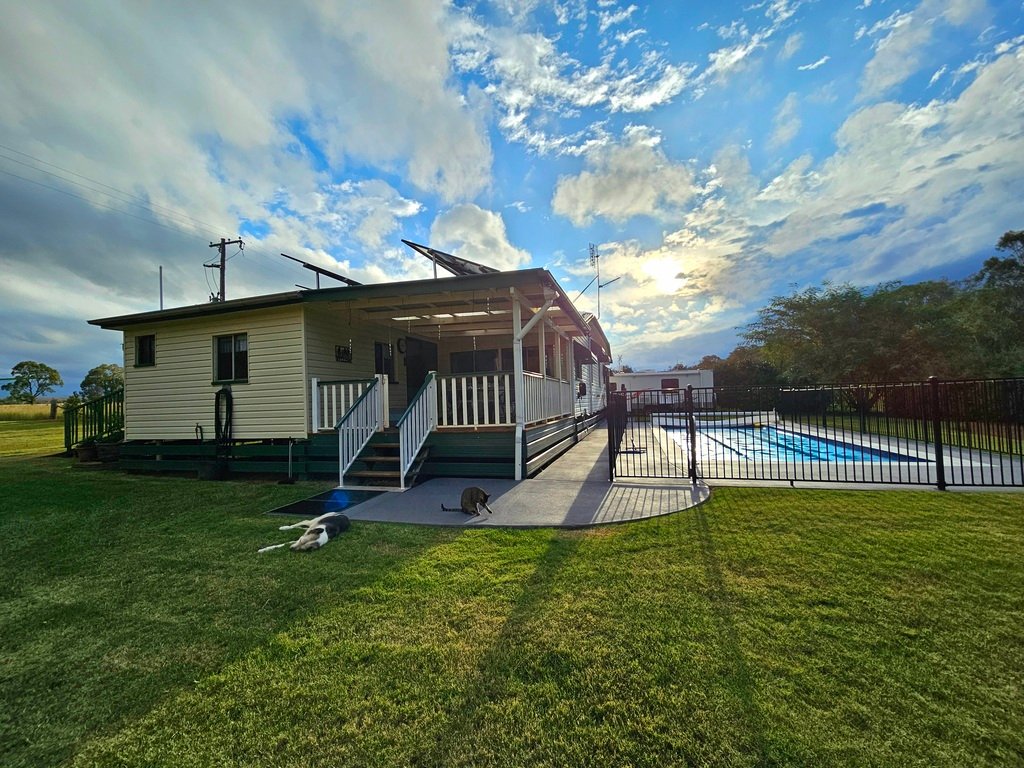
Gardening – Some light gardening was required, which consisted of a ride on mower and a push mower. A tractor was available to remove any trees or branches that might fall.

Arriving At The Farm Sit

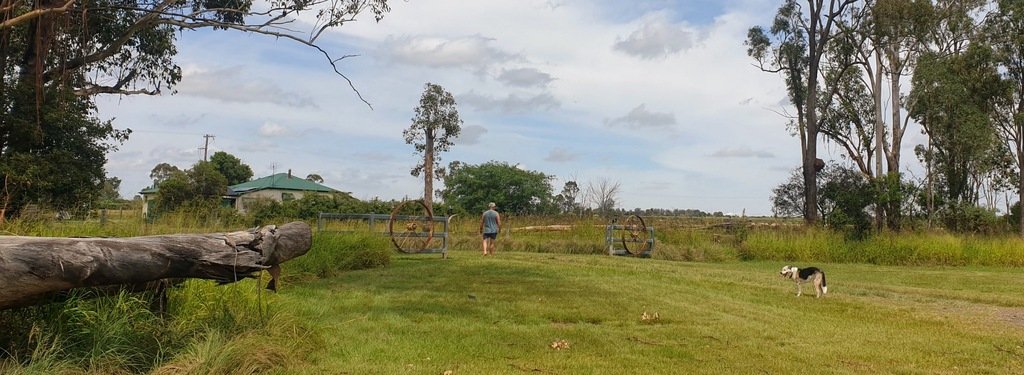
With the farm sit being close to Kingaroy we headed to Kingaroy Showground for a few days to get our bearings. Having asked the farm owners for their address we did a dry run one day and were very happy with the road to and moreover in to the farm. We have had the occasion where the access in to the property we are minding is not accessible to our size van and set up. On those occasions we have worked something out but this is why we ask lots of questions before accepting a sit.

3 month farm sit Aussie House entry to farm with dog
Photo: Easy Access To The Property With Our Van

On the day we arrived at the farm sit we were greeted warmly by the owners and their 3 legged dog Angus. They would be leaving the next day with there own caravan which they were almost finished packing. They showed us where we could park and connect to power and water, which we did, before setting up the basics. We were told we could move if we wanted to after they left.

Getting Shown Around The Farm

If possible, we like to arrive as least the day before the owners leave to get the run down on the place and their animal family. While I chatted to the lady of the house, Larry was shown around the farm and sheds as well as being taken to the local tip where we would be taking our rubbish during our stay.
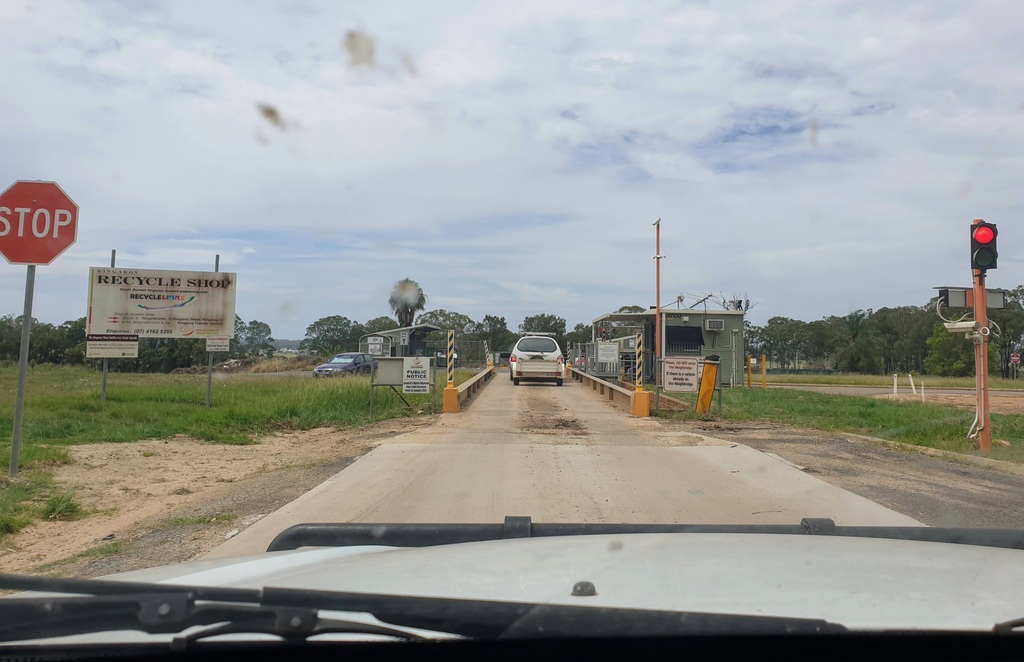
3 month farm sit Aussie House sitters taking rubbish to the tip
Photo: A Trip To The Tip With The Rubbish

Although there was a postal service there was no garbage collection. We would be given use of their ute to use for our rubbish runs, which we would do three of over three months.

Getting To Know The Owners

Not long after we set up we were invited in to have some afternoon tea. One of their relatives had popped over to say hello. I do suspect they came to give the owners some moral support and to check us out. We were more than happy to meet them as it was nice to put a face to one of the contacts we would be given in case of an emergency.

As on other house sits, they had printed out instructions on everything they thought we might need to know. Contact details for vets, neighbours, pool maintenance, family members, even a doggy retreat in case we wanted to have a night away ourselves.

This was however, the first time we had been given a formal document to sign. This is something the owners can print of the Aussie House Sitters website for the sitter and home owner to sign. It covers everything you should have already gone over with the owner and so should not be a problem to sign. Unless it covers things you have not discussed, in which case this is a good time to do so.
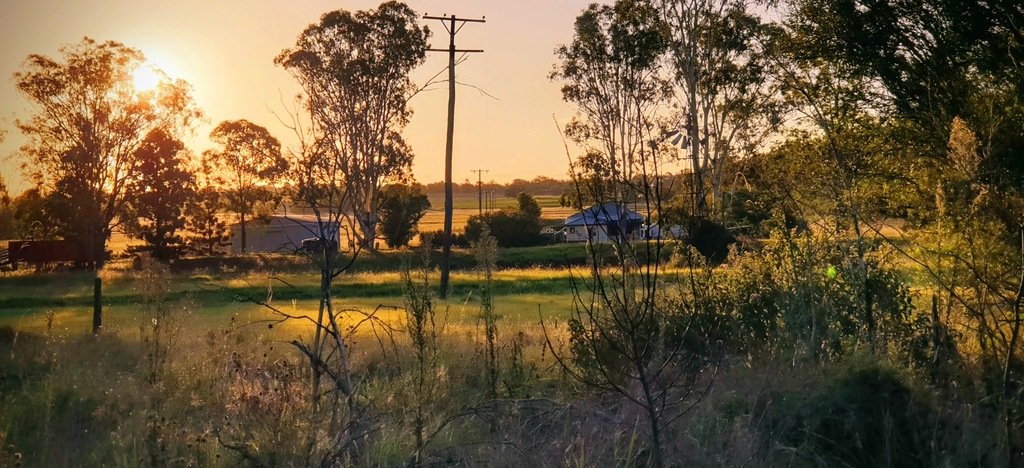
3 month farm sit Aussie House sitters
Photo: Our 3 Month Farm Sit

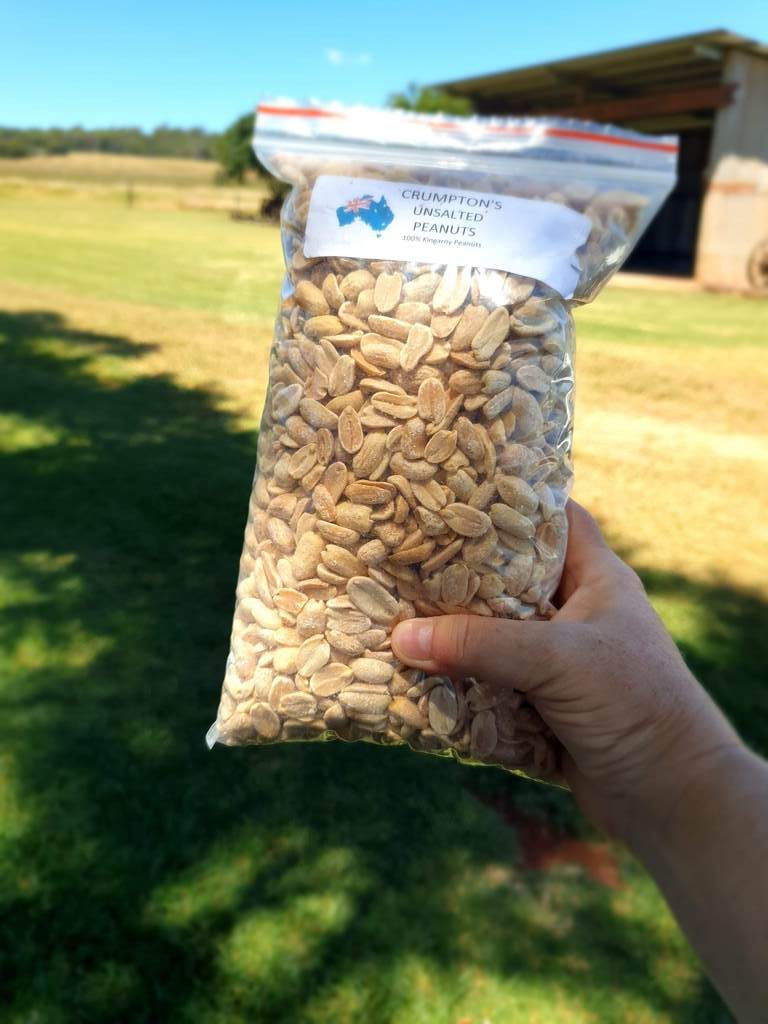
In the evening we were invited back to the house for a BBQ and drinks. They were good enough to have bought Larry some beers and me some sparkling wine as well as a big tub of local nuts. I think sitting around chatting and getting to know each other put them at ease a little. It must be hard leaving your home and beloved animals in the hands of strangers. Hopefully having our Facebook page and website gave them even more of an insight into what kind of people we are.

The next morning we said our goodbyes and then had a look where we would like to park over our 3 months farm sit.

Finding The Best Parking Spot

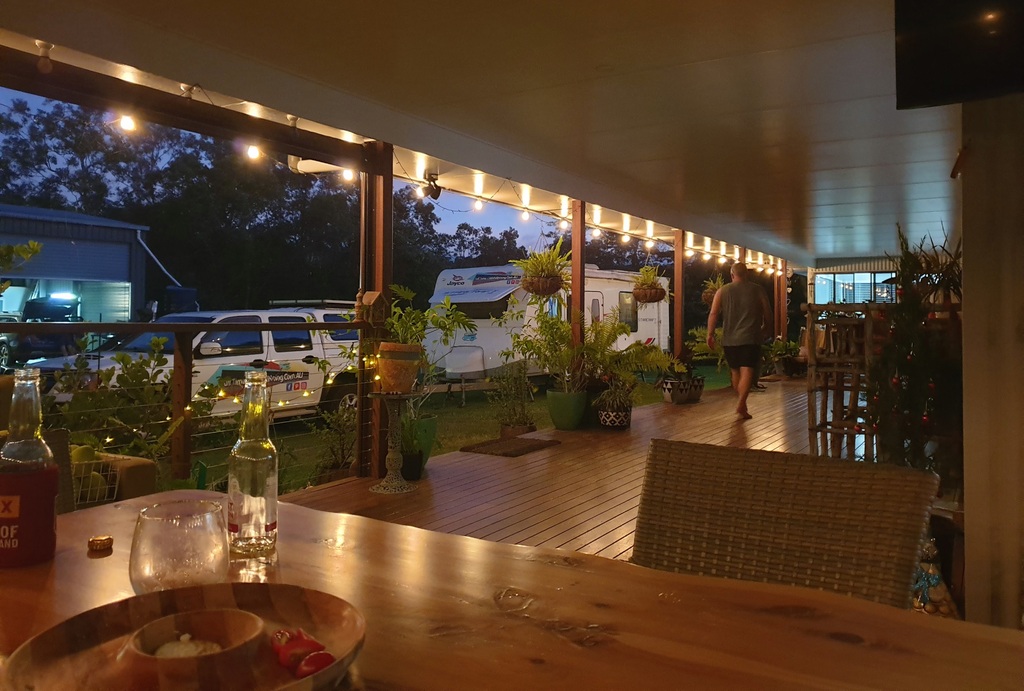
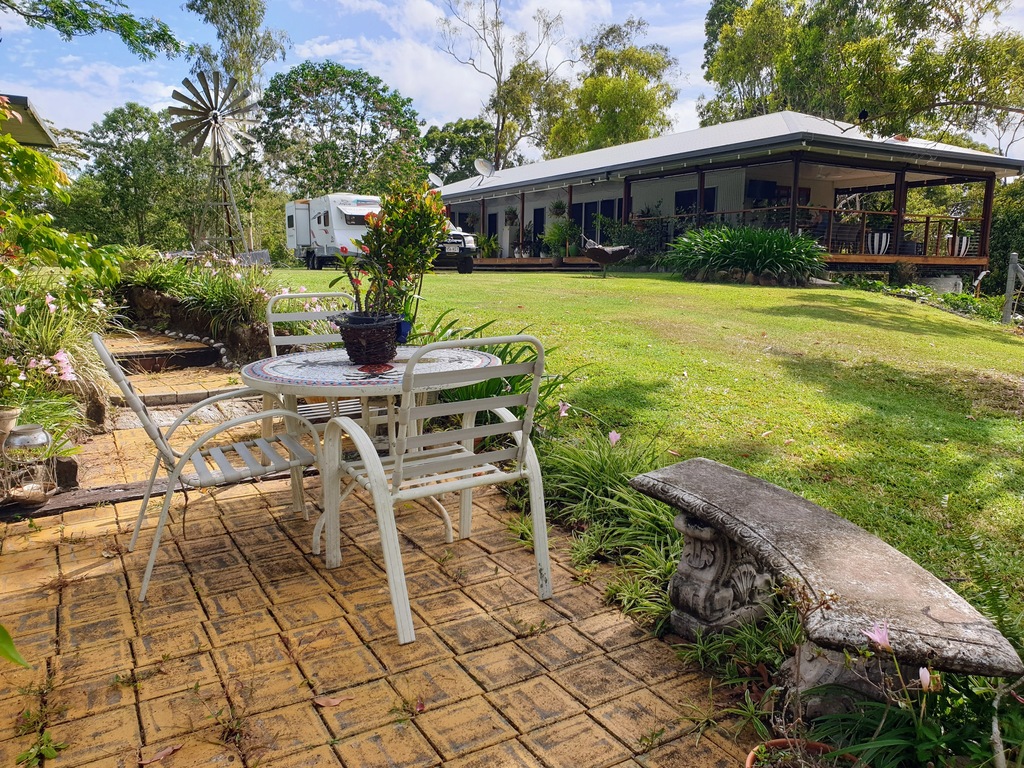
We moved a little closer to the house so we could get nearer to the pool and deck area. As with our last farm sit, we much prefer to sit out on the deck of the house, than putting out and sit under our awning. In this case the owners said we could park on there lawn by the pool and It turned out to be the most fabulous parking spot.
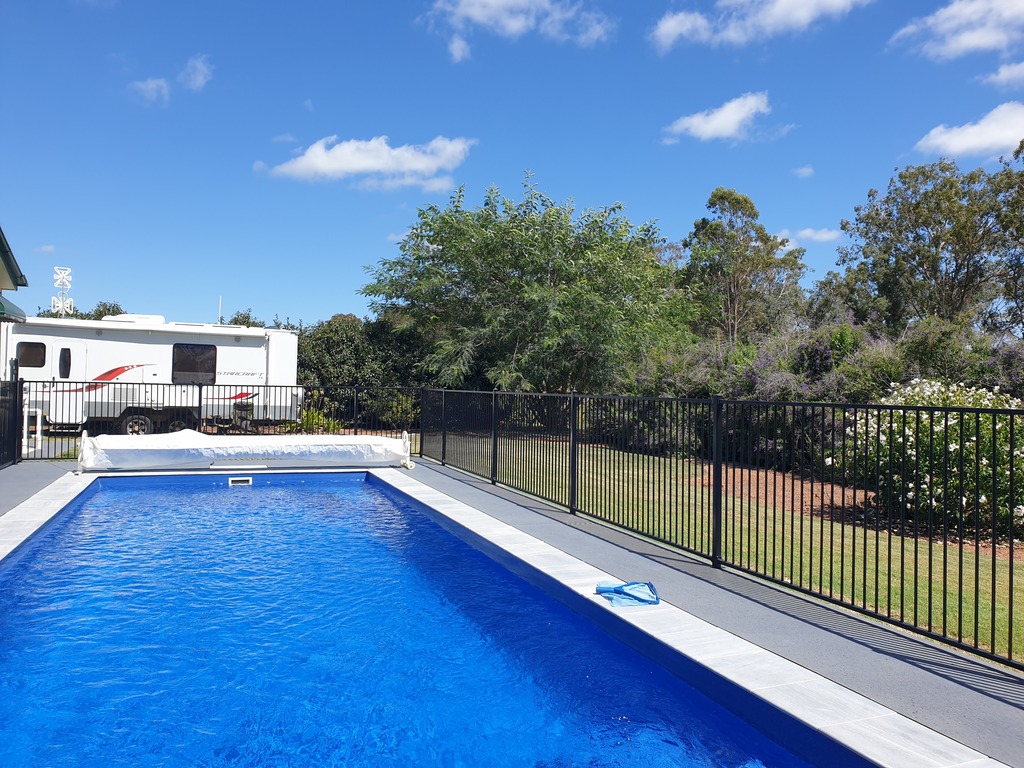
swimming pool 3 month farm sit around Australia Aussie house sitters
Photo: The Best Parking Spot At The End Of The Pool

We were parked a couple of steps from the swimming pool, had power, water and the deck. To top it off, sunsets were in abundance.

Getting To Know The Animals

Angus – The Dog

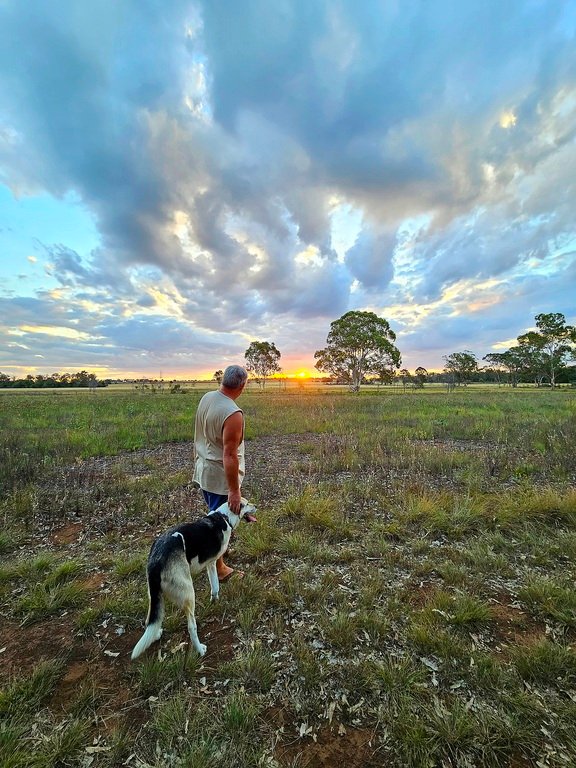
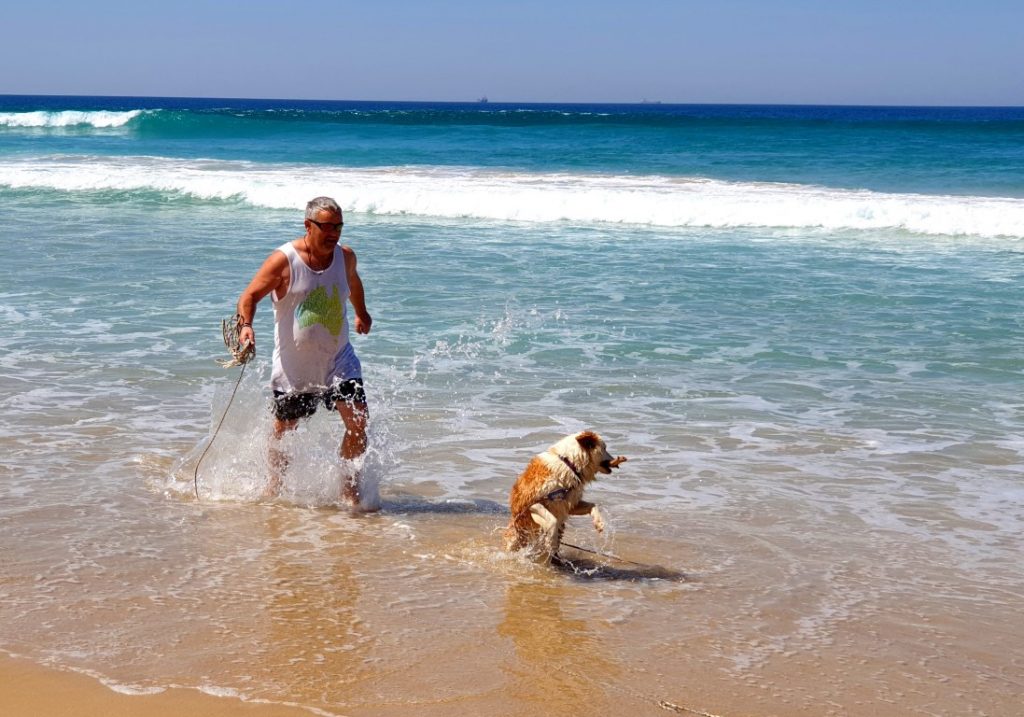
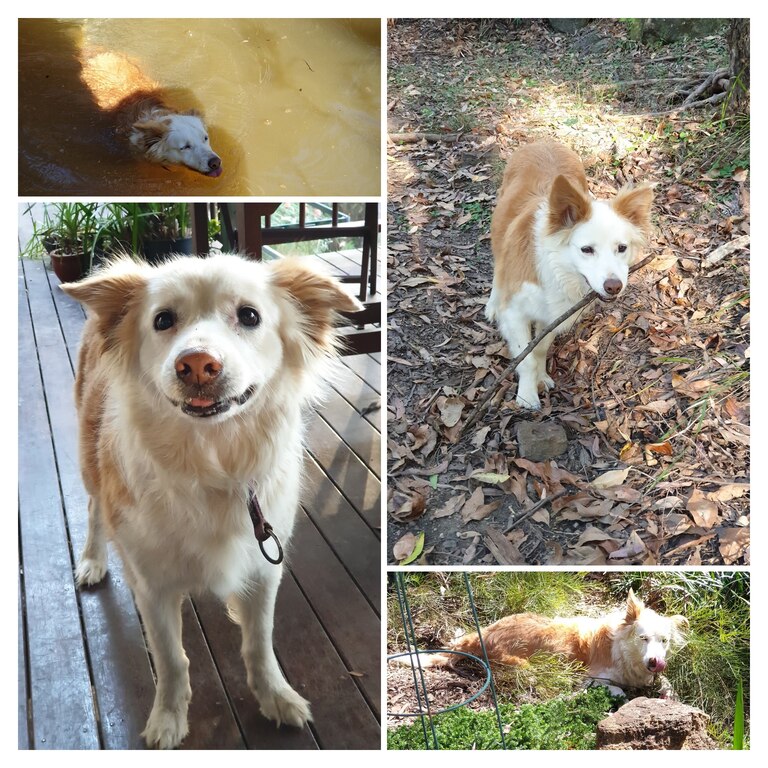
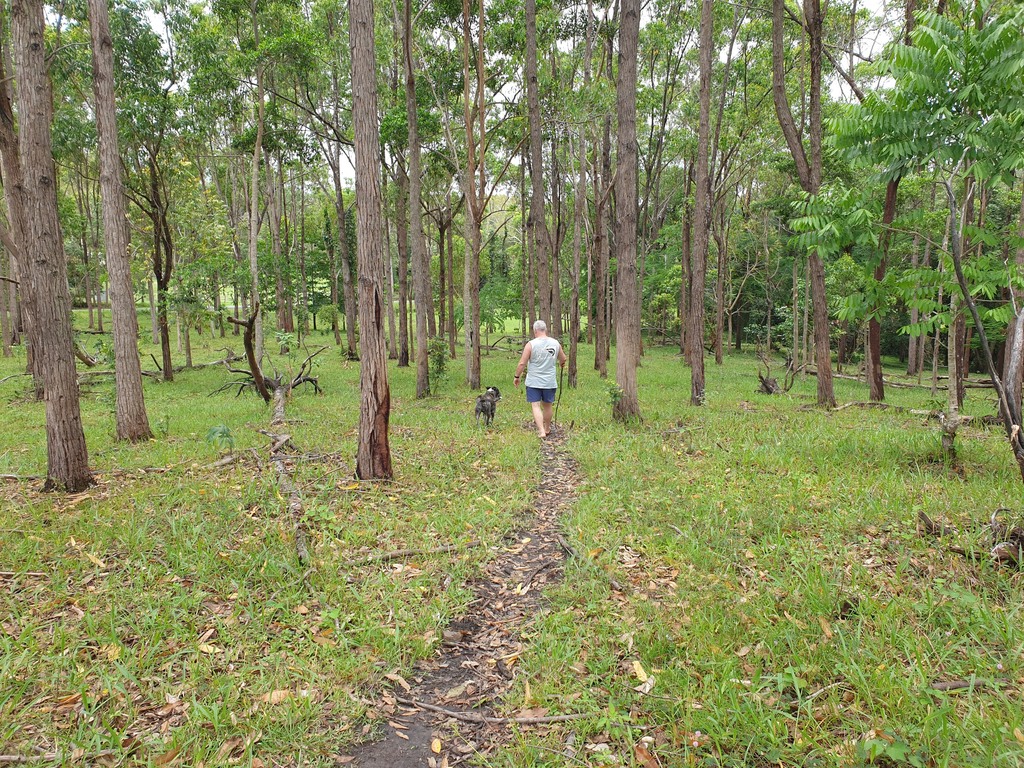
From the start we knew the 3 legged dog Angus, also affectionately known as tripod by some and sometimes “number 7” by Larry (due to his No.7 looking marking) was going to be a sweetheart. We took him for a daily walk as requested by the owners, along the quiet country road. Mixing it up a little by walking around the large field on the property.
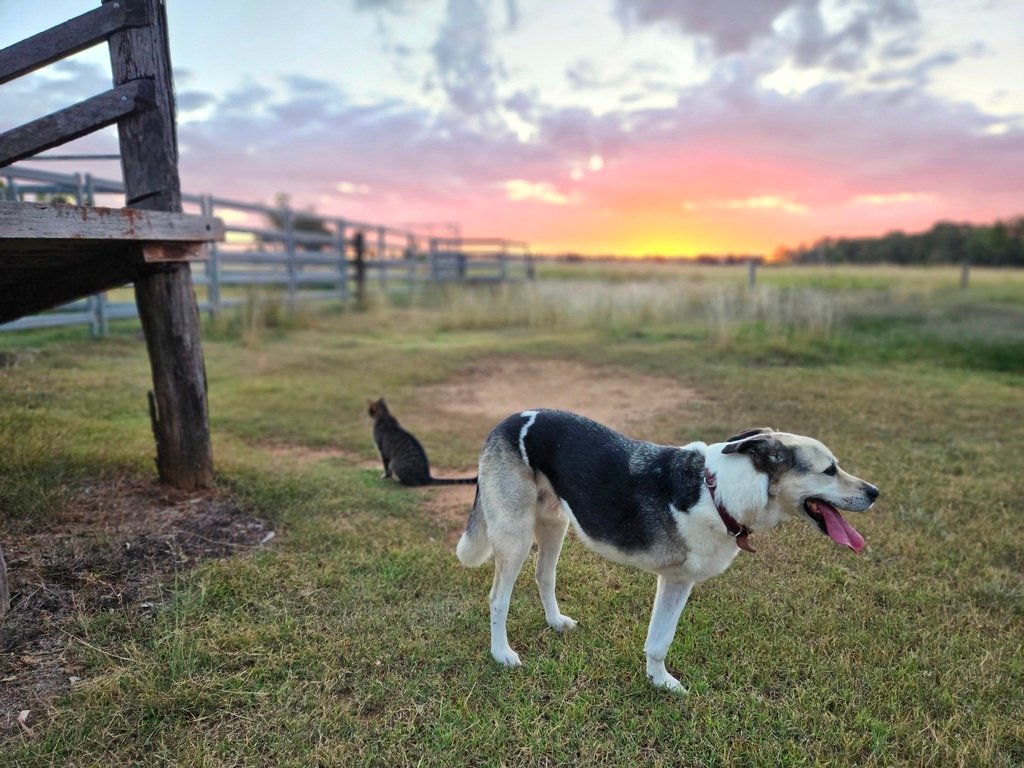
dog and man in field at 3 month farm sit around Australia Aussie house sitters
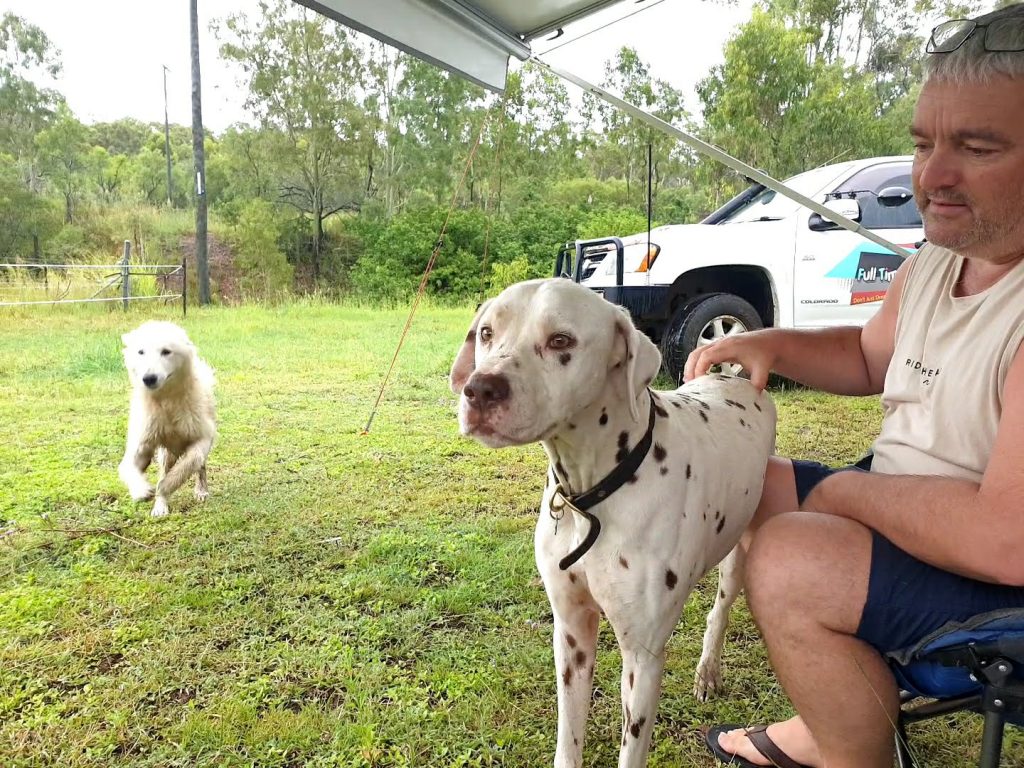
Photo: Angus (AKA Tripod or No.7)
dog and man in field at 3 month farm sit around Australia Aussie house sitters
Photo: One Of Our Walks Around The Farm

As we have never taken care of a 3 legged dog before we walked rather slowly as we didn’t know how fast he could go. Was he stopping because he was exhausted, did he want to turn around and go back? Eventually it was clear, as long as we were walking he wanted to be with us. I stress us! As if one of us wanted to go for a walk with him, he would refuse, it had to be both of us.
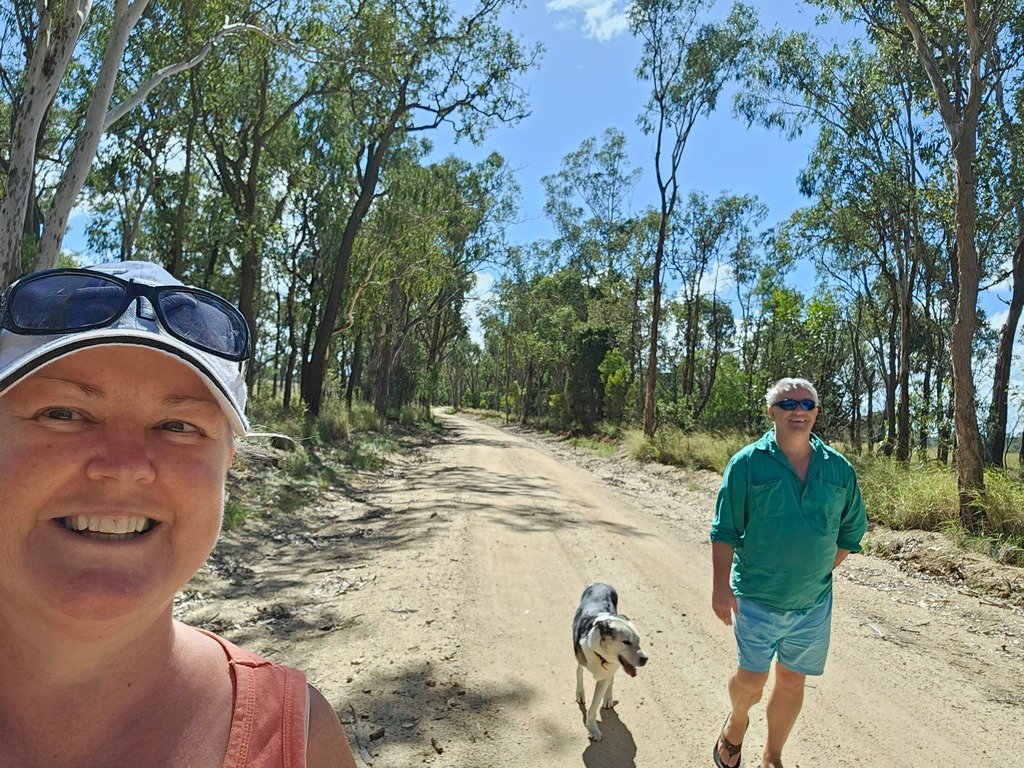
two people walking 3 legged dog 3 month farm sit around Australia Aussie house sitters
Photo: Both Of Us Out Walking Angus

Aussie House Sitters are our choice of house sitting sites. Use our Coupon Code “AHS15%off” for 15% off your joining fee
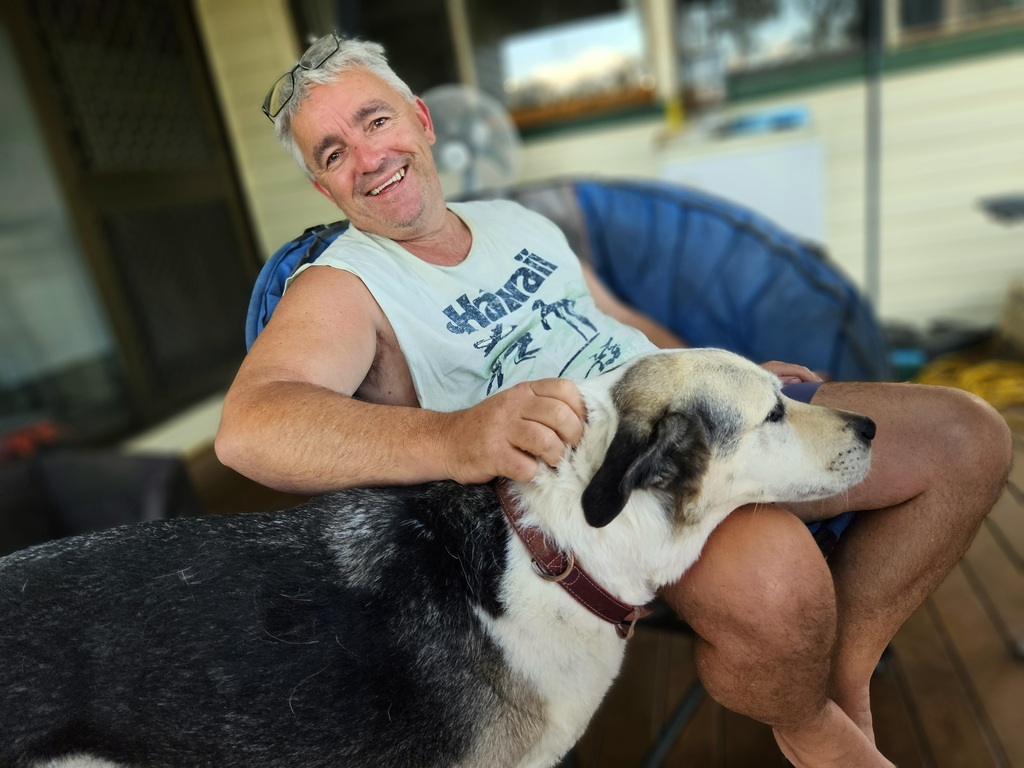
man in chair with 3 legged dogs head on lap  3 month farm sit around Australia Aussie house sitters
Photo: Angus With His Head On Larry’s Lap – Food Time?

Angus was the first to spot a Koala on one of our walks, a dogs nose knows you know. He would rest his head on our laps when he wanted attention or he thought it was dinner time. And when we headed back to the van for the night he would follow and sleep under the van for the night rather than his bed. He was happy as long as he was with us and we felt the same, he really was a sweetheart!
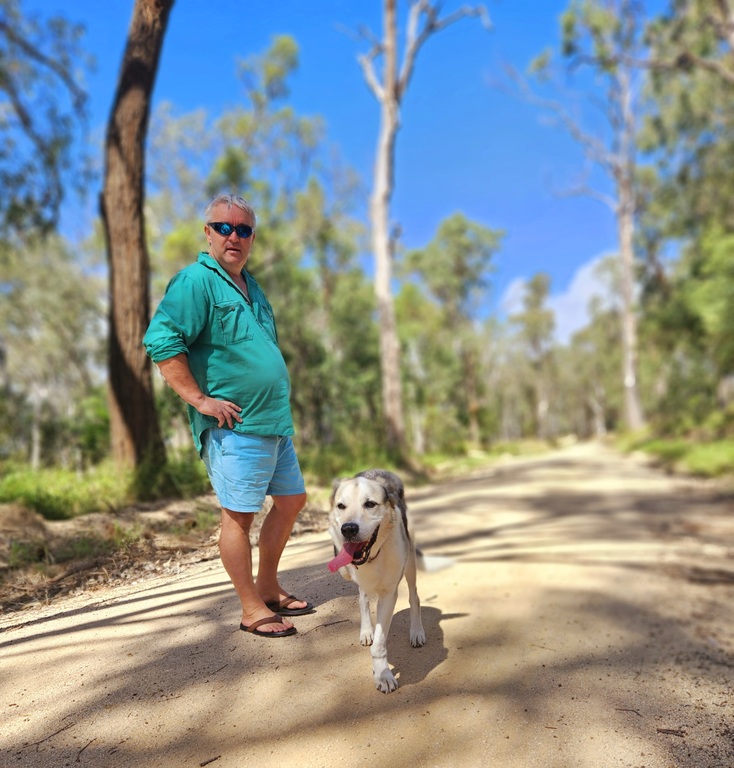
two people walking 3 legged dog 3 month farm sit around Australia Aussie house sitters
Photo: Our 3 Legged Mate On Our 3 Month Farm Sit

Nala – The Cat

Nala is the most talkative cat you could ever meet. Coming to tell us when it was time for food, whether it was or it wasn’t. When we walked by, another conversation would be started with a different kind of meeaww before rolling over on it’s back so you would stroke its belly. What cat does that? I think it has a little bit of dog in it.
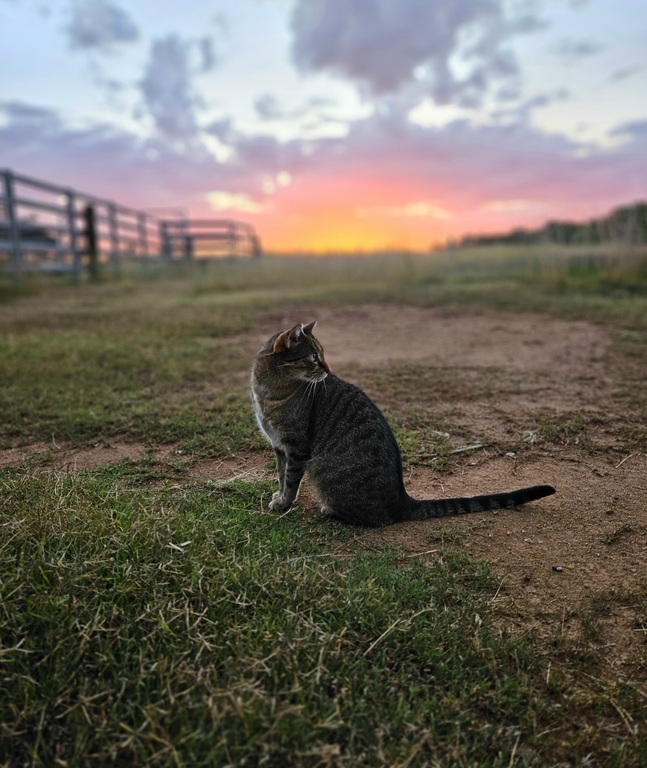
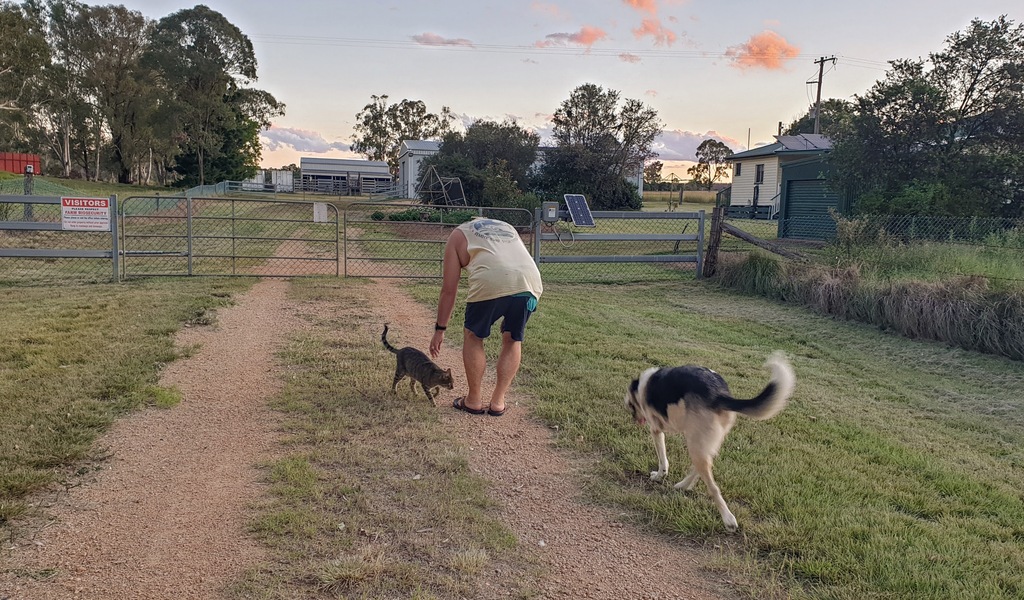
cat at sunset at 3 month farm sit around Australia Aussie house sitters
Photo: Beautiful Chatterbox – Nala

cat and dog at sunset at 3 month farm sit around Australia Aussie house sitters
Photo: Nala Coming To Meet Us At The Gate – Where Have You Been?

Nala loves Angus so much, licking his head and ears most days and then buffing his head on to Angus so he would do the same back. Which he did.
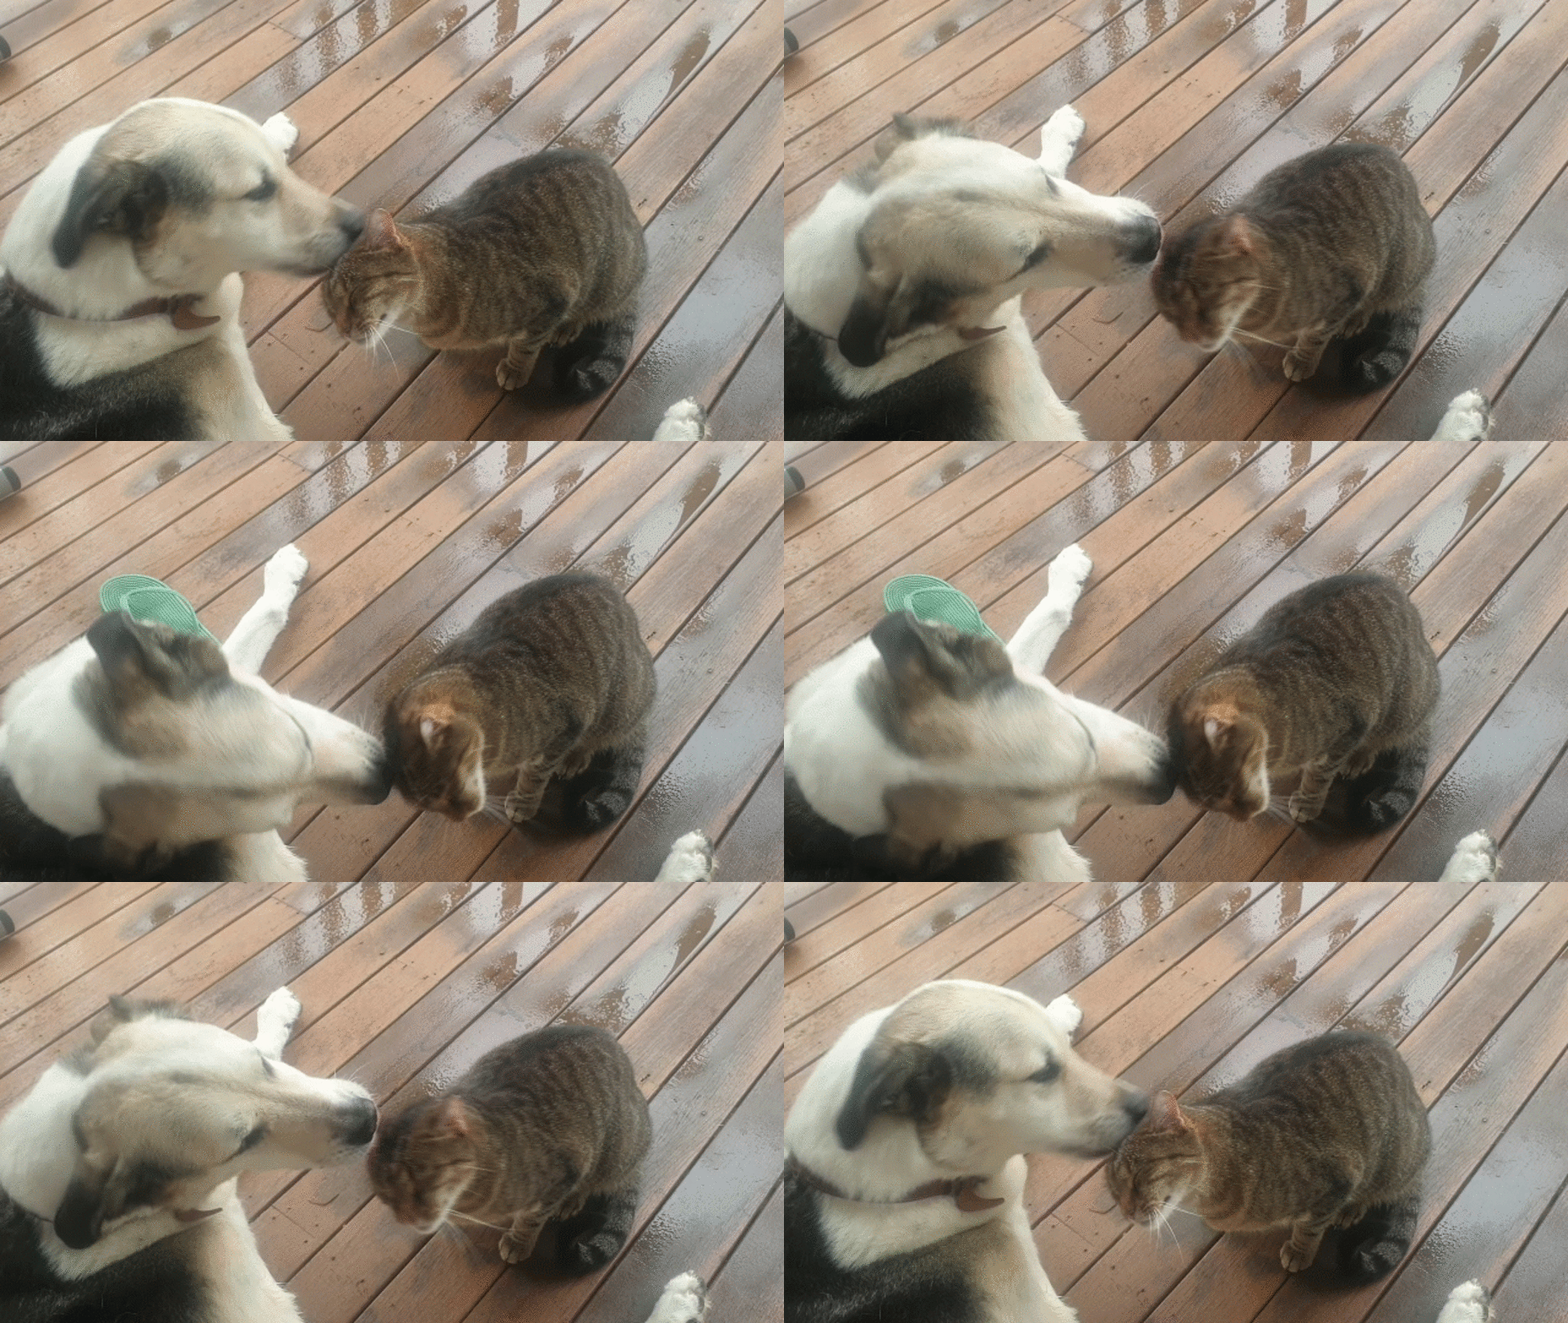
GIF cat and dog dog licking cat head at 3 month farm sit around Australia Aussie house sitters
Photo: Brotherly Love

The Horses

The horses live in a large field which provides them with heaps to eat and has a few water troughs are around the place for drinking. We really didn’t have to do anything with them. On previous farm sits we have moved horses from one paddock to another for better grazing while the owner’s are away.
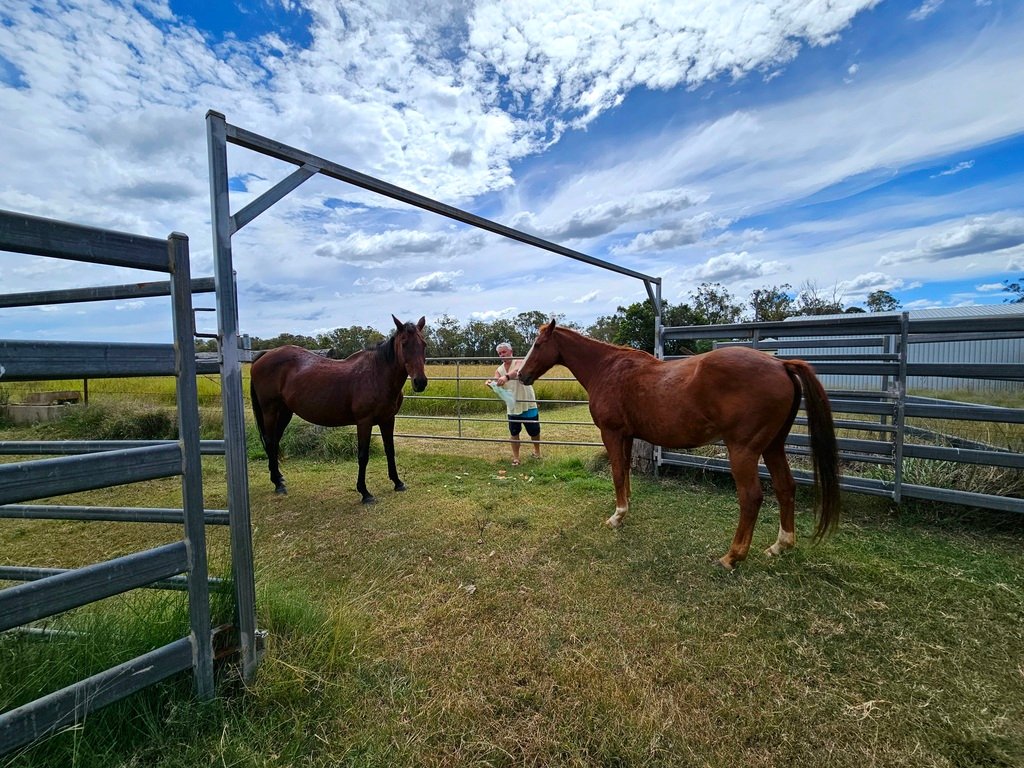
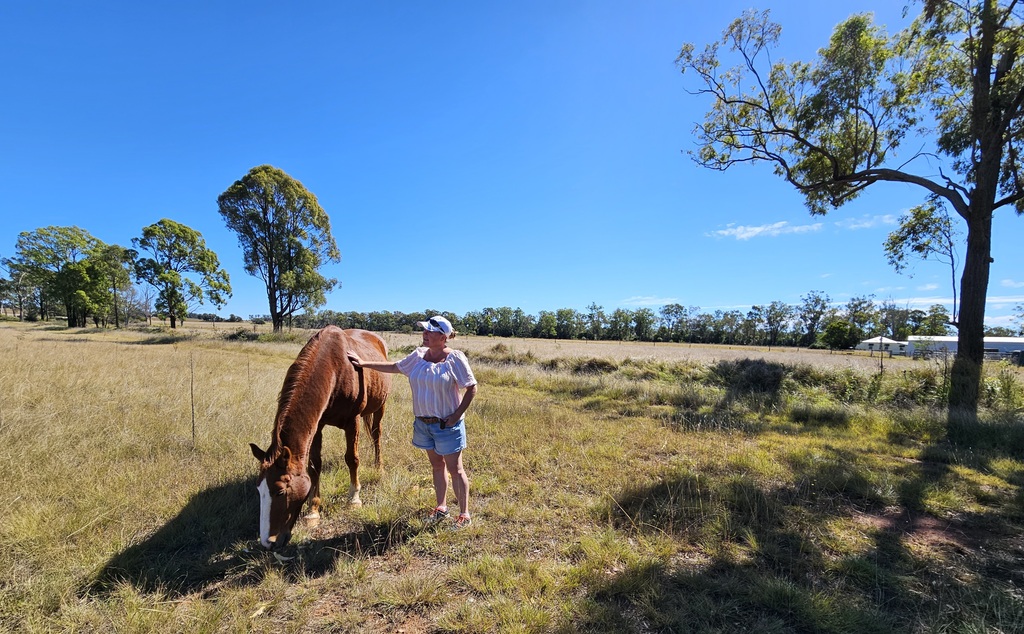
horses at 3 month farm sit around Australia Aussie house sitters
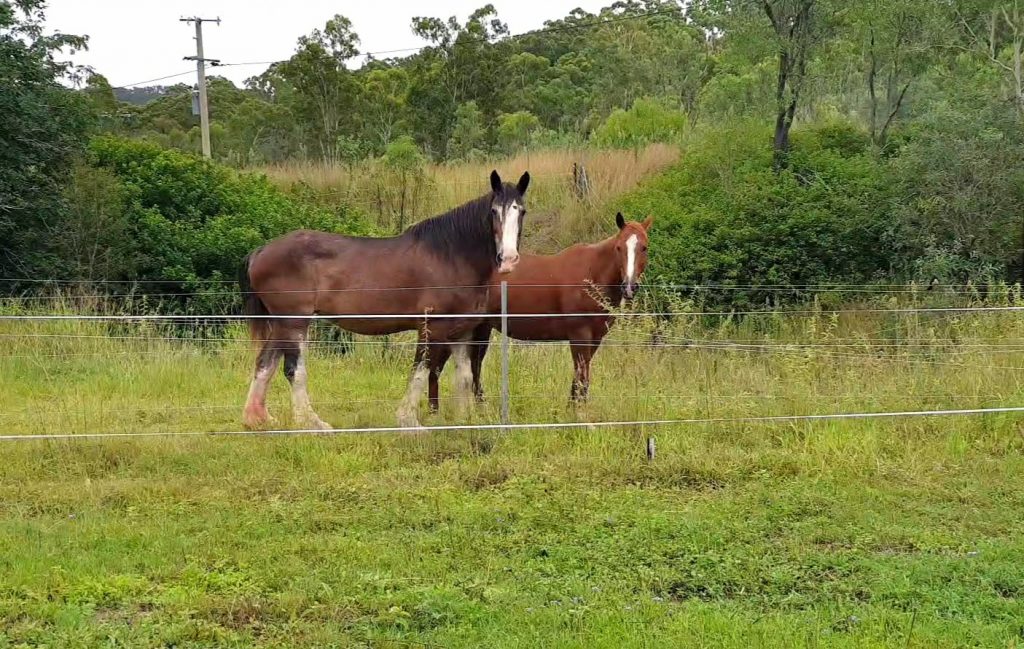
Photo: The Horses On Our 3 Month Farm Sit
horses at  3 month farm sit around Australia Aussie house sitters
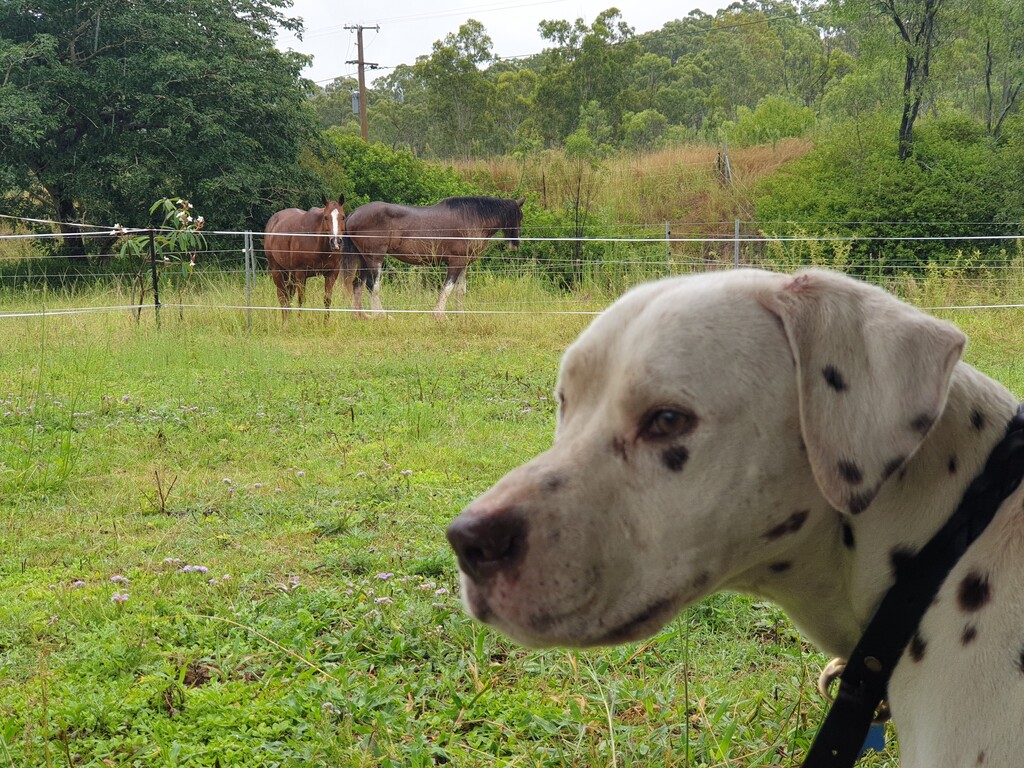
Photo: Getting To Know The Horses Was A Treat For Us

After a few weeks of walking Angus in the field and saying hello to the horses, we started to save our vegetable left overs to feed them. Carrot peelings, lettuce leaves, watermelon skin etc. When we had a bag full of food, Larry would whistle and they would walk or run over on occasion.
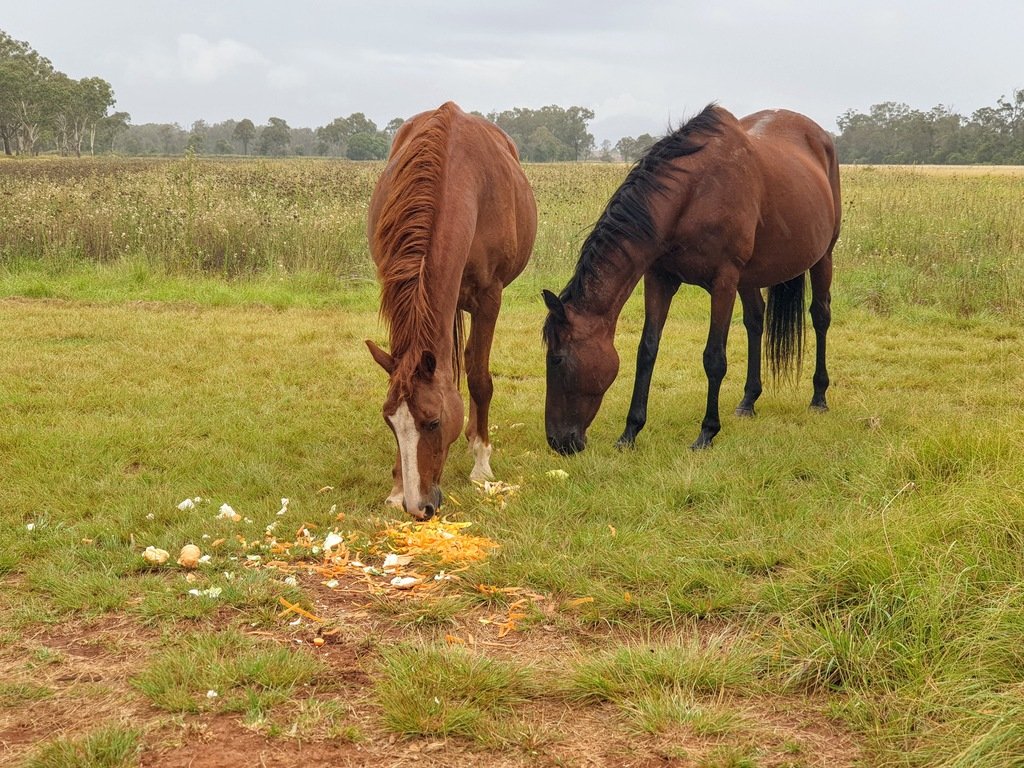
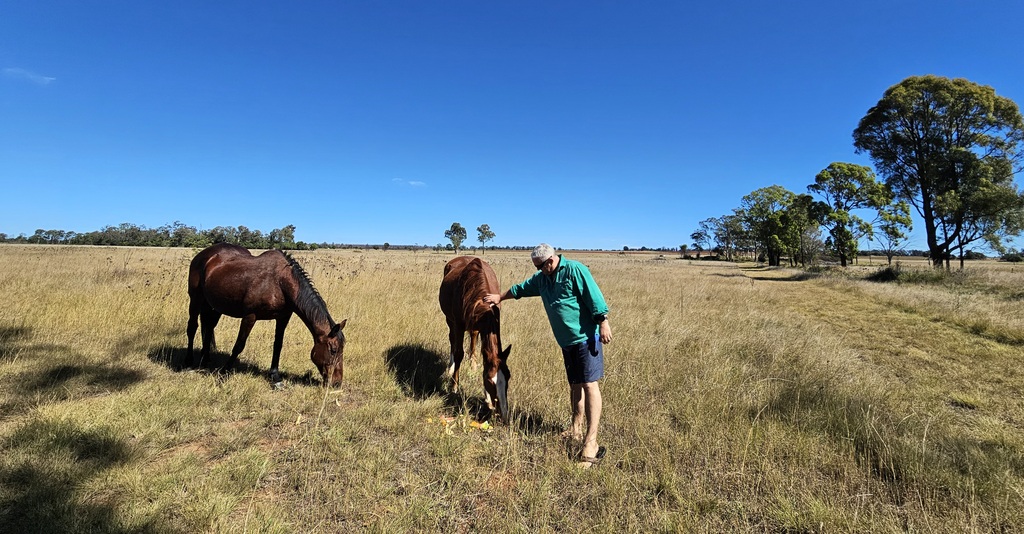
horses at 3 month farm sit around Australia Aussie house sitters
Photo: We Gave The Horses Our Fruit & Veg Scraps

horses at 3 month farm sit around Australia Aussie house sitters
Photo: Larry Checking On The Horses

The Bullock

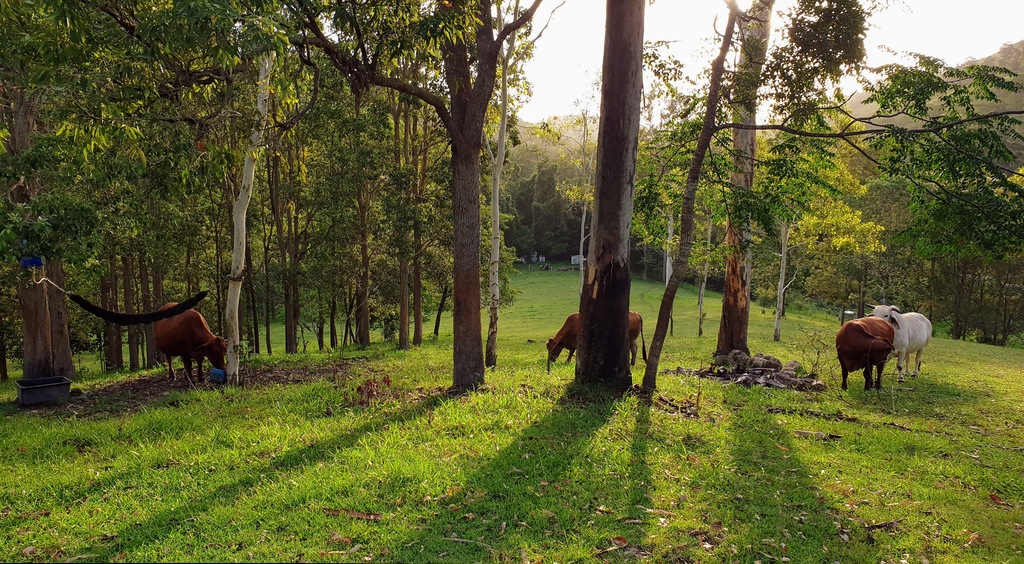
I was beginning to wonder if there was actually a bullock as I didn’t see it for weeks. It wasn’t until it was right at the fence line near the house I actually sore it. And it was huge! How did I not see it before? The bull was also easy to look after as it ate the same as the horses and drank from the same water troughs. Like the horses, we just had to spot him now and again and check the fence line after bad weather.
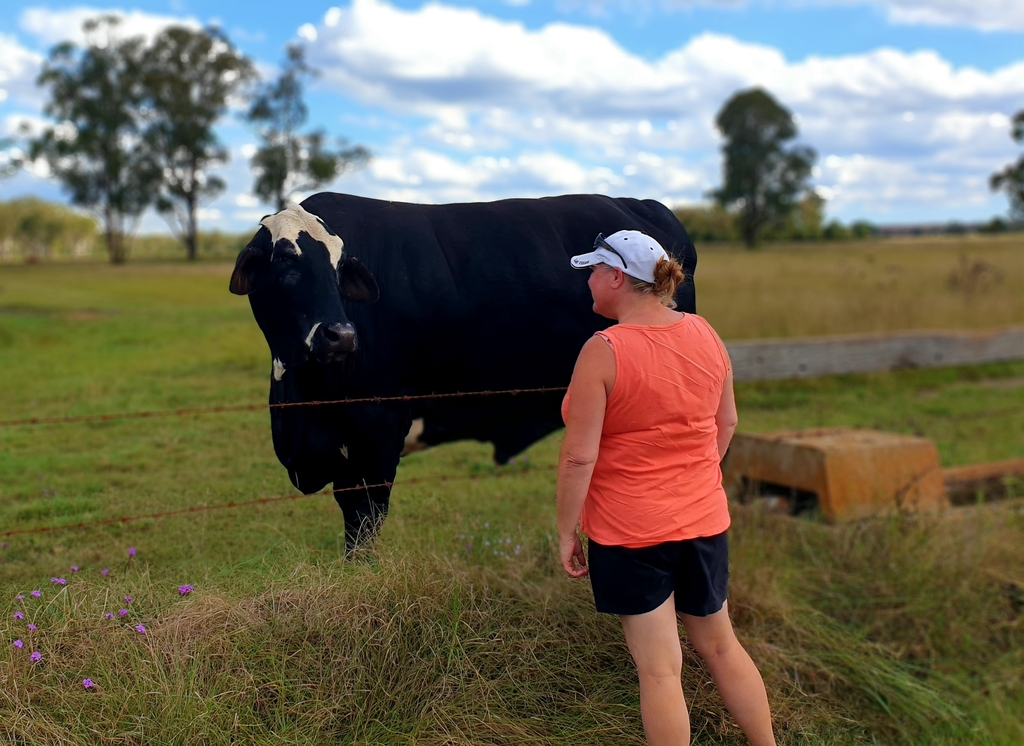
Bull at sunset at 3 month farm sit around Australia Aussie house sitters
Photo: The Bull Was Huge But Hid Well Some How?

Gardening

As mentioned, one of the things we were asked to do, was some gardening. From being little and watching my granddad in his allotment with his roses and rhubarb, I have enjoyed gardening. Working on Hayman Island as a gardener myself as an adult. I do like gardening although these days my body does not. The gardens around the house were small and well kept, so easy to maintain.
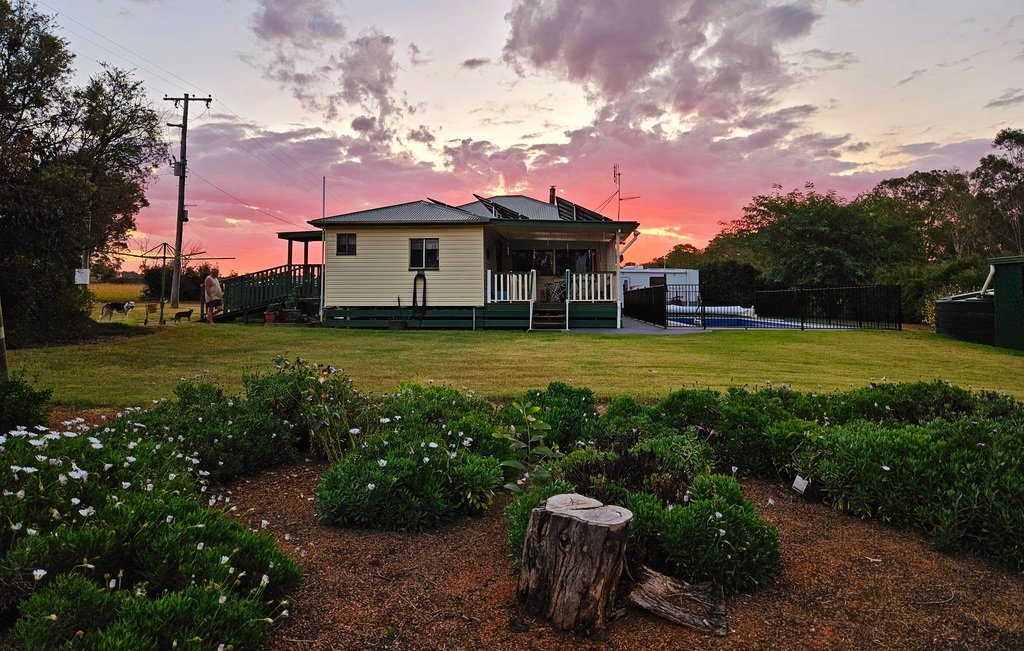
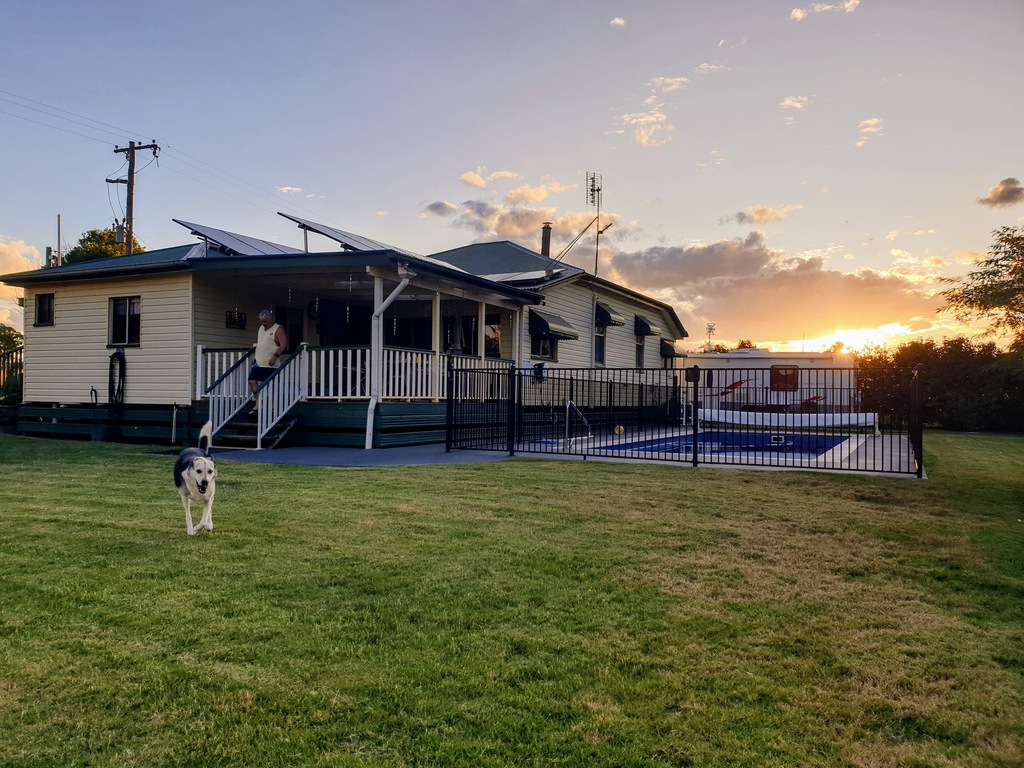
3 month farm sit around Australia Aussie house sitters
Photo: Larry Being Followed By The Cat & Dog Around The Garden
3 month farm sit around Australia Aussie house sitters
Photo: Angus Liked To Roll Around On The Lawn

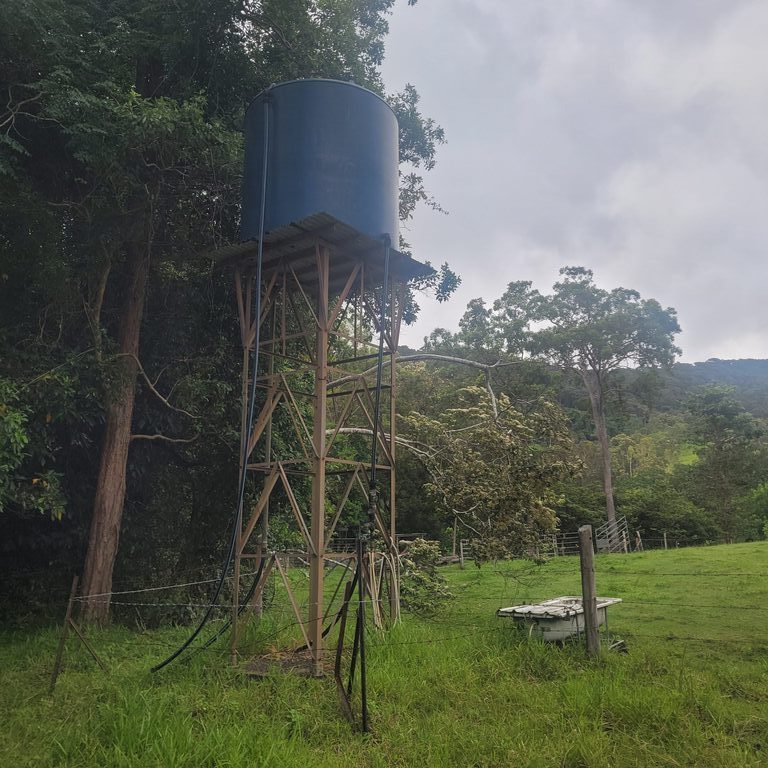
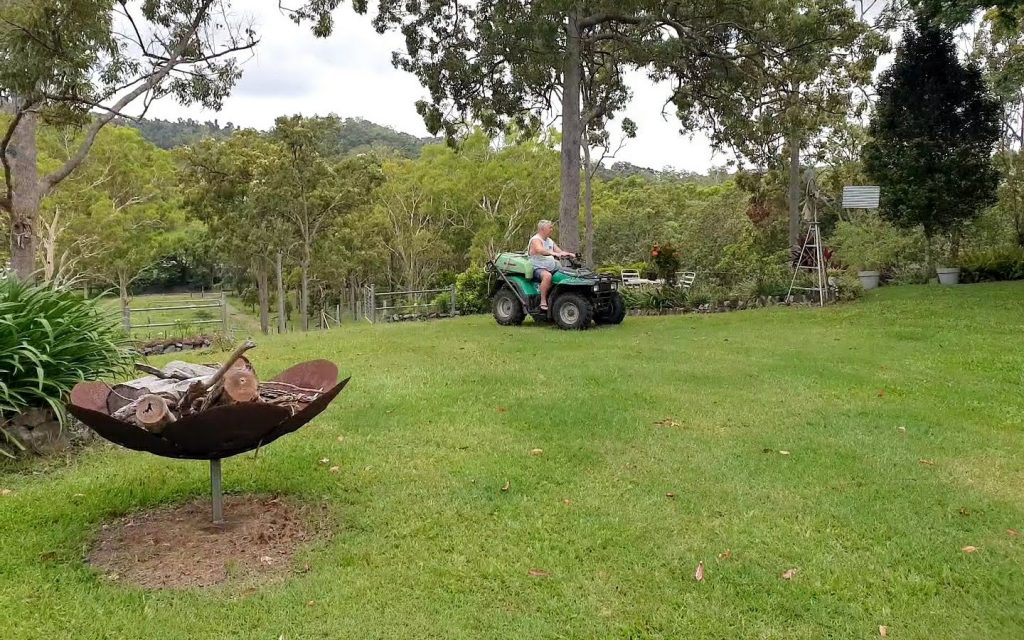
We had a ride on mower for the grass around the property and a push mower with a bag for around the pool. That way it reduced the grass getting into the pool. I love a battery operated whipper-snipper and blower, I find they’re so much lighter and easier to use. As the farm was on water tanks we were asked not to water the garden. We had enough rain to see the garden grow though.
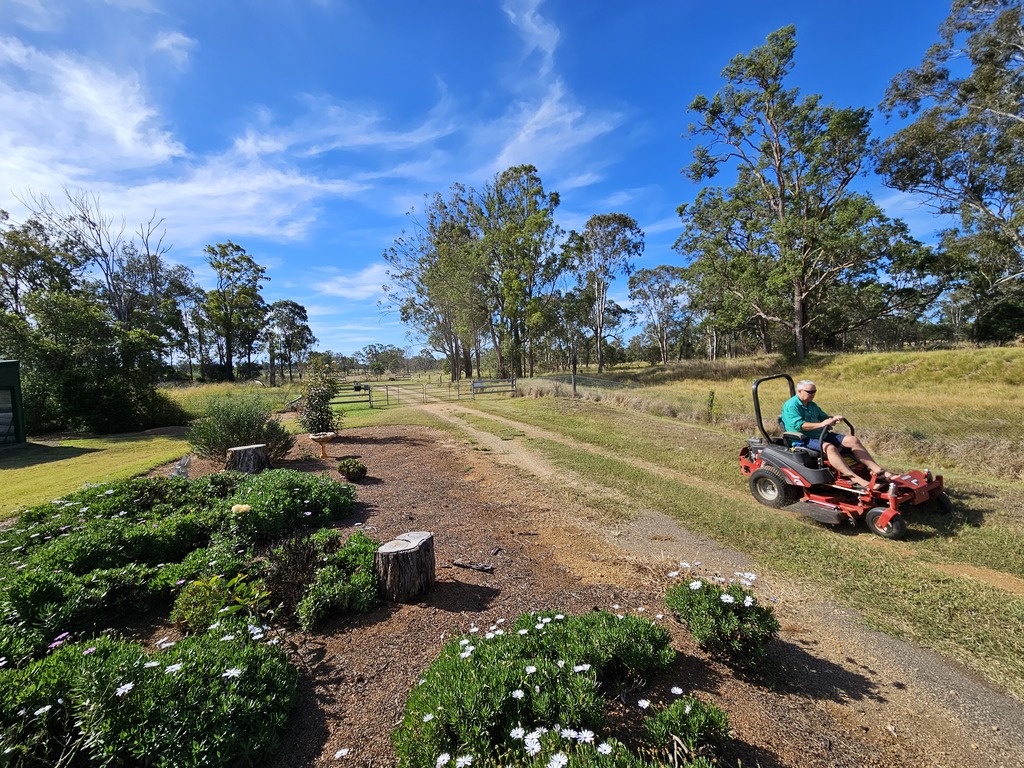
ride on lawn mower 3 month farm site Aussie House Sitters
Photo: Larry Loving The Ride On Mower

Aussie House Sitters are our choice of house sitting sites. Use our Coupon Code “AHS15%off” for 15% off your joining fee
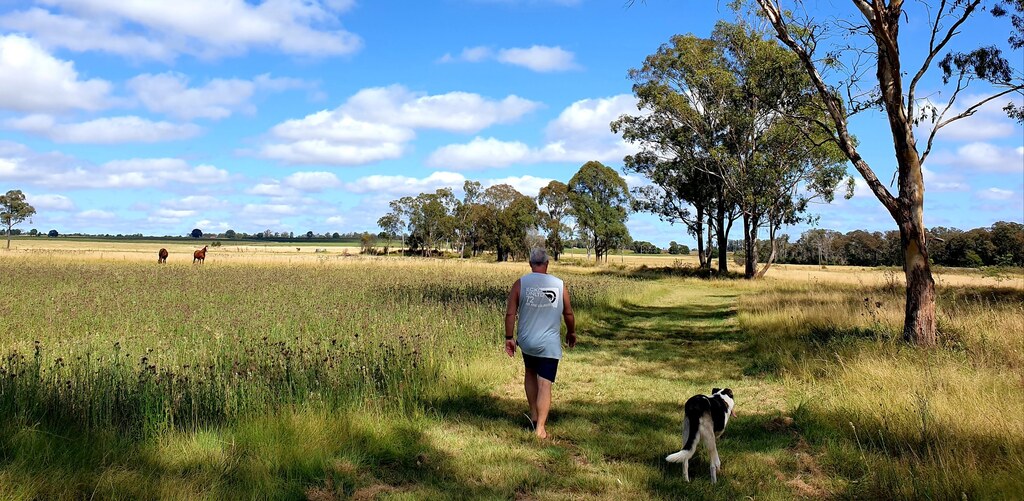
walking 3 legged dog  3 month farm sit around Australia Aussie house sitters
Photo: Larry Mowed A Path Around The field

While on this 3 month farm sit we knew we might get some bad weather. In fact the owners told us in advance that if there was bad weather we could park our ute and van in there large shed. We had a few storms come through as well as a few windy days. Although we didn’t have to move the van Larry did have to get out the tractor a couple of times to move some large fallen branches. He also used the tractor to mow a walking track around the field. This was easier to walk around and check the fence line.
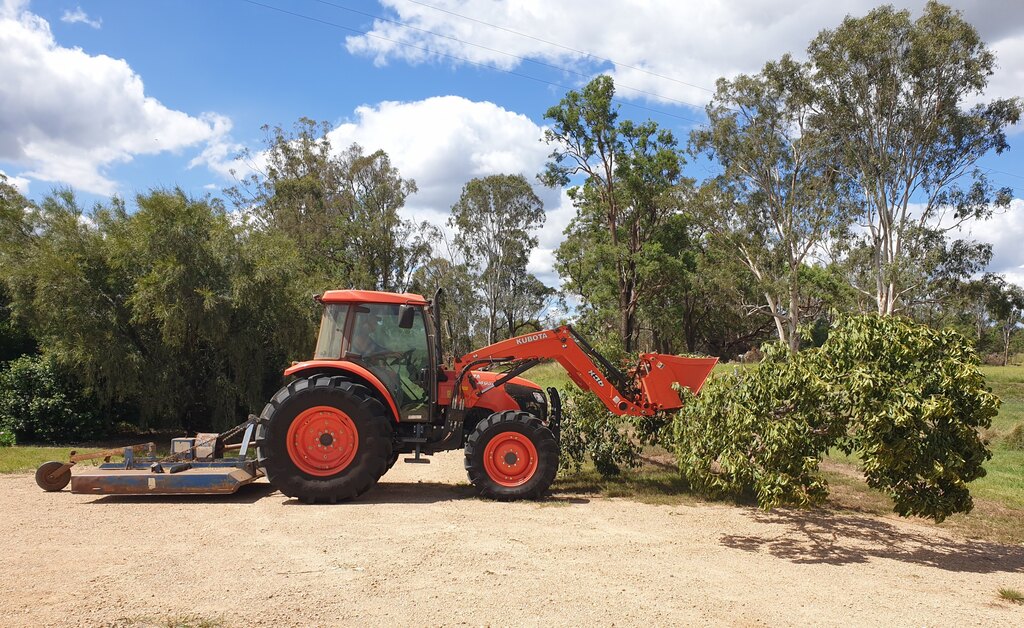
using a tractor to move fallen branches 3 month farm sit around Australia Aussie house sitters
Photo: Larry Removing fallen Branches After A Storm


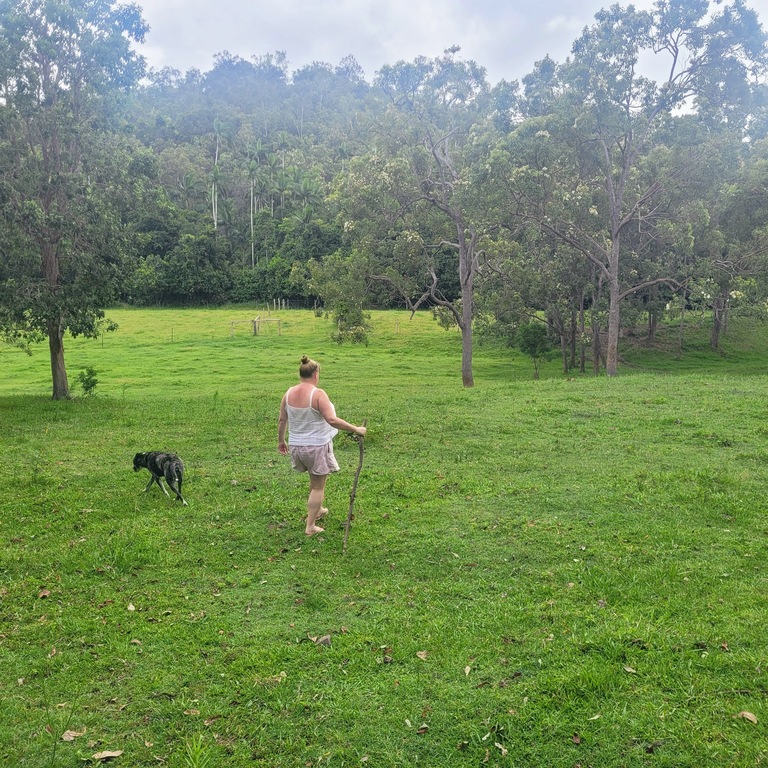
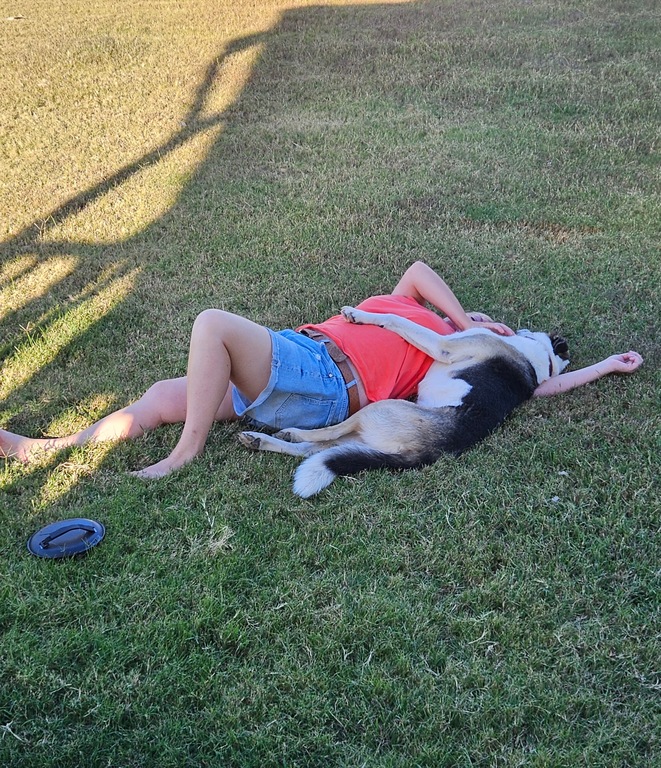
lady and dog laying on grass 3 month farm sit around Australia Aussie house sitters
Photo: Angus & I Enjoying The Fresh Cut Grass

Swimming Pool

I have never heard of a magnesium pool before? It was fabulous!! It really did look after itself. All we had to do was put the creepy crawly in every now and again, empty the basket and test the water with strips. Being a heated pool we were in it more often than not.
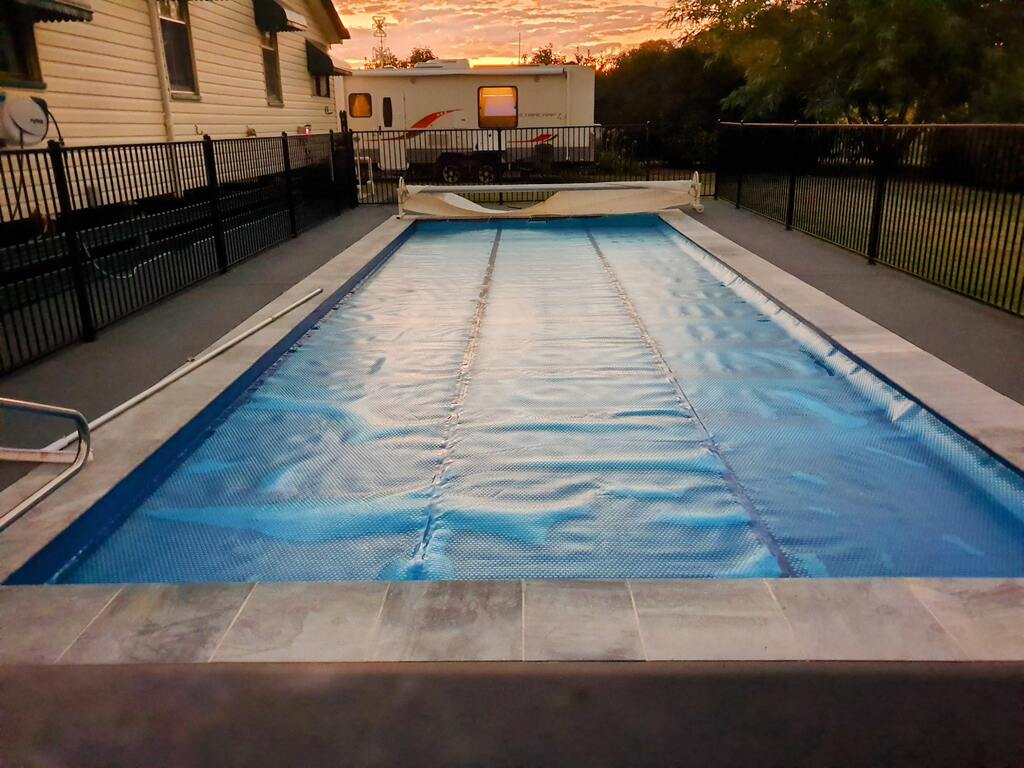
swimming pool with cover and caravan 3 month farm sit around Australia Aussie house sitters
Photo: Pool Covered To Keep In The Heated Water

With the power going off a few times, due to weather and the power company, Larry did have to reset the pool timer. Further more on one occasion he had to remove the cover of the controller to test why it had unexpectedly turned off. It turned out a tinny skink had got in and fried itself, blowing a fuse. We popped in to town to buy another and it was up and running again.
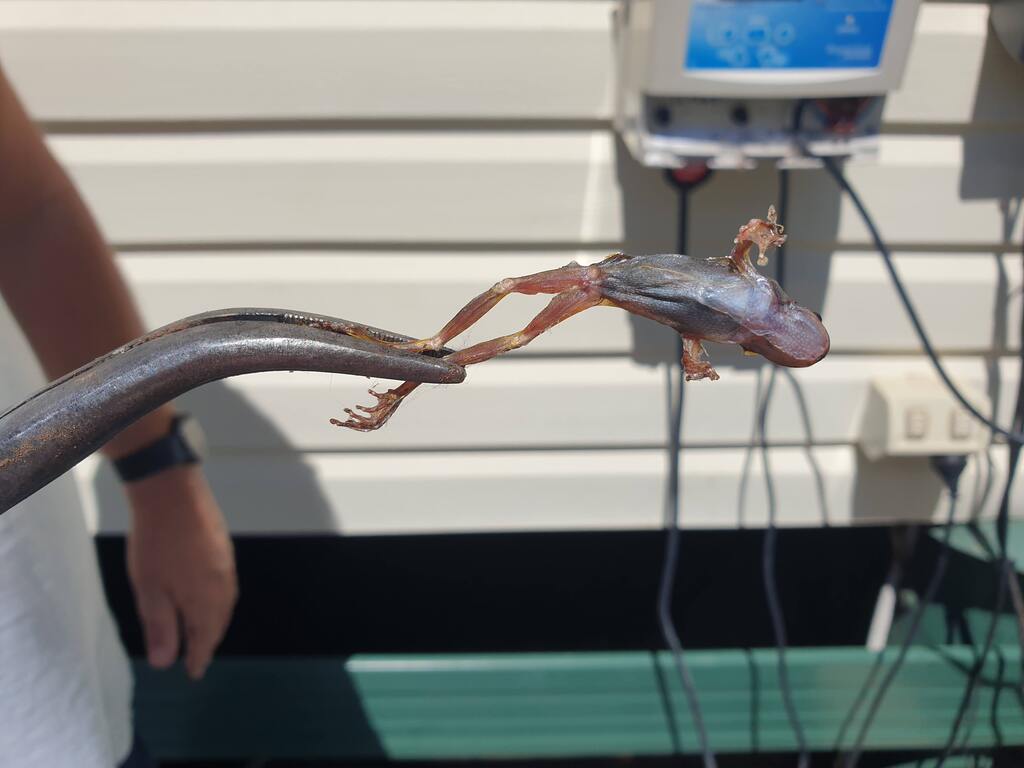

swimming pool filter blown with skink 3 month farm sit around Australia Aussie house sitters
Photo: The Poor Skink Was Toast

swimming pool 3 month farm sit around Australia Aussie house sitters
Photo: The Beautiful Heated Swimming Pool On Our 3 Month Farm Sit

Communication With The Owners

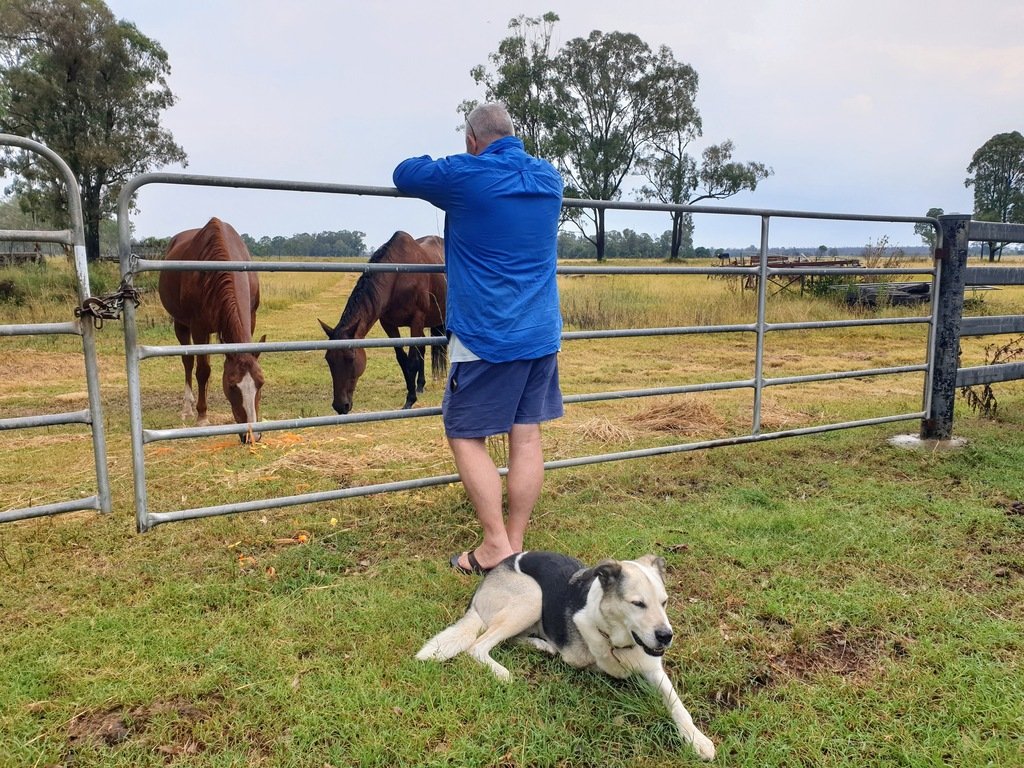
Personally I like to send the owners photos of their animal family while they’re away. And in this case, as it was a 3 month farm sit, I included the garden, pool and house. Larry also text them now and again. For instance when the power company was delivering a new power pole to be fitted on the property and when we hadn’t seen the bull for quite a few days. Seriously, how the heck did we not see it!
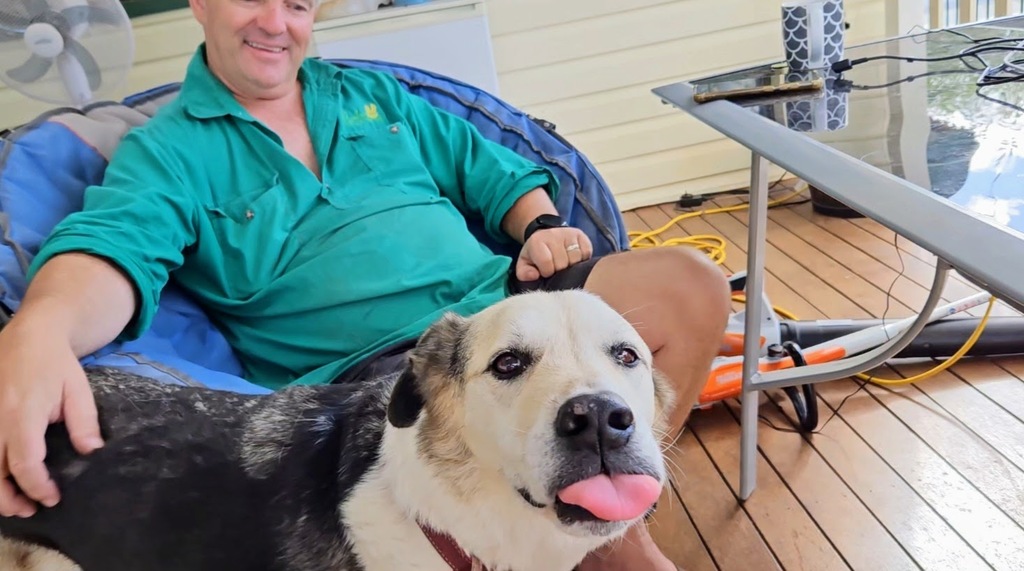
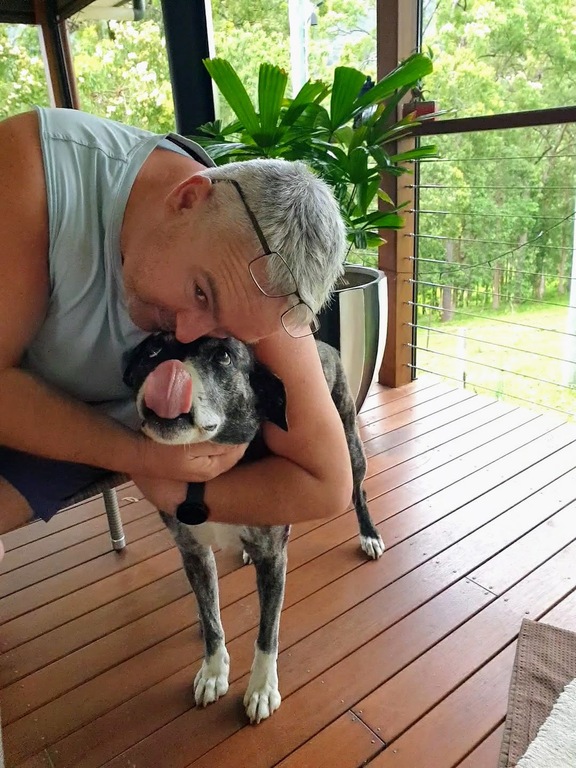
a dog sticking out its tongue and man 3 month farm sit around Australia Aussie house sitters
Photo: Angus Being His Gorgeous Self
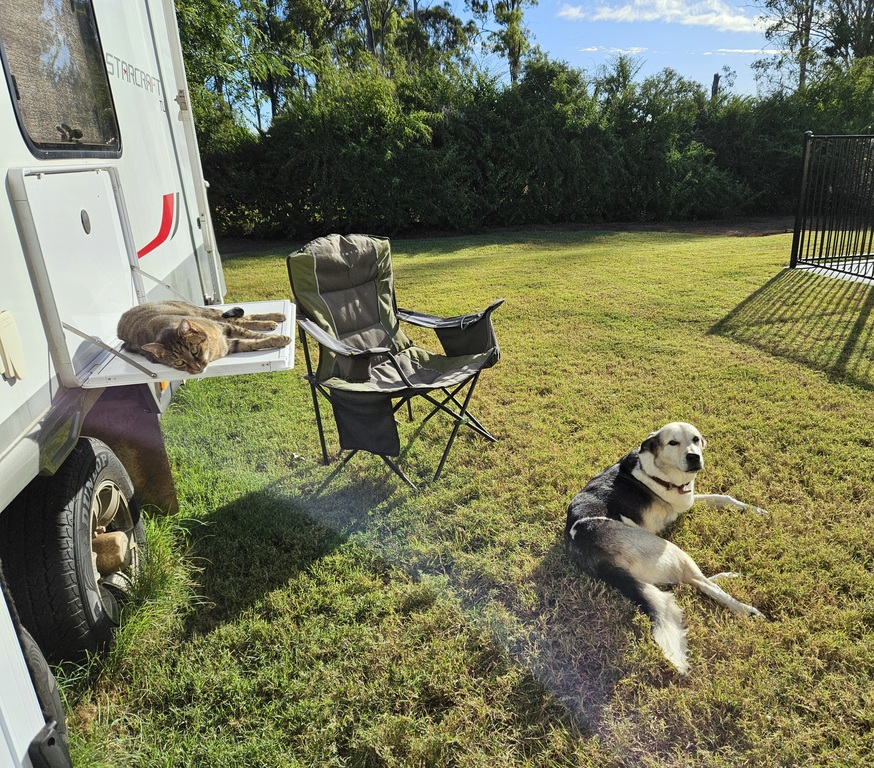
a dog and cat by caravan 3 month farm sit around Australia Aussie house sitters
Photo: Angus & Nala At Our Van Every Morning

2 horses and a dog and man over the other side of gate 3 month farm sit around Australia Aussie house sitters
Photo: Sending Photos To The Owners So They Can See They Are Taken Care Of

All owners are different in the amount of communication they want or is possible due to their location. I do actually enjoy taking and sending them photos of their pets though.

House Care

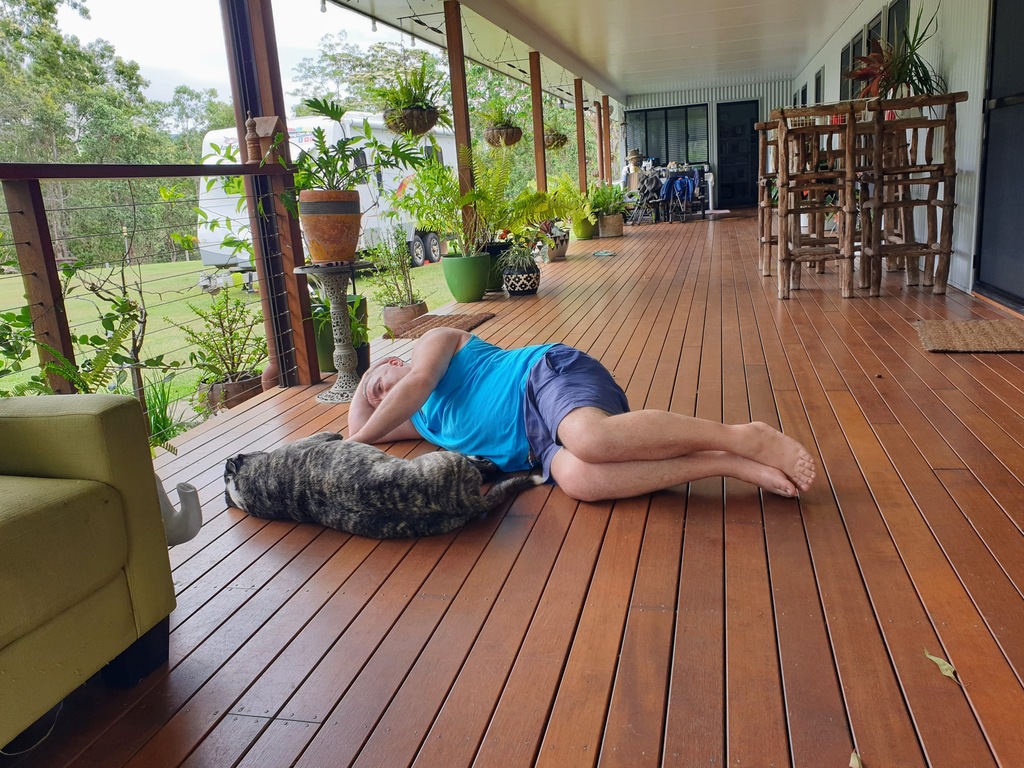
As with almost all of our house and farm sits we live in our van (which we personally prefer) unless the owners request we stay in their home. This 3 month farm sit was no different. Although we used their toilet and kitchen to boil the kettle and use their oven a couple of times, we didn’t need to use the house. Actually, come to think of it, I did sit in the house with Angus a few times when it was thunder and lightning as he was so scared.

Before the owners returned I still went over the the floors with a vac and mop just to freshen the place up. We also gave the deck a tidy as this was where we spent the majority of our time.

Opportunity To Discover The Surrounding Areas

As with our other Aussie House Sits, we find we can explore the surrounding areas while saving money on park fees etc. Being in the area we visited Kingaroy and it’s surrounding areas quite a lot. Kingaroy is famous for it’s nuts so we visited a couple of local nut stalls.
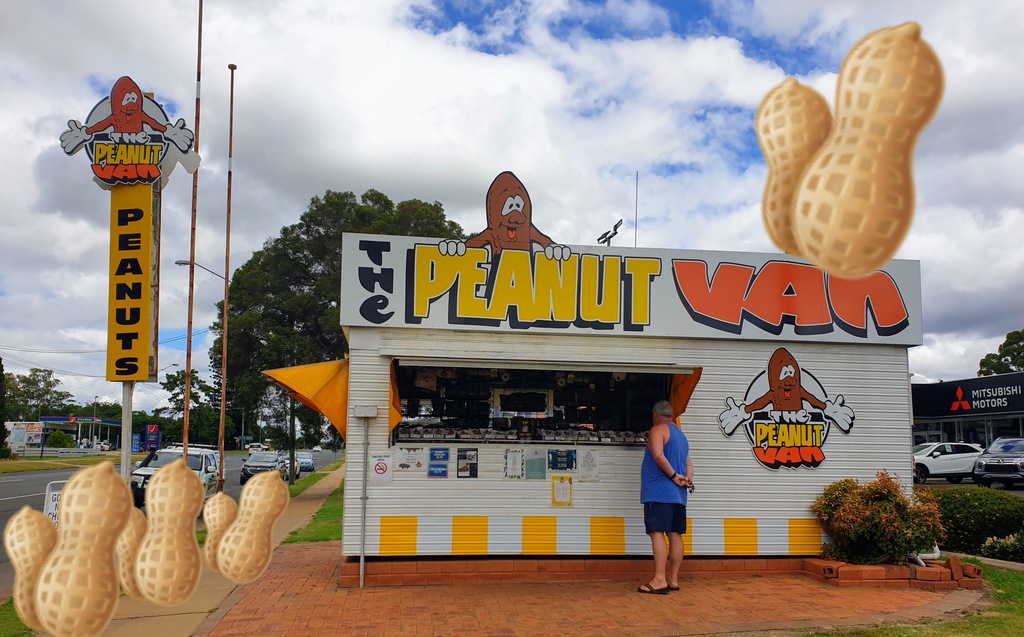
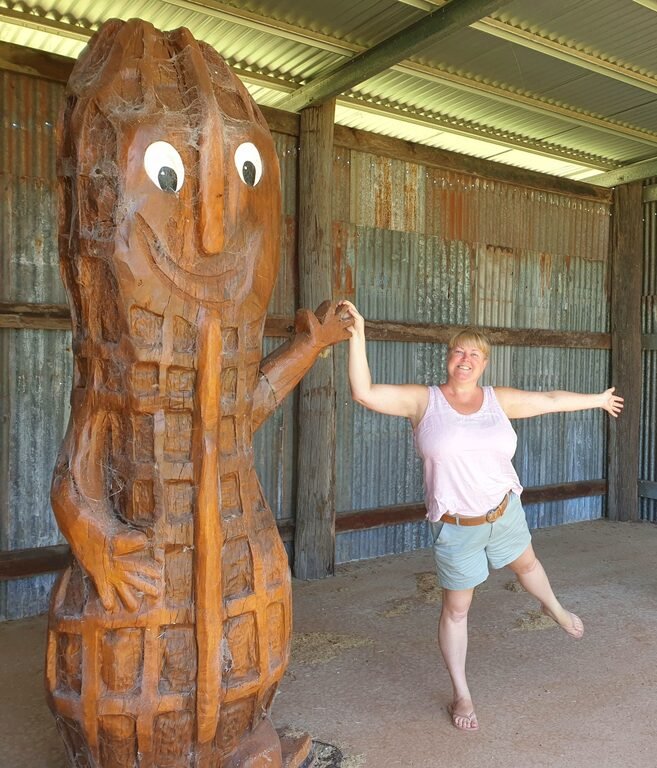
peanuts kingaroy
Photo: The Peanut Van Kingaroy Was A Must While In The Area
outback Equipment

Local markets are in abundance around Kingaroy. Nanango was a short drive away and had an enormous market. Wondai market was smaller but is next to some nice local shops. We also checked out so many free camps in the surrounding areas in the region. Kingsley grove estate is worth a mention. It has a 48hr free camp, so you can have lunch and do some wine tasting then head back to your van for the night.

Tips For Home Owners

There are a few house sitting sites out there but we are on Aussie House Sitters. As an owner your add on there is free! On the other hand, us, the house sitter, pay a fee to join ( Use our Coupon Code “AHS15%off” for %15 off your joining fee) 😀

You can go on the Aussie House Sitters Site website for free and have a look at potential house sitters. You can see there photos, what they have written about themselves and what house sits they may have done before. When house sitters have been on the site for a few years like us, you will see that they have membership status, such as, gold members, silver members etc.
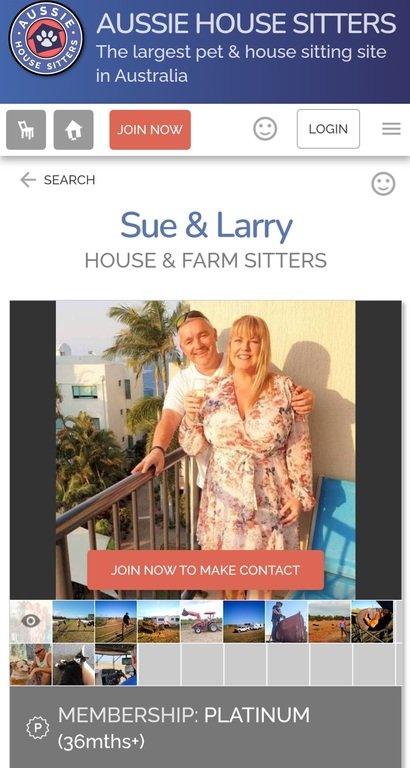
Aussie house sitters full time caravanning profile
Photo: Our Aussie House Sitters Profie

One good tip for home owners is to read the reviews of your potential house sitter. If they have done previous house sits, the home owner gives the sitter a review once the house sit is over.

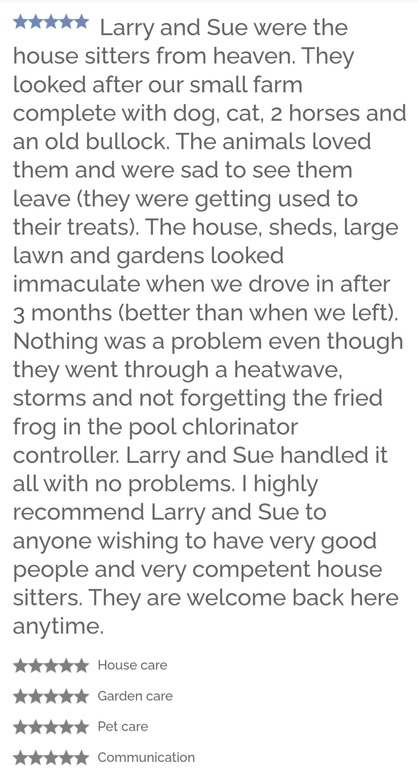
Photos: House Owners Can Read Reviews On House Sitters, Making It Easier To Choose The right One For Them

Aussie House Sitters are our choice of house sitting sites. Use our Coupon Code “AHS15%off” for 15% off your joining fee
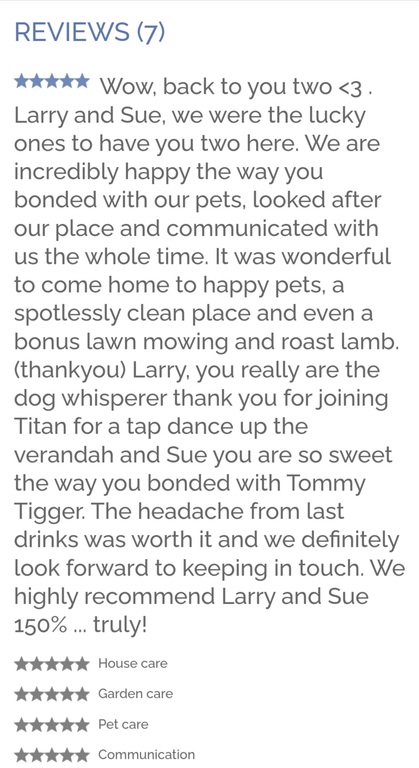
Aussie House Sitters farm sit full time caravanning profile
Photo: House Sitter Also Have A Star Rating You Can Check Out

As I say, there are other house sit sites out there but I can only comment on the one we’re on. Please check out the link to Aussie House Sitters and have a look around at a few house sitters.

To Conclude

As I’m sure you have gathered, we love house and farm sitting with Aussie House Sitters. Being full time on the road it saved us sooo much money having somewhere to park with free power and water. Also, we have now learnt, how much we love having a swimming pool at our farm sit 😀

Having some lovely reviews from previous house sits is great, as other home owners now know we are trustworthy and clean. Two must haves that home owner want. You can see some of our other farm sits here, on our “House Sit Around Australia” post.
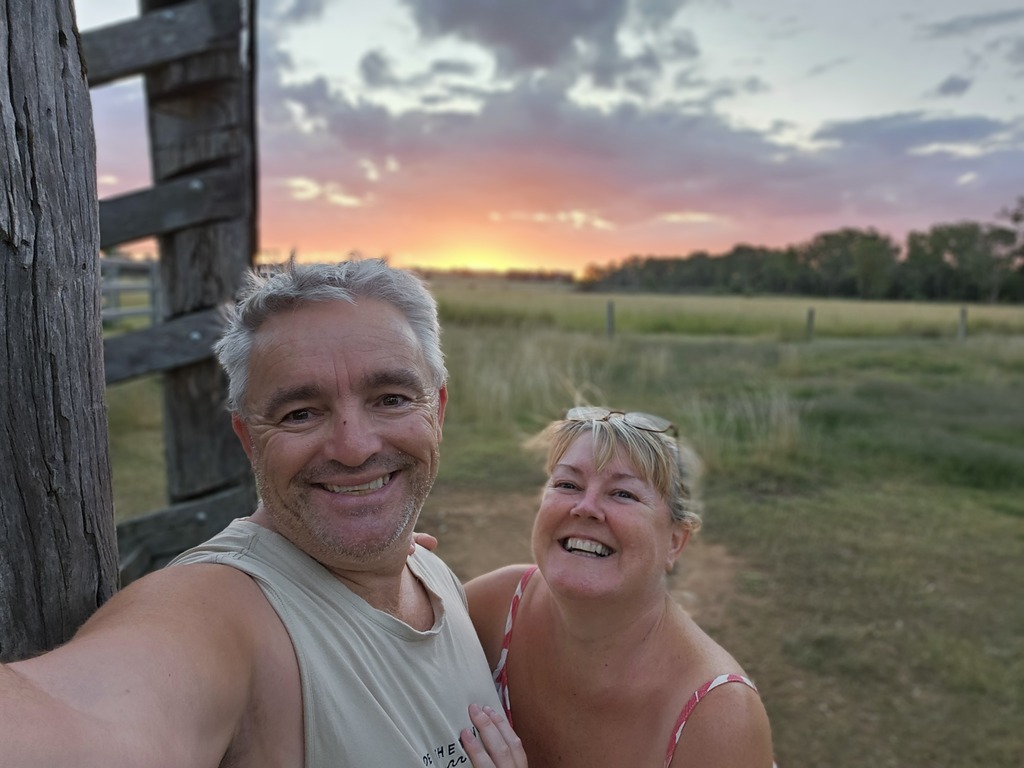
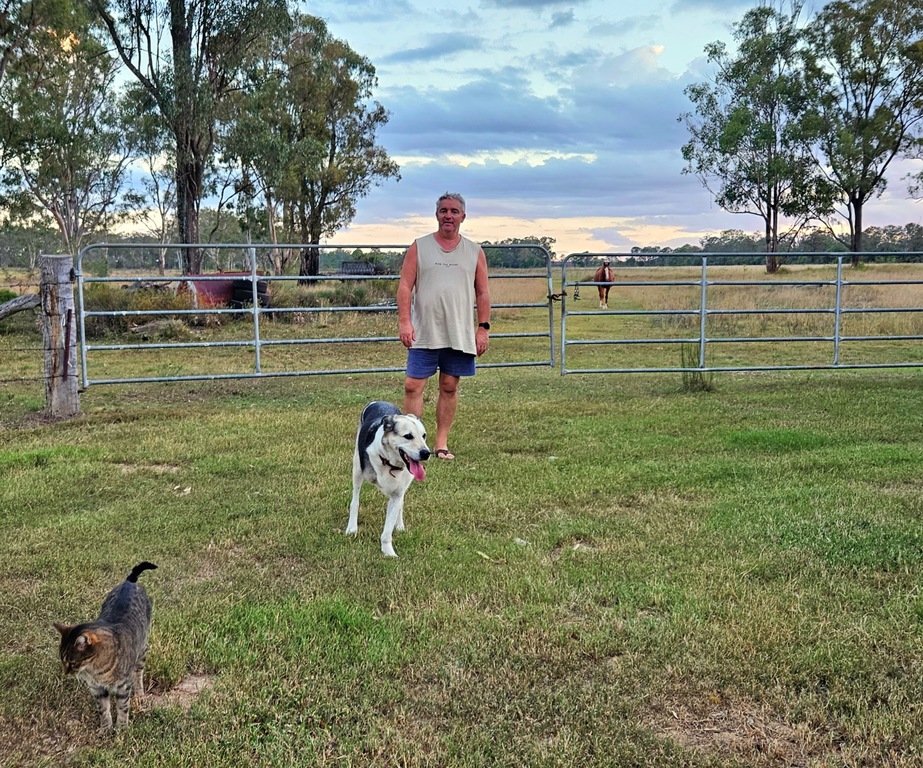
a dog and man over the other side of gate 3 month farm sit around Australia Aussie house sitters
Photo: Larry & Angus On Our 3 Month Farm Sit

It was a little sad leaving Angus and Nala, 3 month farm sitting these two, we got quiet attached. If you’re contemplating doing house or farm sitting OR if you yourself need a house or farm sitter, we highly recommend Aussie House Sitters.

You Might Also Like

outback Equipment

Would you like FREE accommodation while you travel? The lovely people over at Aussie House Sitters have been good enough to give our members a discount. Use our Coupon Code “AHS15%off”. This will give you 15% off your regular membership

Aussie House Sitters are our choice of house sitting sites. Use our Coupon Code “AHS15%off” for 15% off your joining fee

Posted on 2 Comments

Starlink RV Internet & Ethernet Connection

Starlink RV Internet Ethernet cable on caravan

Starlink RV Internet & Ethernet Connection

We decided to get Starlink RV Internet while farm sitting out on a rural property for 3 months. As we live in our van full time and use the internet every day it was a no-brainer for us to get it.

Larry uses the internet for his learning and writing code as well as for Larry’s smart caravan features. I also use the internet every day for writing here on our website and on our Full Time Caravanning Facebook page. Not forgetting using the internet for streaming services as well as TV channels on our smart TV when our TV aerial doesn’t work in certain areas. Previously we have used RV WiFi and the Night Hawk, I’ll talk a little about those later.

caravan couch 15 lessons learned full time caravanning
Photo: We Use Our Internet Every Day For Multiple Things

What Is Starlink RV Internet – Satellite

Starlink is a satellite internet company operated by SpaceX, yes the one owned by Elon Musk. They have around 4000 satellites orbiting the earth at this time and more are going up as I type this. The satellites now provide full coverage anywhere in Australia, where as a year ago only parts of Australia could get it. As they are satellites, as long as your dish has a clear view of the sky, you can be in a remote or rural area and they claim you can still get good internet reception. In fact, Starlink can work better in these types of places as cites can have buildings that block the satellites view.

With the Starlink RV Internet you have to worry more about parking under trees etc so the dish (or Dishy as Elon refers to it) can find the satellites. When you order Starlink you get access to download the Starlink app. One of the features of the app is to check for obstructions by pointing your phone at the sky and seeing if dishy has an obstructed view of satellites or not.

Starlink RV Internet Full Time Caravanning satellite
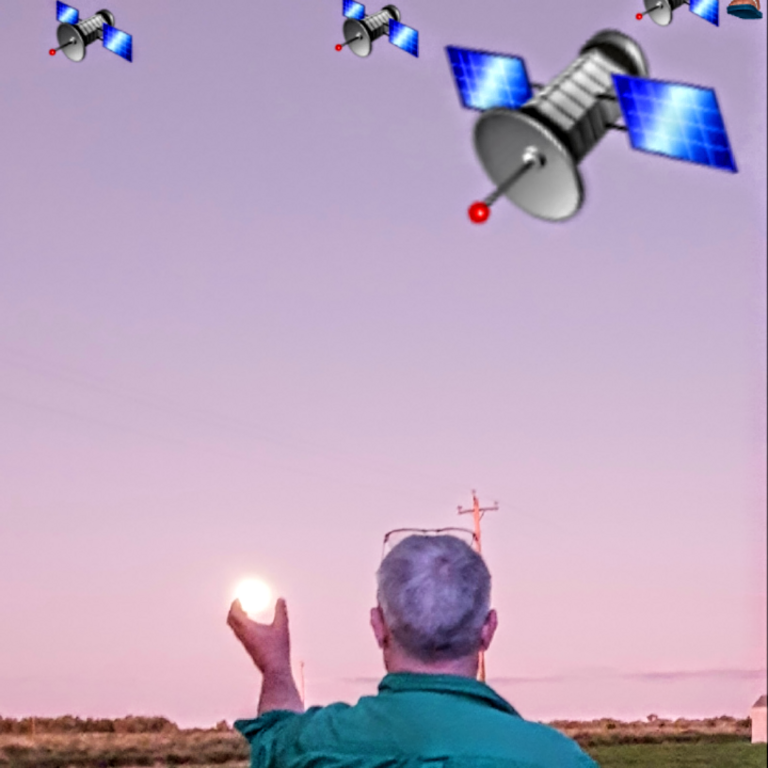
Photo: SpaceX Satellites Aren’t This Close 😉

Starlink RV Internet Kit & Cost

The Starlink RV Internet is designed for travellers who use Starlink in different locations. You can also buy the regular stationary Starlink for your home. The home one is cheaper per month at $139, but it can not be used for travelling. In saying that I believe you can change it to be for your RV but then you can’t change it back to a home one again and vice versa.

Starlink RV Internet arriving for Full Time Caravanning Australia satellite
Photo: Excitement as Our Starlink RV Internet Kit Arrives

Unboxing Starlink RV Internet arriving for Full Time Caravanning  Australia satellite
Photo: Unboxing Our Starlink RV Internet Kit

A bonus for the Starlink RV internet is that you can pause and un-pause your Starlink RV plan. Great for those who only travel for part of the year. Also, a big bonus for us full time travellers or those working on the road, the $174 a month is unlimited data!!

We were spending at least $30 each, per month, on our mobile phones. Plus $85 per month for internet on our Telstra router sim card. We can now get rid of the Night Hawk router and Telstra sim if we wanted to, but we’re keeping it for now. If we are stationery for a few months or more and the Night Hawk is working ok, we can pause the Starlink and use the Night Hawk again. At the moment we have decreased the cost of that Telstra sim to the minimum plan which is $25 per month. We’ll see if it’s worth keeping over the next few months.

For us personally, $174 for unlimited internet is fabulous and for Larry the concept of not having to deal with Telstra or worry about intermittent internet is a bonus!

Starlink RV Internet kit comes with

  • Dish
  • WIFI Router
  • Power Supply
  • Cables
  • Ground Base – so you can set it up on the ground where ever you choose

Other Items Purchased

  • Roof mount – to put the dish on top of the caravan roof when we stop.
  • Pack of 10 shielded Ethernet ends – so the original Ethernet cable could be modified to clip into the side of the caravan.
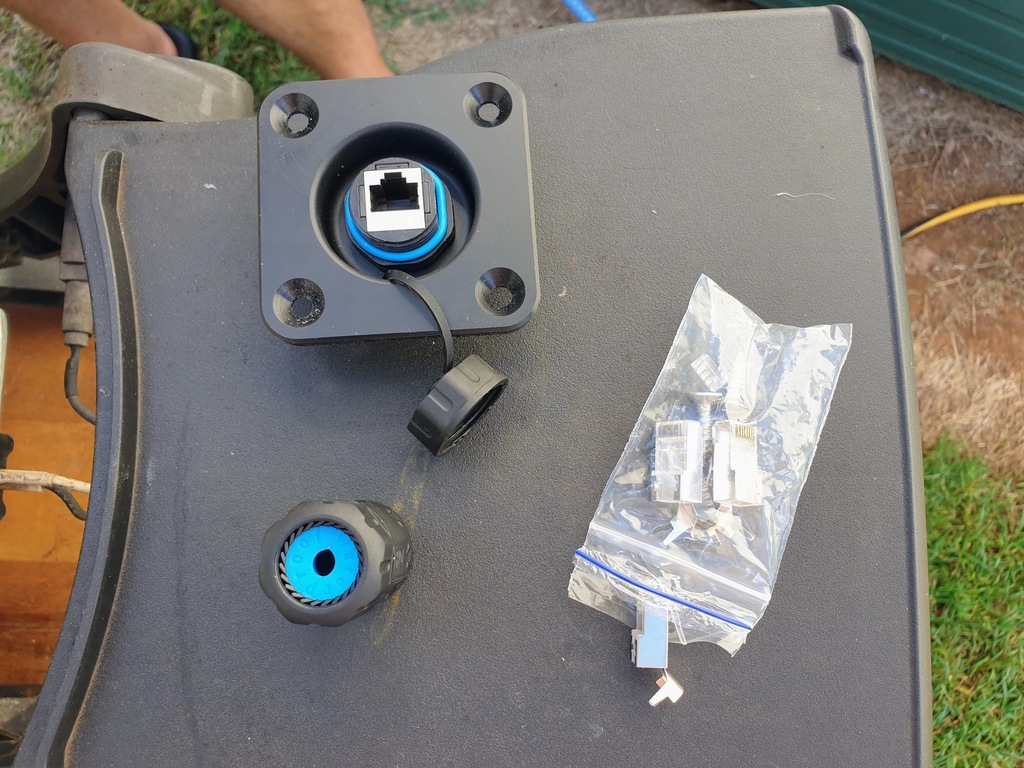
  • A RJ45 recessed data socket and joiner – to connect the external and internal Ethernet ends.
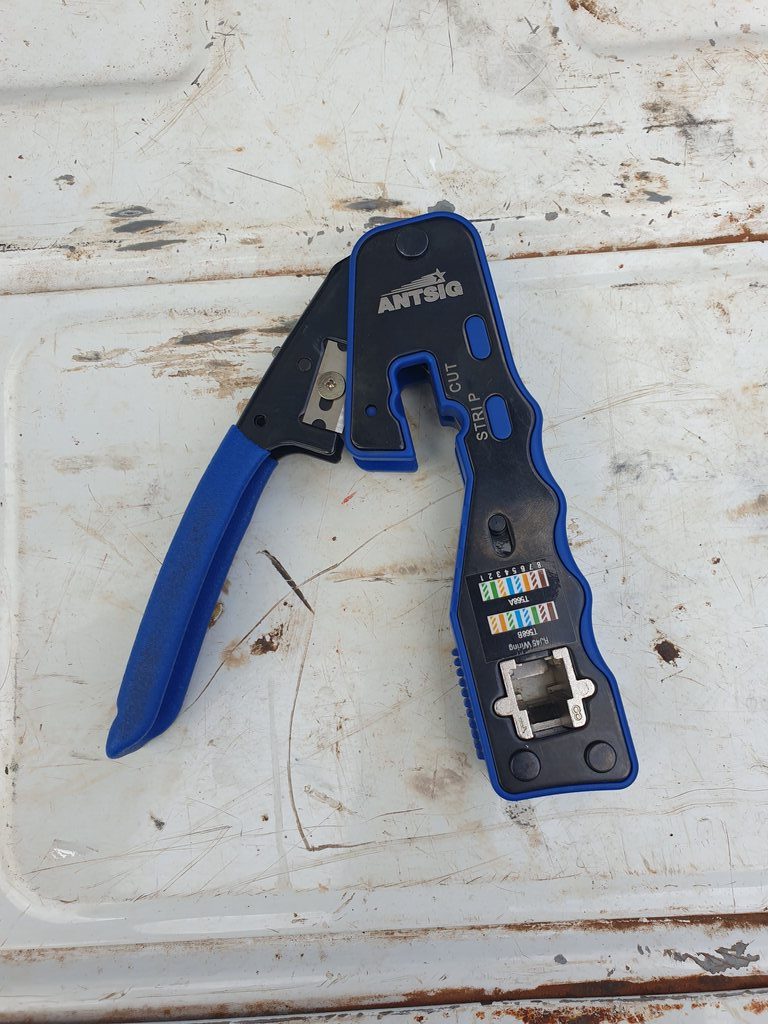
  • All in one, pass through crimping tool
  • Silicone
starlink RV Internet kit full time caravanning around Australia
Photos: Dish On The Ground, White Router, Ground x Base & Roof Mount

Starlink RV Internet Ethernet kit
Photo: pass through crimping tool – A RJ45 recessed data socket and joiner
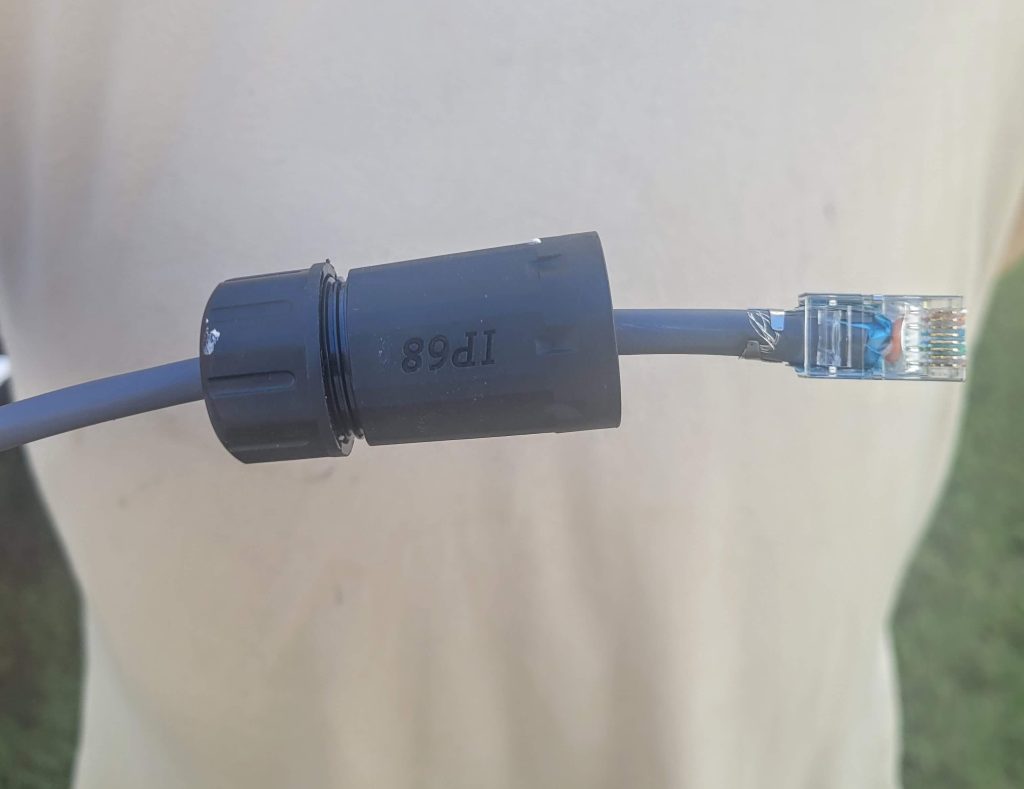
Ethernet data socket – Used shielded Ethernet ends

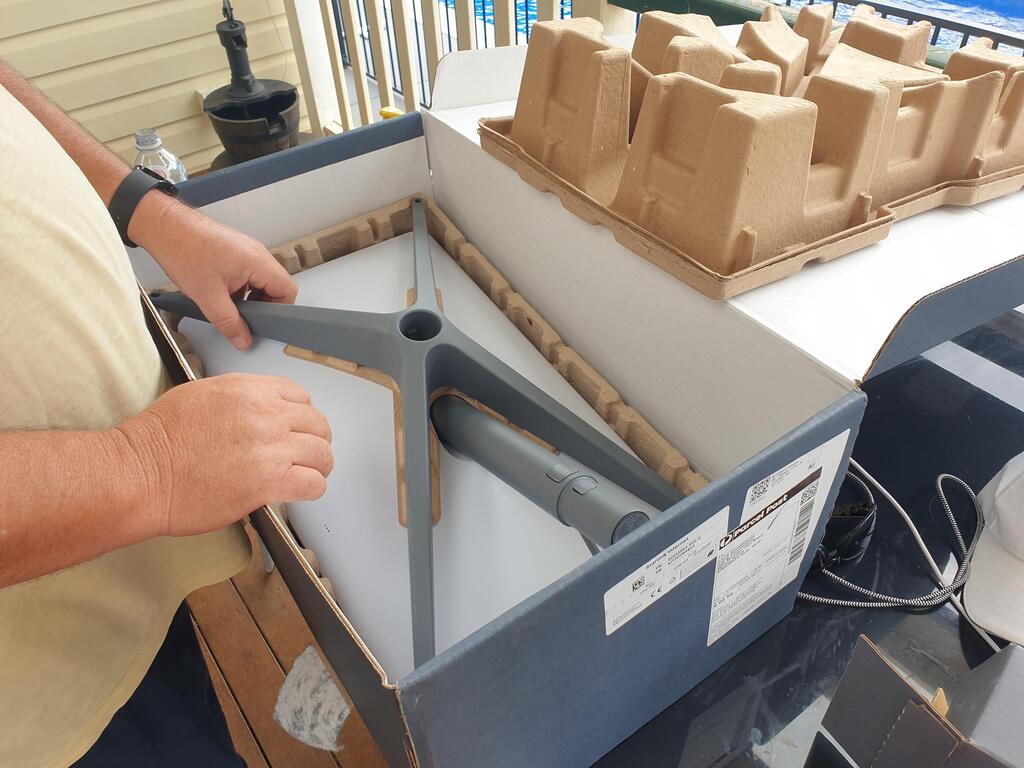
Our roof mount came within just a couple of days. The large box with the Starlink RV Internet kit came not long after. Larry was like a kid at Christmas waiting for it to arrive and unboxing it. I particularly liked the instruction book. Part of which states, damage by Dinosaur is not covered in the warranty 😀 You have to appreciate the lightheartedness in what is usually a boring instruction manual.

Initial Starlink Setting Up

Obviously when the box arrived Larry wanted to get straight into it and set it up. A storm was about to come through but that didn’t put him off. He wanted to know if it worked and how well it worked compared to the ABN we had been using at our Farm sit. After plugging in the Starlink WiFi Router in, plugging the dish in to the router then logging in to the Starlink app, Larry scanned for satellites with his phone.

Starlink RV Internet for Full Time Caravanning Australia scanning for satellite on phone with the app
Photo: Larry Scanning For Satellites On His Phone App

Starlink app obstructions Starlink RV Internet Ethernet cable on caravan
Photo: Starlink Phone App

Starlink RV Internet for Full Time Caravanning Australia satellite Dish
Photo: A Clear Space To Put Our Starlink RV Internet Dish

With the dish on the ground, about a meter from our caravan, it started to move and turn finding any SpaceX satellites above. Within a couple of minutes it had found a multitude of satellites. Seconds later strong winds came through as did some heavy horizontal rain.

I’ll let Larry intervene and explain more here

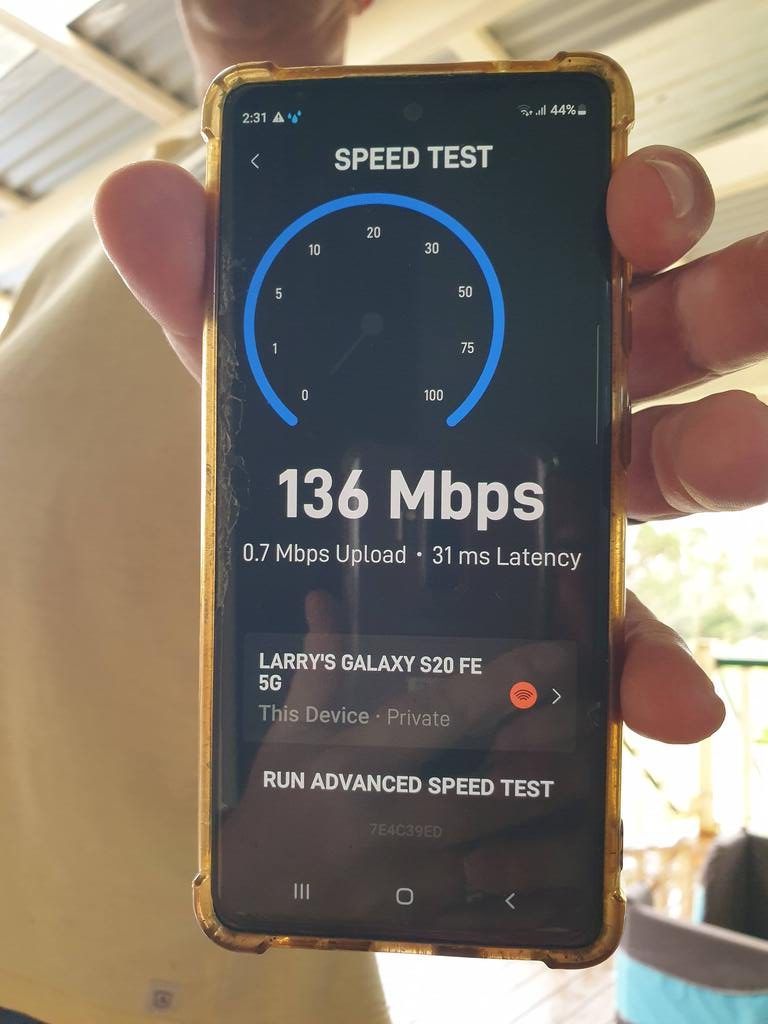
Checking to see what the up load and Download speed was. With the wind, rain and cloudy sky, our new Starlink RV Internet was showing a speed of 136 Mbps download. Compared to the NBN at the Farm Sit, which was 2Mbps We were thrilled. Just to note this is speeds based on one connected device. When you connect more devices the speed is shared between devices so the numbers look smaller initially. But even still, with multiple devices connected, it hands down beats anything Telstra 4g has been able to provide.

Speed test for Starlink RV Internet Full Time Caravanning Australia
Photo: Larry Did A Speed Test

Tent World

Video: Larry Doing A Speed Test In Bad Weather – 69MB Per Second

Starlink RV Internet – Ethernet Connection

Having used our Starlink RV Internet for a few days, and loving it, Larry wanted to make it easier to connect and set up. Moreover, upon reaching and leaving our destination. This could be achieved by putting shielded Ethernet ends on the existing router and dish cords. And then, putting a data connector between the inside and outside of the van to connect the two. Ultimately, we would only have to plug in and unplug the dish from the van when we stop or move on. I’ll go in to how and where in more detail further down.

Ethernet Starlink RV Full time caravanning Australia
Photo: Adding A Ethernet Connection

Starlink RV Internet Full Time Caravanning Australia
Photo: A RJ45 recessed Ethernet data socket and joiner
Pack of 10 shielded Ethernet ends

What About RV WiFi – Night Hawk & Phone Hot Spot?

RV WiFi

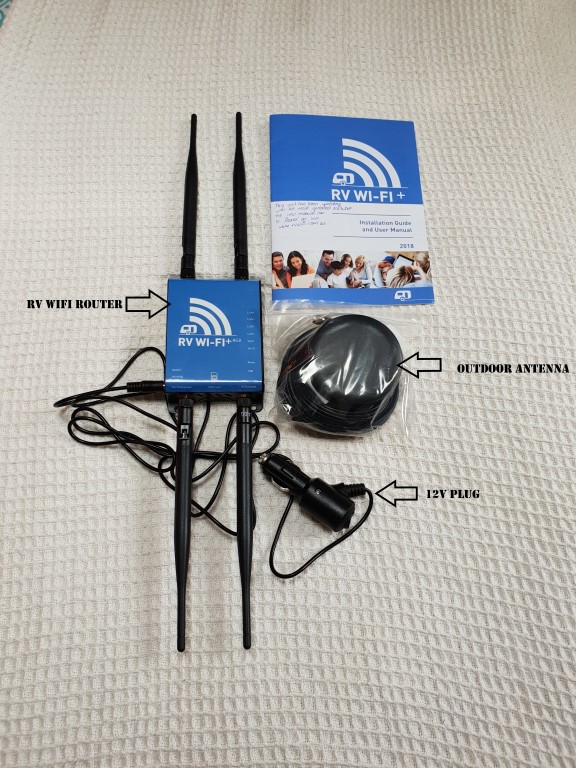
As mentioned, we have previously used RV WiFi. Initially it was better than using our phones as hot spots and Larry liked it as he had hooked up all our caravan home assistant stuff to it. Larry connected heaps of things in the our van to the RV WiFi making our van a smart van. Things like automating lights and voice controlled stuff, water level sensors and many more. Over time we noticed the internet side (which is why we purchased it in the first place) was lacking. The more we travelled the more we noticed our phones hot spot was working better. We have been using Boost Mobile for years. Like any technology, things improve with age. The RV WIFI now has 5G, maybe it’s better now?

Starlink RV Internet or RV WiFi? Full Time Caravanning Australia
Photo: RV WiFi

Phone Hot Spot

We use Boost Mobile on our phones and we highly recommend them for phone and internet around Australia. It’s been handy in outback places to download movies and cast them to our smart caravan TV. Boost works of the Telstra network and works great in so many more places then other telcos. They are also cheaper than Telstra. One of the reasons we liked having a router for the van, was so Larry could make our home in to a smart van. We decided to try a different router as the RV Wifi was no longer efficient.

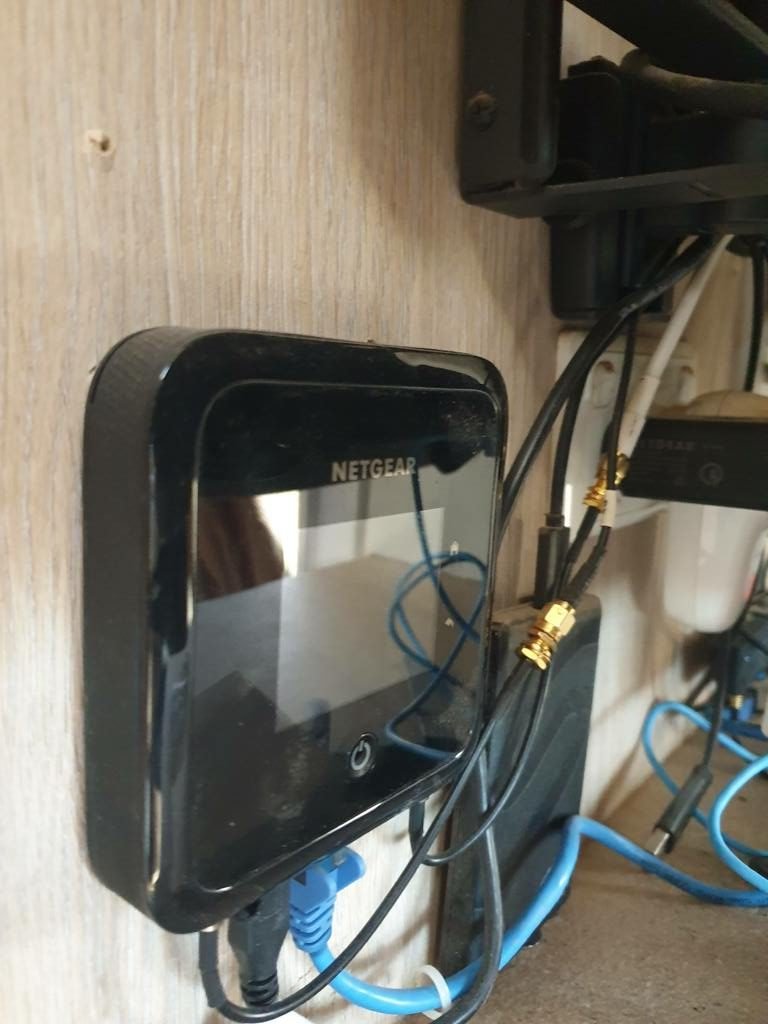
Night Hawk

The Night Hawk seemed like a good step up from the RV WiFi. Internet speed was quicker we went from 2Mpbs on average with the RV Wifi to an average of 58Mbps on NightHawk BUT, again the more we travelled the more we noticed our Boost mobile and phone hot spot was working better in some poor reception areas. We purchased a aerial to help get a better signal from the Night Hawk, but it still had some issues in areas we travelled to. That probably comes down to 4g coverage being limited in more rural areas and also the lack of towers. It is what it is and I guess you have to expect it’s not going to be 100% all the time.

internet router telstra 15 lessons learned full time caravanning
Photo: We Still Use The Night Hawk For Our Smart Caravan

Having transferred all the caravan smart home assistant stuff from the RV WiFi to the Night Hawk, the Night Hawk was still serving a purpose. Unfortunately, sometimes that was only the local network for our vans smart stuff.

Larry being the geeky, techie type, had been reading about Starlink Internet for a while. Once he noticed there was one for us travellers, and that could work in “almost” any place he decided we should give the Starlink RV Internet a go.

Adding A Ethernet Connection To The Starlink RV For Ease Of Set Up

Once we knew the Starlink RV Internet was up and running and working amazingly at our Farm Sit, Larry contemplated cutting the wires and adding Shielded Ethernet connections. Larry always has these ideas to change things up so they work better for him or for the van, depending on the situation. I sometimes have to smile, roll my eyes or in this case ask a heap of questions. Why? How? Where, What if? So with that being said, here are the answers:

WHY Put Ethernet Ends On The Router & Dish?

The reason for this is a simple one. The way the connections are now, you have to pass the cord for the dish through a window or some kind of hole (in our case, maybe the top or side vent of the fridge?) to connect it to the router. Not a big deal for some, but, as we live in our van full time, we wanted a more semi- permanent set up. Also, we wouldn’t be happy leaving the dish on the ground overnight.

Starlink RV Internet Ethernet caravan connector
Photo: Looking where the Ethernet caravan data connector will go on the outside of the caravan

HOW Will You Put The Ethernet Ends On?

When Larry said he would cut the wires then attach the shielded Ethernet connector, I was very uneasy. Larry has made, altered and changed many things on many occasions over the years. And, although sometimes at first things don’t go as planned, they normally turn out in the end. He talked me through how he would do it, in fact he told me a few times! until I could understand. I’m a bit technically challenged 😛

Anyway, here’s how he did it…..

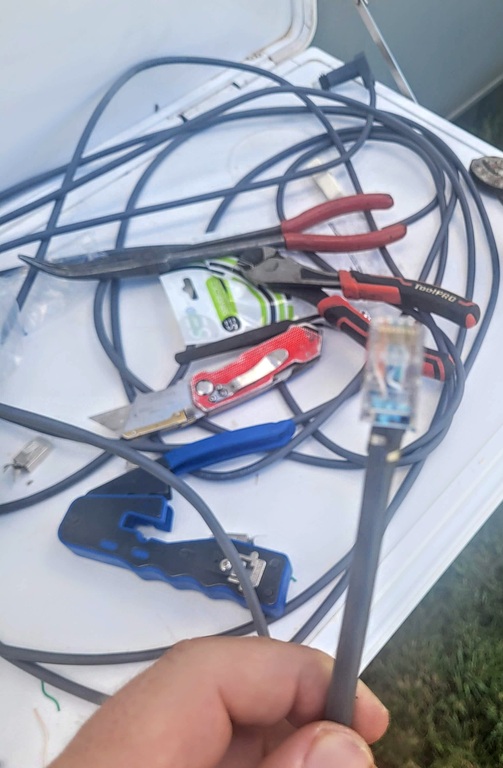
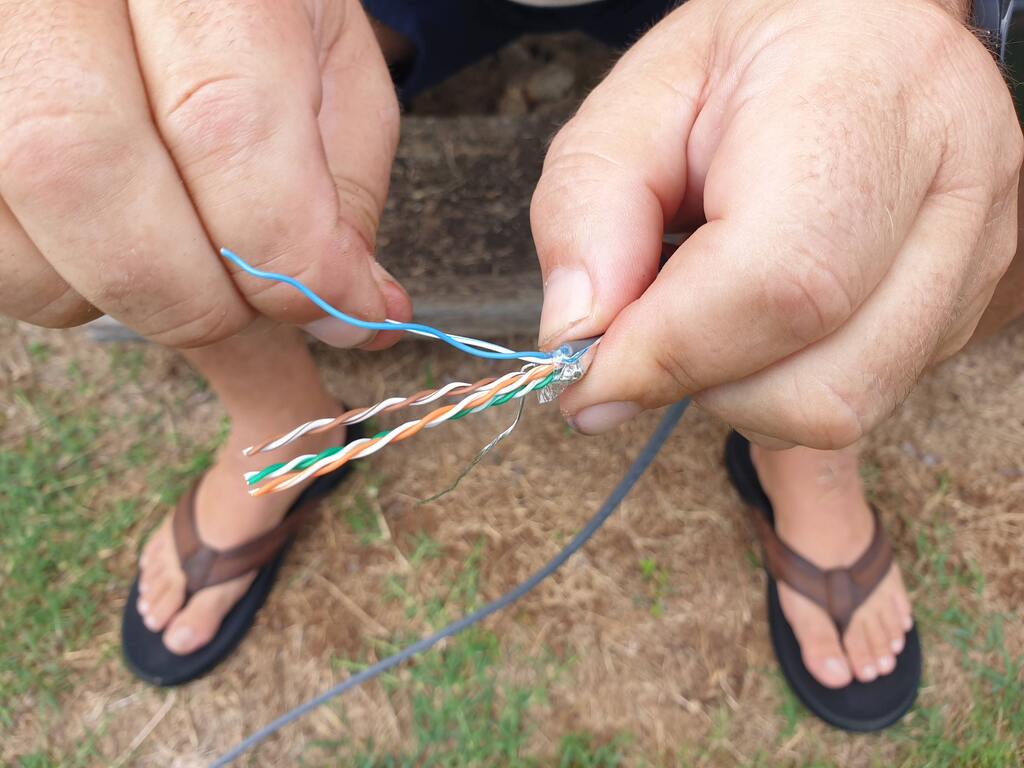
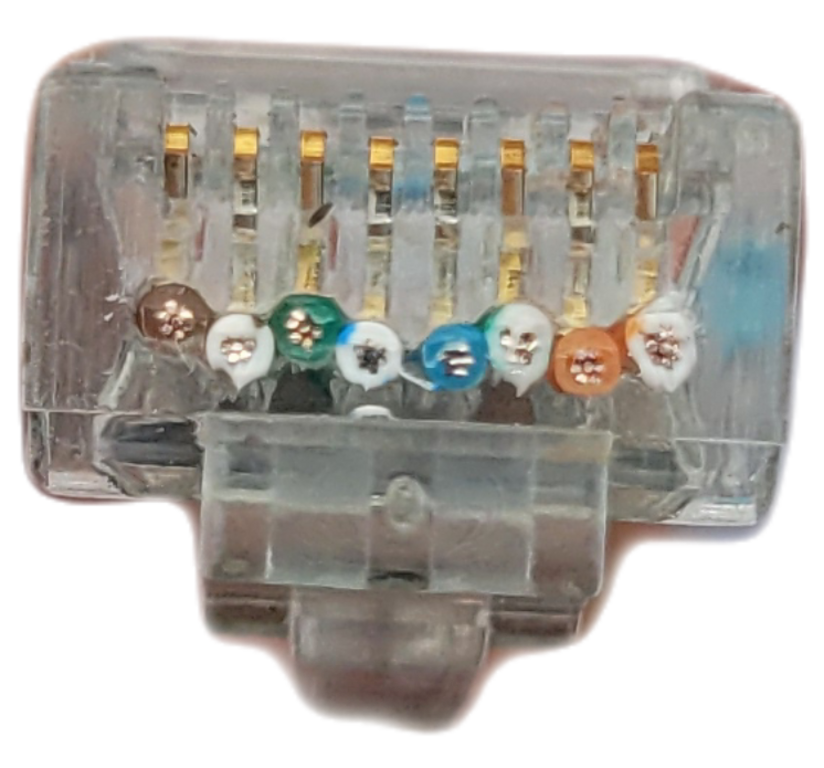
Once he cut the cord to the dish and the router with a all in one tool (the tool cuts, strips and crimps) he slid the joiner cover down the cord first. Then he peeled back the shielding foil covering the wires and separated the wires. Turning what was 4 wires into 8 by untwisting them. These 8 wires now needed to be inserted carefully in to the shielded Ethernet ends, before putting that in to the pass through crimping tool.

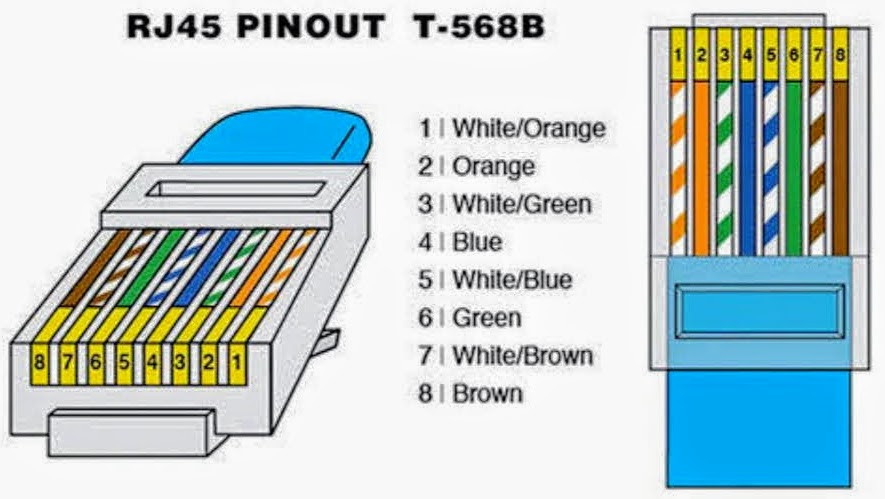
Photo: Ethernet RJ45 Wiring

Starlink RV Internet all in one pass through tool  for Ethernet wiring Full Time Caravanning Australia
Photo: All in one, pass through crimping tool

Starlink RV Internet Ethernet connection full time caravanning Australia
Photo: Slide The Joiner Cover Down Over The Wire Before Putting The Ethernet End On

Larry also bought a pack of 10 shielded Ethernet ends as he had read that it was very easy to muck it up (The wires and connection were meant to be fiddly).

I’ll let Larry intervene and explain again

Once the separated wires were carefully put in to the Ethernet end, it was put back in to the all in one tool to be closed, crimped and excess wires cut off. The exact same was then done to the Router cord. The Starlink cable has proprietary ends on it that connect to the router and the dish. What that means is they are ends of the cable that are designed to specifically to connect to the dish and router, you can’t use other cables. However the cable itself is Cat6 cable so by cutting and putting the Ethernet connections on the cable we can retain the proprietary ends but also have connections that are compatible with most Ethernet device, like Ethernet hubs, Ethernet routers etc. In the case a Ethernet pass through wall plate.

starlink RV Internet Ethernet RJ45 pinout wiring
Photo: Separating The Wires

Starlink RV Internet Ethernet wiring Full Time Caravanning Australia
Photo: The Fiddly Wires In The Ethernet Connector

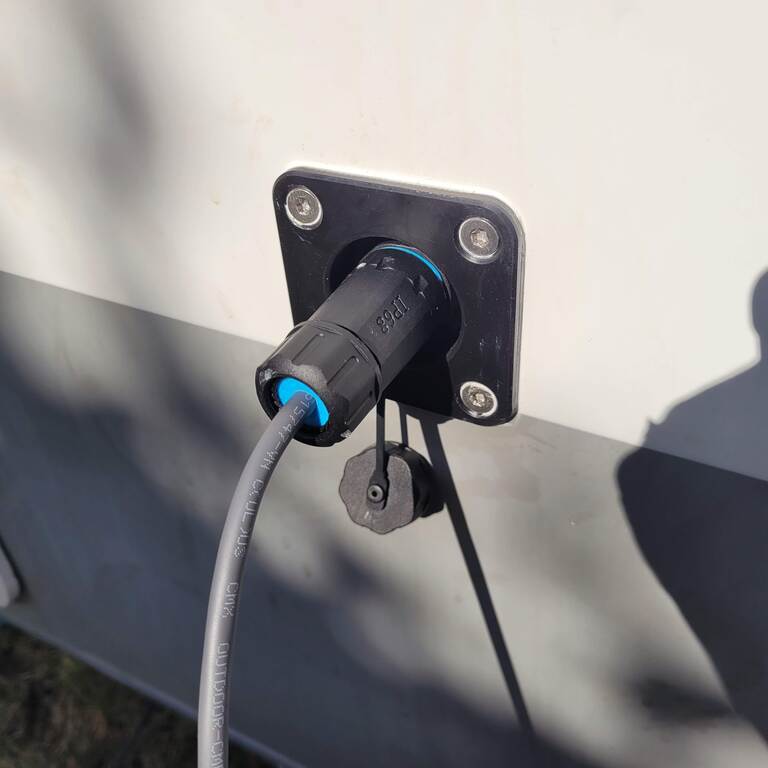
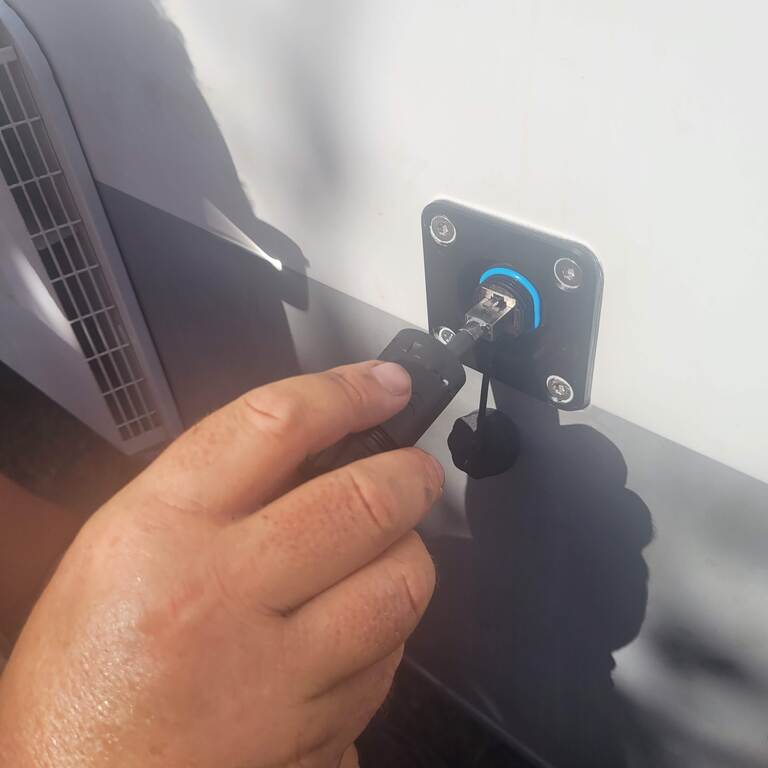
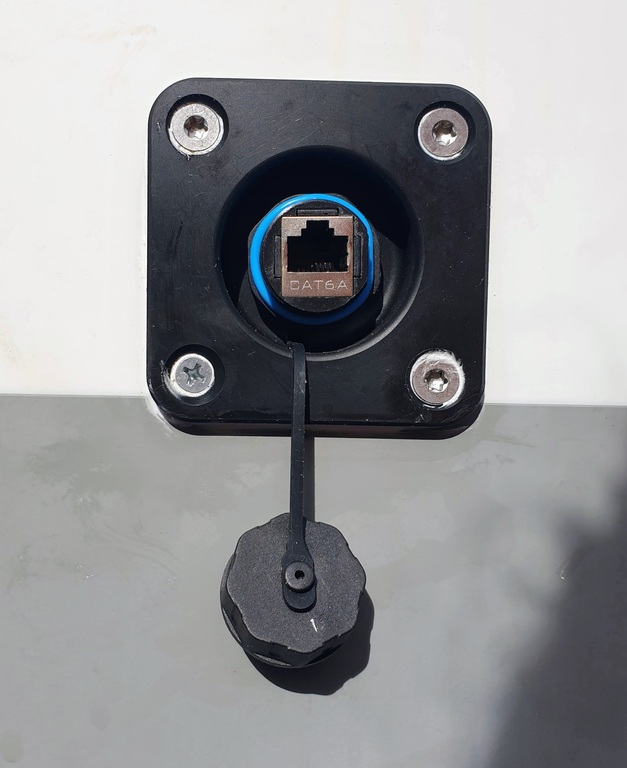
These two Ethernet ends now plug in to either side of recessed data socket and joiner – to connect the external and internal Ethernet ends. Speaking of which, Larry was going to be drilling in to the side of the van, making a hole for the connector. My thought was… Oh’ boy! I’m not to sure about this! or words to that affect ;).

WHERE Will You Drilling A Hole In The Van?

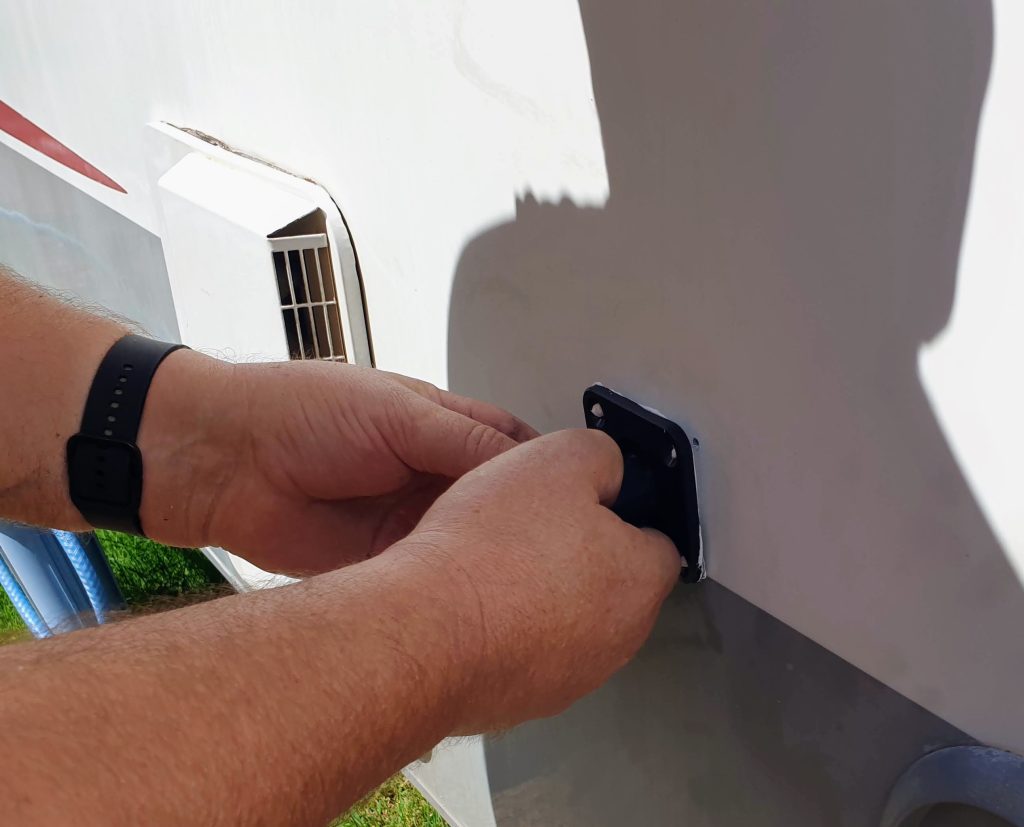
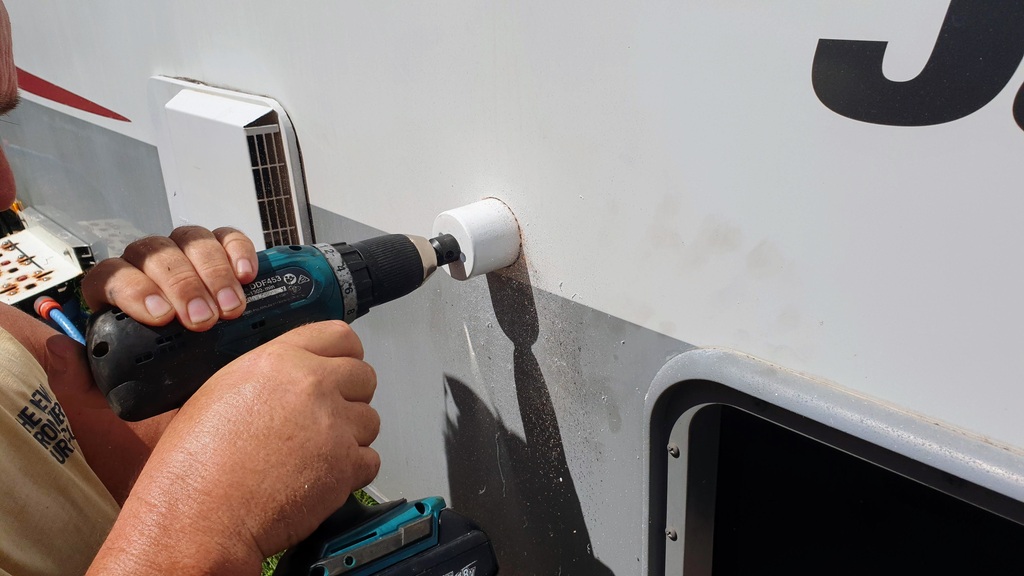
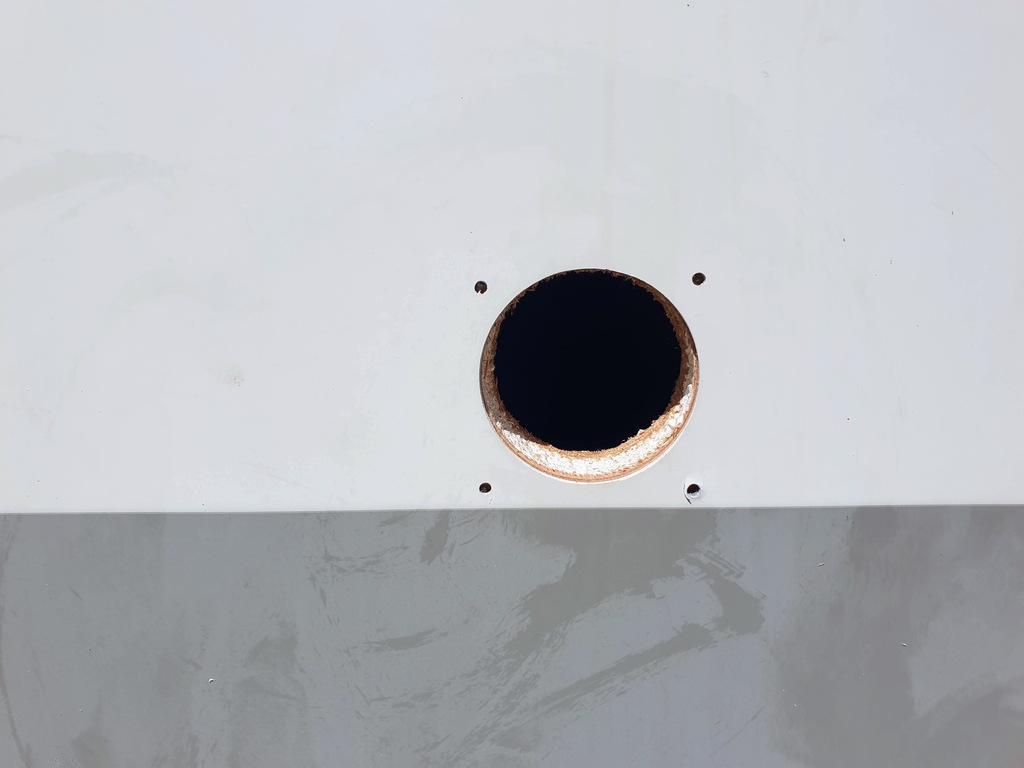
The connector would be put on the side of the van but within the top of the front boot space, not through to the inside of the caravan. Once Larry used his drill with a 51mm hole saw to cut out the hole, he then marked out where the screws for the recessed data socket would go.

Starlink RV Internet drilling in to the caravan to put the a Ethernet conection Full Time Caravanning Australia
Photo: Drilling In To The Front Boot Of The Caravan
To Put The Ethernet Connection

Starlink RV Internet drilling in to the caravan to put the a Ethernet conection Full Time Caravanning Australia
Photo: Hole For RJ45 recessed data socket and joiner

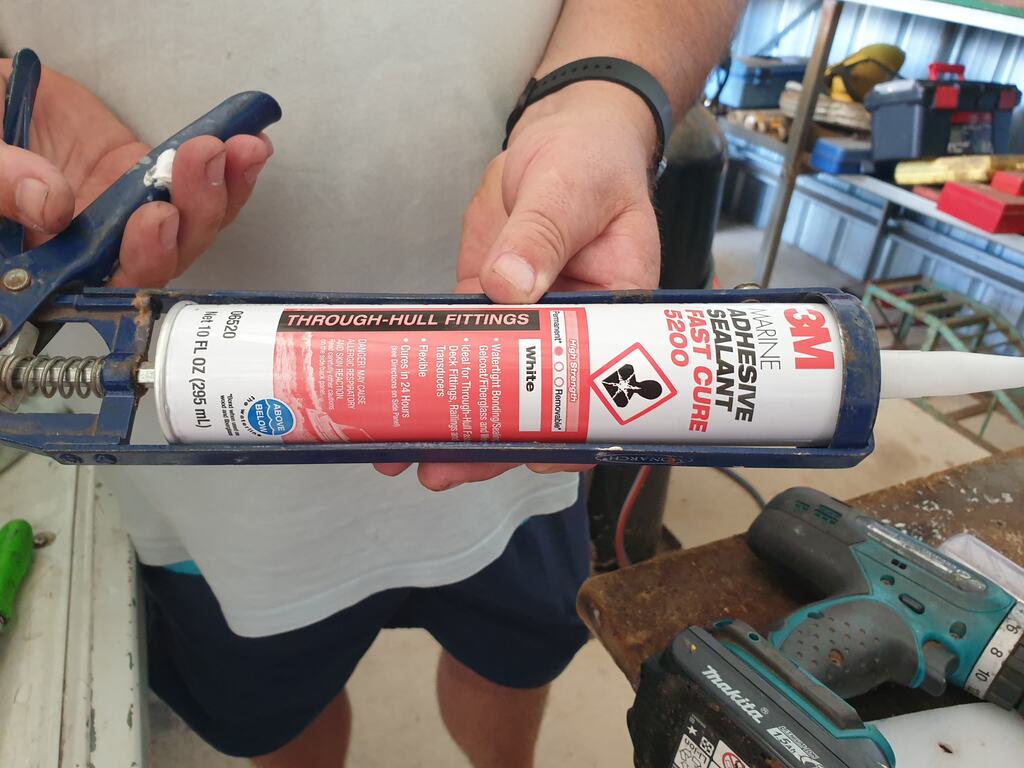
3M marine adhesive sealant (for through hull fittings) around the hole for Ethernet connector for Starlink RV Internet
Photo: 3M marine adhesive sealant for around the hole in the van and connector

Before Larry screwed the recessed data socket to the van, he used wet and dry silicone (for through hull fittings) around the hole and on the back of the connector. Lastly, screwing it on the van.

BUT … After plugging in the new Ethernet ends it initially didn’t work aahhhhhhhhh!!!!!!!

Starlink RV Internet Ethernet caravan connector
Photo: Screwed In To Place & Plugged In

Why Didn’t It Work & How Did You Get It Working?

Nearly all of the Shielded Ethernet connectors were used up trying to get it to work. Some pins looked like they hadn’t penetrated the wires correctly

While taking me through what was happening, Larry eventually noticed that remains of old chopped wires was sneakily caught inside the tool. This was causing the pins not to get crimped into position properly. This had to be the reason it wasn’t going to plan!

Starlink RV Ethernet data connector on caravan
Photo: Seeing If It Worked

Starlink RV Internet Ethernet cable on caravan
Photo: A Recessed Data Socket

With the couple of Ethernet connectors he had left he did the connections perfectly!

But for crying out loud, it still didn’t work 🙁

I could see the disappointment and confusion on Larry’s face. I had a google and went on YouTube to see if I could find anything remotely helpful.

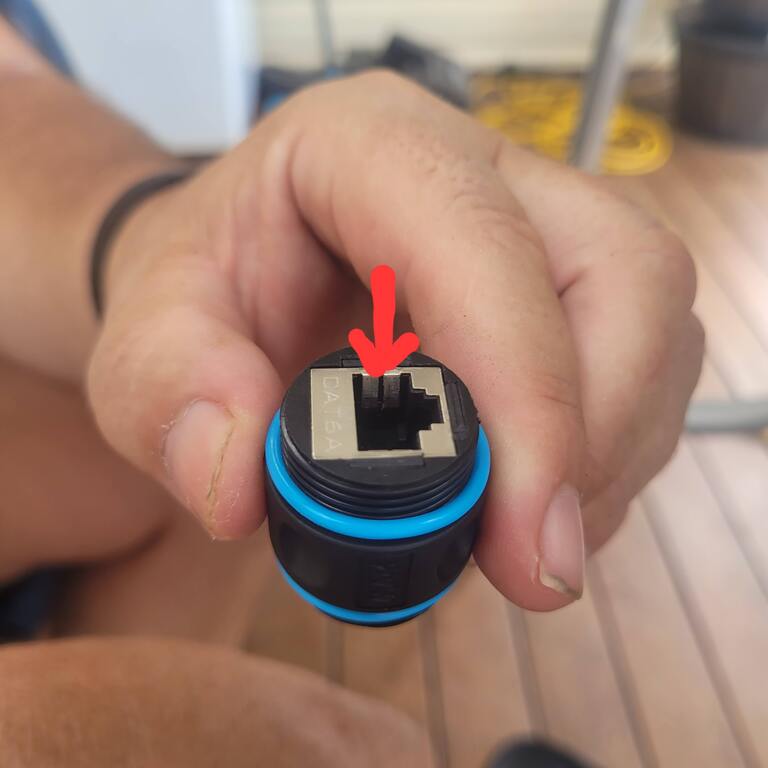
A couple of videos mentions the earthing wire or drain wire as someone else called it. This got Larry thinking. He had tucked this wire under the tail of the shielded connector so that it provided the earth through the shielding of the connector. This is the correct method and the shielding of the connector should then make contact to the inside of the of the data socket and provide the earth to both sides of the data socket. In theory they both should have been fine.

Starlink RV Internet Ethernet caravan data connector
Photo: These Metal Sides On The Data Connector Needed To Be Moved In Closer To The Earth Wires

Finally, on closer inspection, Larry noticed that the side walls of the Data connector, were not touching the Ethernet terminal shielding and therefore not transferring the earth. He used a pick to pull the little metal sides inwards, plugged the Ethernet ends back in… AND…. Voila, Whoooo it works!!. Now some say that the drain wire doesn’t need to be connected. However Larry believes it does for the reason that it didn’t work until he made this tweak.

Some quick technical notes from Larry on these Ethernet ends.
If you are contemplating doing similar to us, Larry’s tips are :

1. Use Shielded Ethernet terminals. The shielding protects from signal interference and the cable already uses shielding so it makes sense.

2. Strongly advise getting “pass through” shielded Ethernet terminals with a supporting tail. The pass through side of it allows you to pass the wires through the entire terminal then chop off the excess wire. This makes it way simpler to confirm you have the order of the wires correctly before crimping.

3. By using pass through connectors if you have issues with connections later. You can use a multimeter to test for continuity between the ends of the wire that you passed through and the pins of the connector. That will tell you if its been crimped properly. Would be hard to do that if you didn’t use pass through connectors.

4. Starlink uses the T58B Ethernet wiring schema, so will you 🙂

Where Will The Router Live?

In our van the best place for the router to live was on the shelf behind our club lounge. This way the cable from the router could go in to our front boot, under our lounge, to the new connector.

Where Will The Roof Mount & Dish Sit?

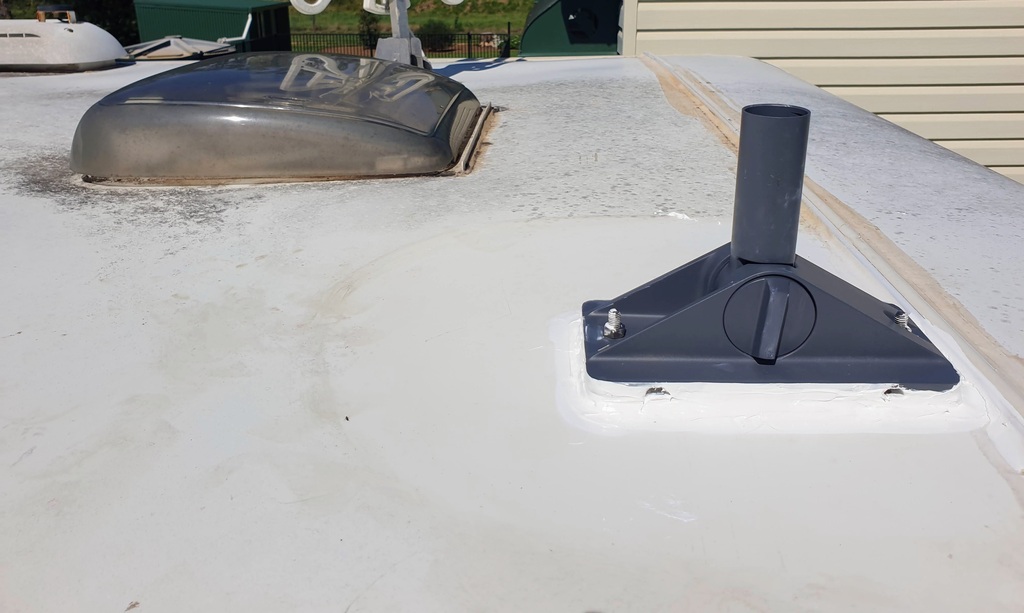
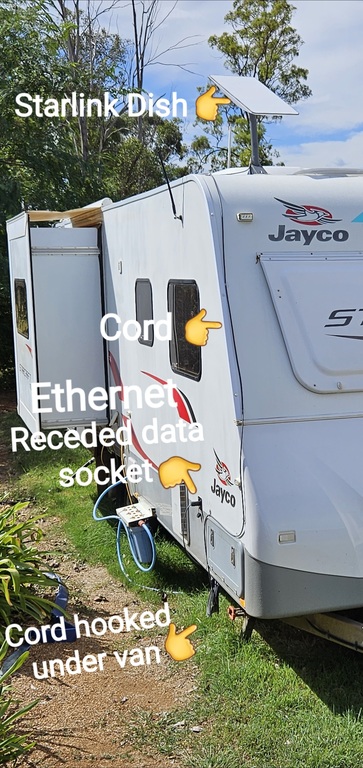
We thought the best side of the caravan for the dish to go would be the side without the awning. We didn’t want to be putting the dish up while trying to lean over the awning if it was out. Larry chose to put the RV dish holder near the front of the van in a place it wouldn’t cast a shadow over our solar panels. Also, hoping the airstream might follow the curve of the van go over the top.

Starlink RV Internet Roof Mount
Photo: The Starlink RV Roof Mount Will Go On The Front Of Caravan Roof

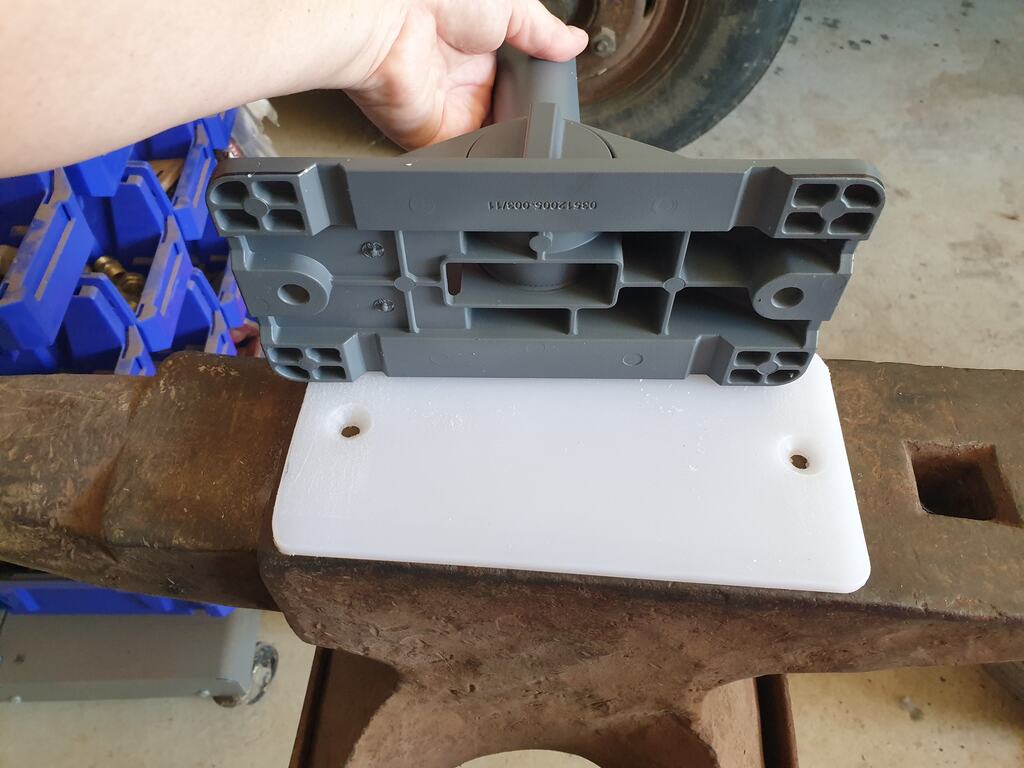
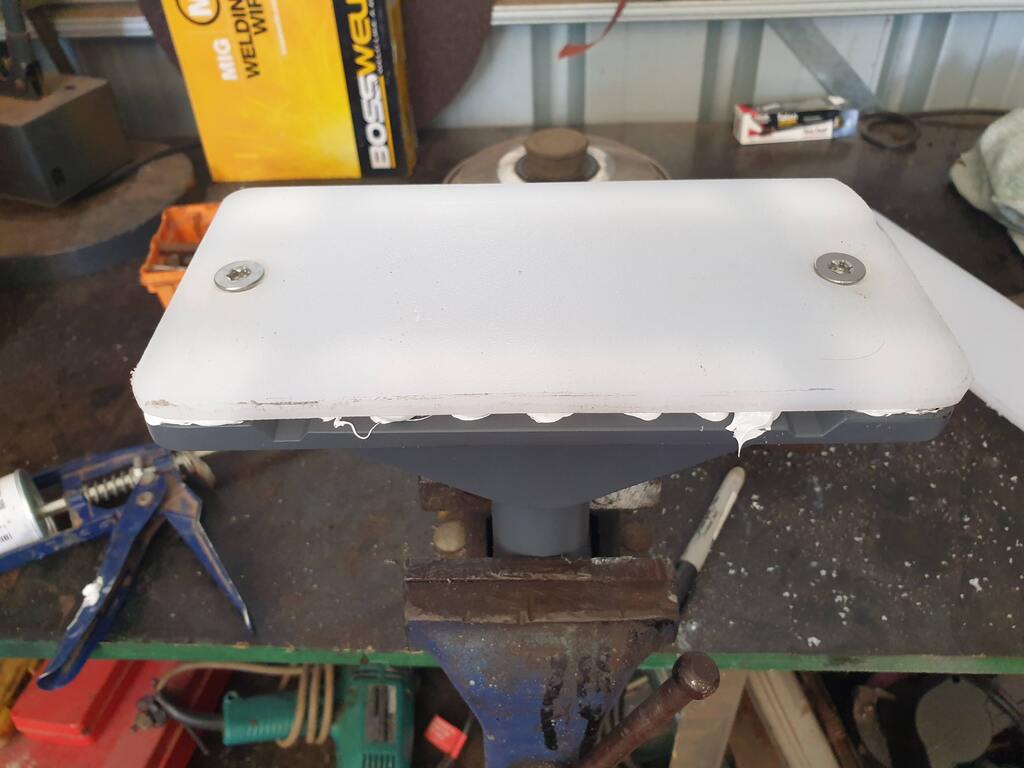
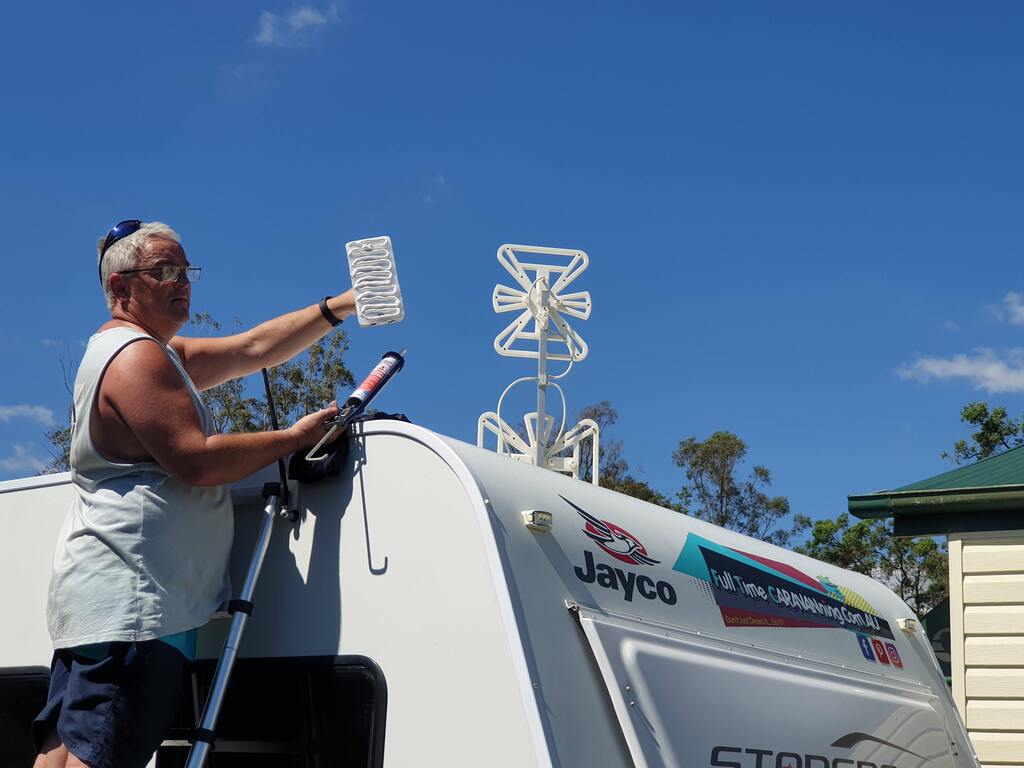
As with our solar panels, Larry decided to add silicone to the base of the roof dish holder. As the base of the holder doesn’t have much of a flat surface, Larry cut out a piece of a chopping board, screwing it and applying silicone to the base of the holder so that it had more surface area for contact.

Siliconed Starlink RV internet Roof mount on top of caravan Full Time Caravanning  Australia satellite
Photo: Plastic Chopping board Cut Our
For The Bottom Of Roof Mount

Siliconed Starlink RV internet Roof mount on top of caravan Full Time Caravanning Australia satellite
Photo: Roof Mount Siliconed & Screwed To New Base Plate
For Bigger Coverage

Siliconed Starlink RV internet Roof mount on top of caravan Full Time Caravanning Australia satellite
Photo: Larry Siliconed The New Base Plate, Of The Roof Mount, To The van

Starlink RV internet Roof mount on top of caravan Full Time Caravanning Australia satellite
Photo: Roof Mount Attatched To The Front Of The Van
The Cylinder That The Dish Slides Into, Folds Down

The Starlink RV dish holder was then put in to place on our caravan roof and siliconed on using 3m Marine self adhesive silicon. This stuff is exceptionally strong once cured. If you look at the photo above, the cylinder that the dish slides in to, folds down flatter.

Keeping The Cord Tidy

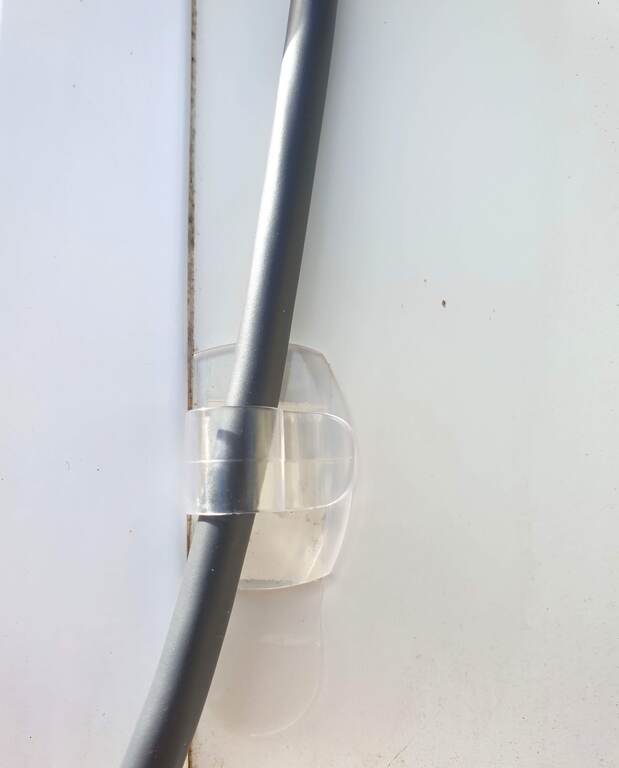
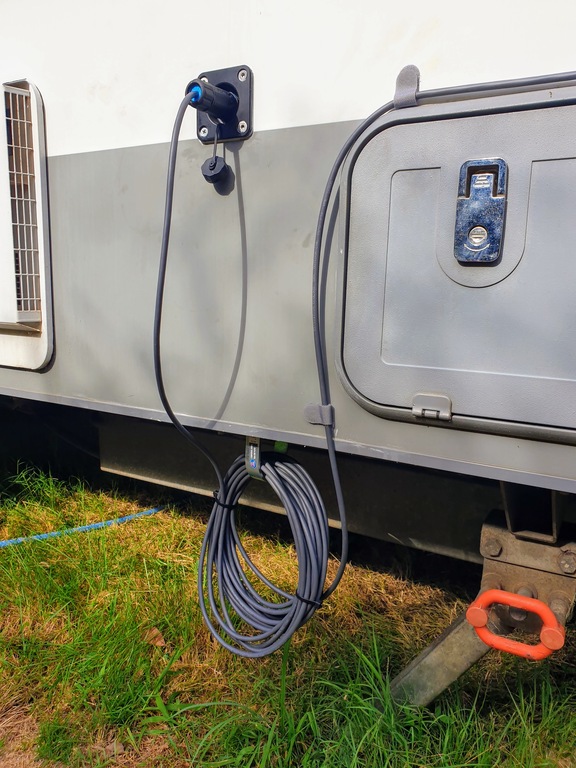
The long cable from the Starlink dish to the data socket is quite long. Larry bought some clips from Bunnings to hold it in place while the dish is on the roof, easily un-clipping when it comes down. This saves it dangling down over the window and flapping in the wind. Also, it looks neater. Speaking of which, he also attached a hook under the van to hook the extra cable on to.

Starlink RV Internet Ethernet cable on caravan keeping the cord tidy with clips
Photo: keeping The Cord Tidy With Clips

Starlink RV Internet Ethernet cable on caravan
Photo: Hook Under Van Keeping The Cord Tidy & Off The Ground

Starlink RV Internet Ethernet cable on caravan keeping the cord tidy with clips retractable ladder
Photo: Tidy Cord From Dish On Roof To Data Socket

To wrap up the how’s and why

  • Now both the Starlink Router and the Starlink RV Dish have working Ethernet ends ✔️
  • The data socket and joiner connecting the external and internal Ethernet ends, works ✔️
  • The internal Ethernet cable on the router can stay permanently plugged in to the data socket in the front boot ✔️
  • All we have to do now when we stop at, or leave a place, is plug the dish in to the side of the van. We can then decide to either put the dish on the roof or we can just leave it on the ground on the X base ✔️

Other Question You Might Have

Can You Run Starlink RV Internet On 12V Power – On A Inverter?

Over to Larry again

Yes you can use Starlink RV Internet off grid on an inverter. As it has a start up of around 140watts when the dish is adjusting so you will need a 200w sinewave inverter at minimum but preferrably 400w to 600w. Alternatively, there is recent activity from Canada who have created a 48v device that can power your dish and router. It’s only a matter of time before a 12v version comes out. However you can get a 12v to 48v power supply to run it straight from a 12v battery but we will wait until a 12v version comes out.

Starlink RV Internet Ethernet connection on caravan set up dish on roof of van
Photo: Dish In Roof Mount Until We Move – Cord Temporary Attached To Van With Clips – Ethernet End Plugged In To Van

Starlink RV Internet Ethernet connection on caravan set up dish on roof of van

Note from Larry:
The dish is powered by the router using what they call “PoE” Power over Ethernet. So it’s the router that is plugged into the 240v that sends the power through the Ethernet cable to make the dish move and operate. You can’t just plug the dish into a different router and walk away. For one, as mentioned the cable has proprietary ends so wont work for that reason, but also you need to power the dish via the router or by other means. Using the devices that are coming out now like mentioned from Canada, you can connect the device to your batteries, then power the dish via this new device and connect any router you want to the device, effectively allowing you to run the system from 12v and use either original router or an alternative router.

What Kind Of Data Speed Do You Get?

Back to Larry

  • Data speed can vary but it can be anywhere from around 10Mbps to up to 300Mbps. At the end of the day, in simple terms you can stream Netflix or watch You Tube effortlessly which is generally a good guide for us travellers :),
  • Latency appears to be around 30 milli seconds (30ms) which is pretty good for what it is. The lower is always better
  • Upload speed also varies . Our upload speeds are higher now than it was on 4G
Starlink app speed test Mbps Starlink RV Internet Ethernet cable on caravan
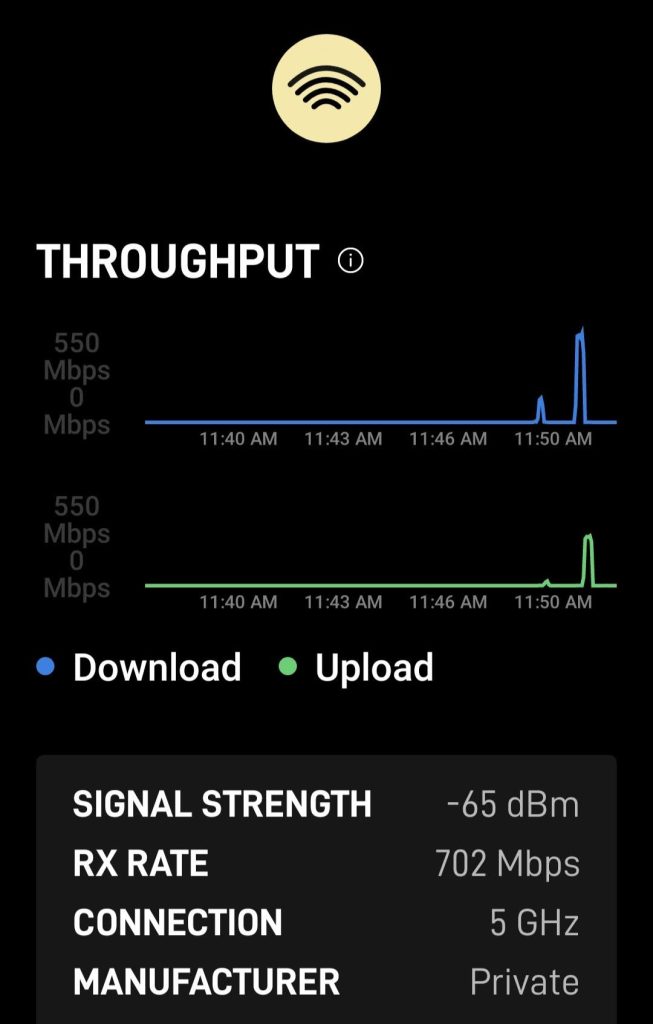
Photo: Starlink App Speed Test

Starlink app speed test Mbps Starlink RV Internet Ethernet cable on caravan
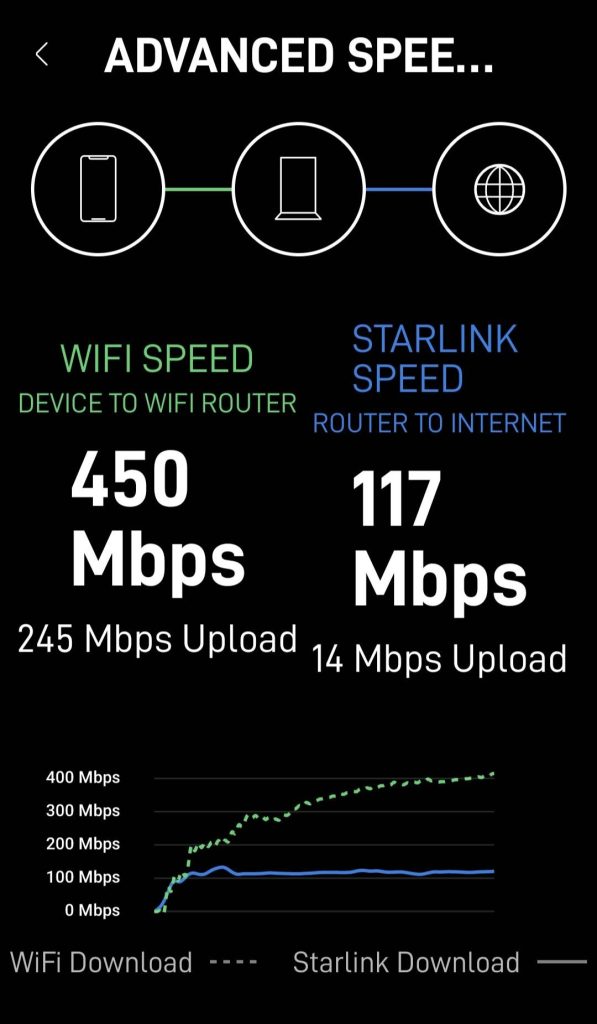
Photo: Advanced Speed Test On Starlink App

There is a option in the Starlink app to check router to device speed and router to dish speed. The 31ms latency is awesome compared to the likes of the NBN. The NBN is around 900ms. What does that mean ? well for Starlink, because the satellites are in low orbit it takes 31 millseconds (less than half a second) to send info to the satellites and get the signal back again. which basically means things load faster.

Starlink app speed test Mbps Starlink RV Internet Ethernet cable on caravan
Photo: Starlink App

A Few Tips/Points

  • Remember to put the joiner cover on to the cord before you put the Ethernet connector on or you will have to cut the connector off and start again.
  • The warranty will be voided on our Starlink as we have altered it. That’s our choice! and would be yours to if you choose to do the same. For us it’s worth it. You have to decide if it’s worth it for you.
  • If you don’t have a emergency phone you might be able to use Starlink RV Internet for WiFi calling so if you’re out on the Nullabour with no phone reception but you have Starlink RV Internet, you could call or facetime someone on whats app, Facebook etc. Obviously, you should not take this to mean you will be fine without a proper satellite emergency phone. But, if you don’t have a emergency phone, Starlink RV Internet ticks that box also.
  • Although he did everything right in the grand scheme of things, it was the two little things Larry didn’t expect, that caught him out. We definitely recommend trouble shooting the parts that “surely must be ok”? If you have eliminated the obvious and it’s still not working, then maybe it’s what ever’s left. In this case the dastardly stuck wire in the all in one tool. And the sides of the Data connector not being close enough for the earth wires to touch.

On a side note, as Larry did everything right, but still had no idea what was wrong or when it could be fixed he chose to buy a new cable. So now we have a spare to sell or store for the future.

We have used it for the last few months in rural areas and it works perfectly. We’re loving it so far.

As I always say “Everyone Is Different” this is what we do, this is how we find it 😀

For more tips and information from other travellers that use the Starlink RV Internet, check out “Starlink Nomads Australia – Mobile Satellite Internet” Facebook page.

Aussie House Sitters are our choice of house sitting sites. Use our Coupon Code “AHS15%off” for 15% off your joining fee
You Might Also Like

Posted on

Kingaroy Showground – Qld

sunset and Caravan camping at Kingaroy Showground Qld

Kingaroy showground is around 150km SW of Gympie in the South Burnett region of Queensland

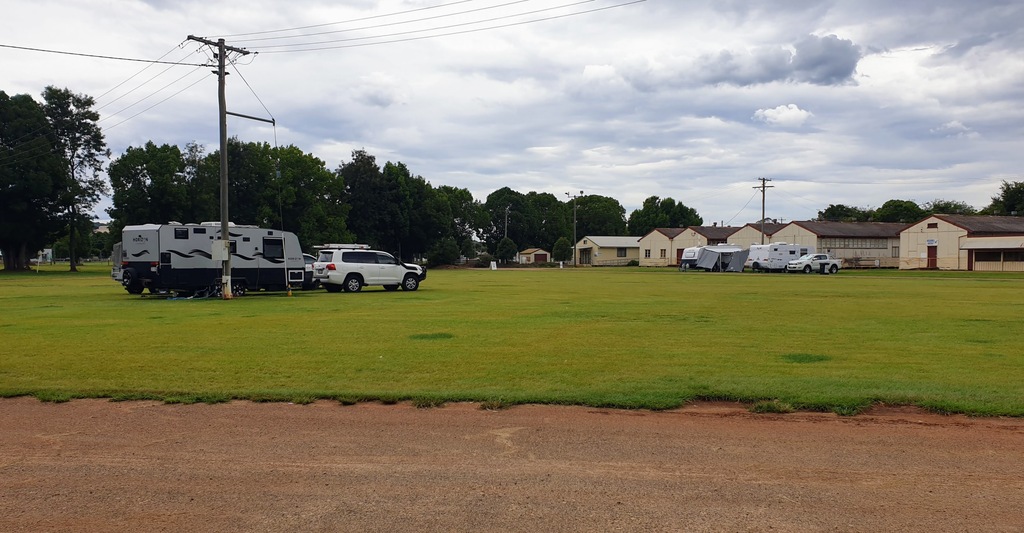
After our night at the Historic Boondooma Homestead, we headed around 115km SE to Kingaroy showground. Booking is essential at this showground, so give them a call before you turn up and you shouldn’t get there before 11am.

Camping At Kingaroy Showground

We arrived just after 11am at reception and the managers welcomed me into the reception. They had just finished their rounds of cleaning and maintenance etc. Which is why they prefer you to turn up after 11am. We paid for two nights initially but then booked in for three more nights as it was a nice showground to stay at.

Caravan camping at Kingaroy Showground Qld
Photo: Large grass sites

Caravan camping at Kingaroy Showground Qld
Photo: Shade Under The Trees

Caravan camping at Kingaroy Showground Qld
Photo: Room For Any Size Rig

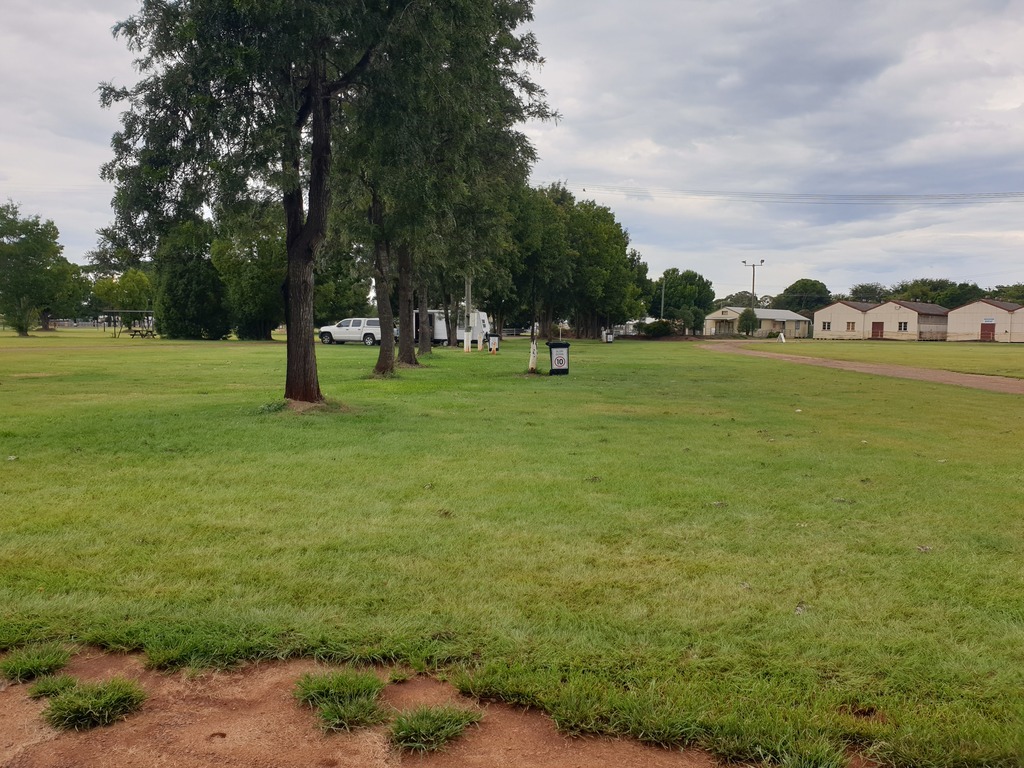
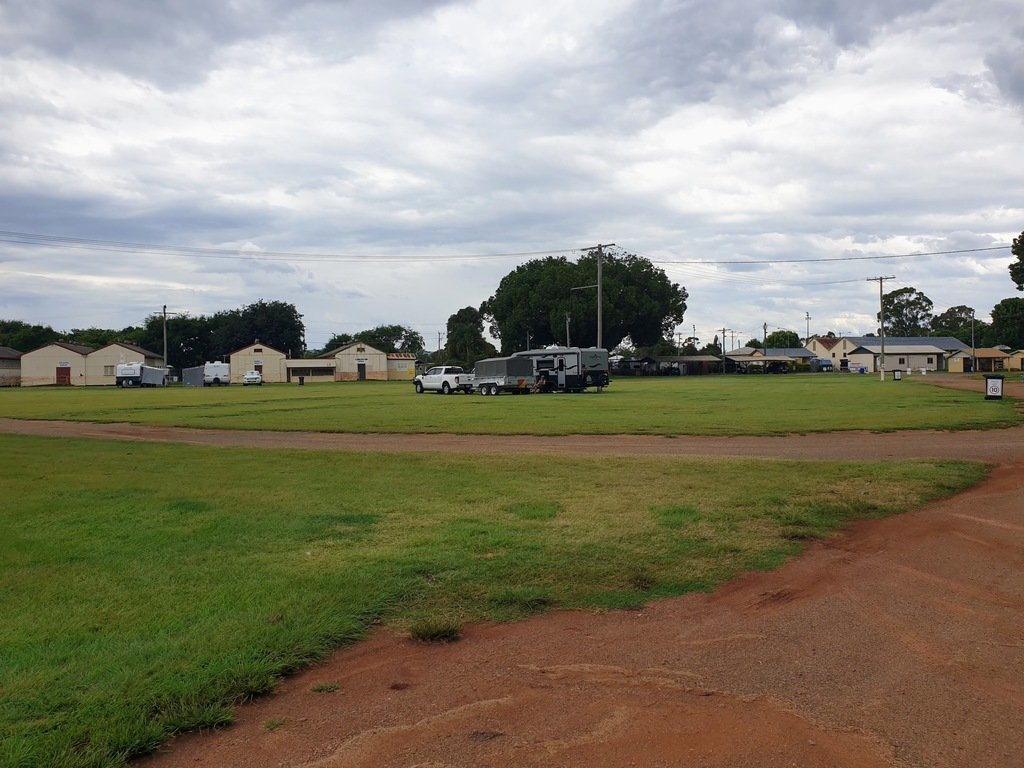
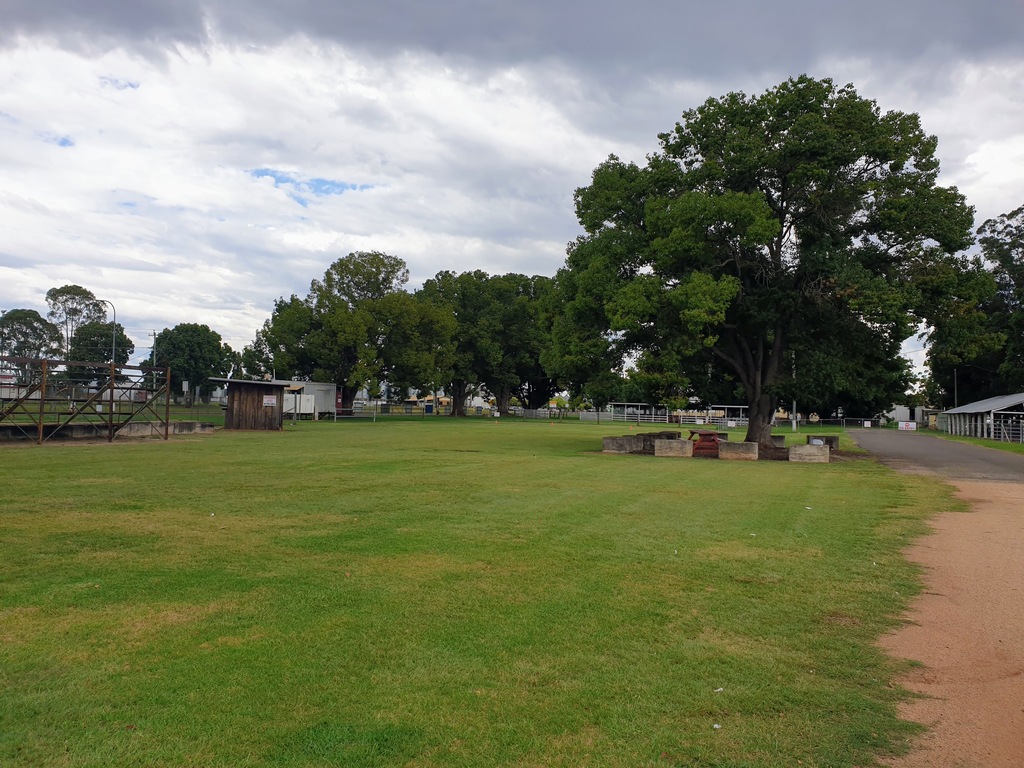
Sites are large and the managers at Kingaroy showground keep the grass well maintained. Some parking areas are under the shade of trees and some are not. You could probably stay connected at almost all of the sites. There’s a huge amount of power and water sites available as well as un-powered sites.

Caravan camping at Kingaroy Showground Qld
Photo: Un-Powered Site Section

Caravan camping at Kingaroy Showground Qld
Photo: Many Caravan Clubs and Caravaners Come Together

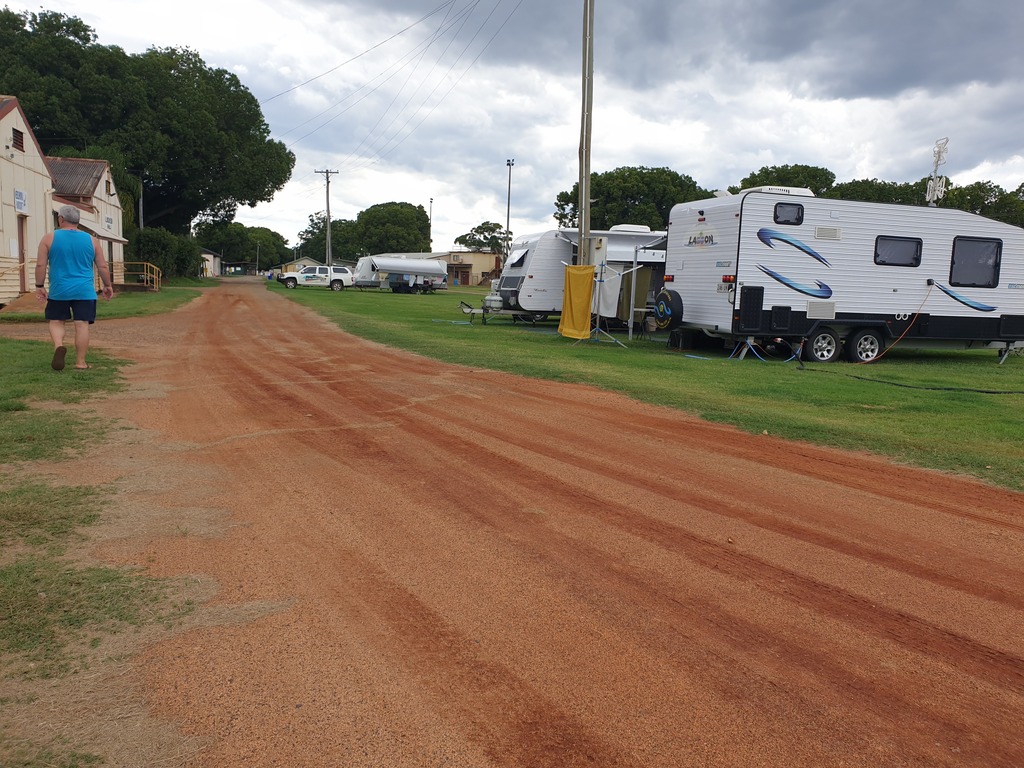
We did move locations before we left as we took the ute and the caravan to a car wash. When we came back to the showground we parked in the middle section and stayed connected. I believe caravan clubs etc come in big numbers to stay at Kingaroy Showground and I can see why. There is so much room for many vans of any size.

Caravan Car Wash

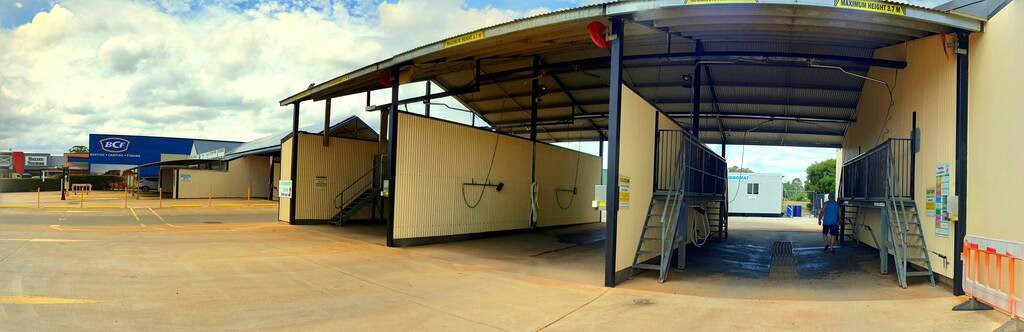
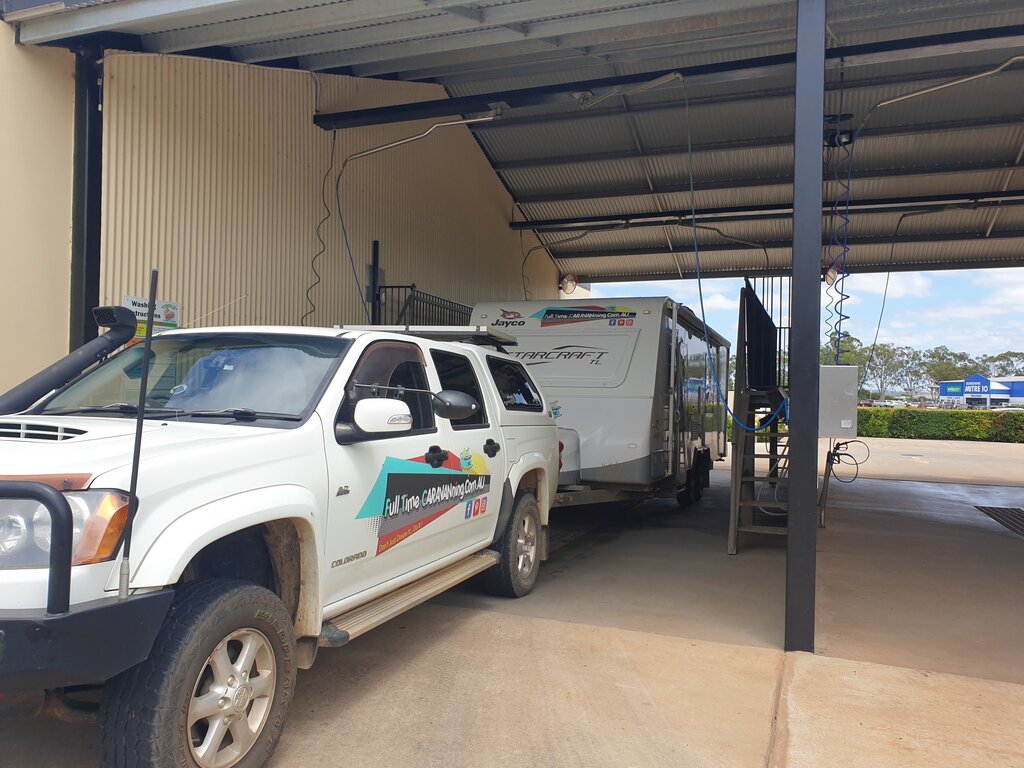
On a side note: For those looking for a car wash that will fit your caravan or motorhome, Kingaroy care and dog wash at 12 Rogers Drive, Kingaroy is fantastic. It has 3 bays you can fit your rig in. All have steps to see on top of your roof. One has two lots of stairs. As well as a normal car wash and dog wash they have large washing machines. This place is only a 5 or so minute drive from Kingaroy Showground.

Kingaroy car and dog wash. caravan roof cleaning with ladder to get up.
Photo: Kingaroy Car/caravan Wash

Kingaroy car and dog wash. caravan roof cleaning with ladder to get up.
Photo: Room For Caravan & Two Ladders To Get To Solar

Kingaroy car and dog wash. caravan roof cleaning with ladder to get up.
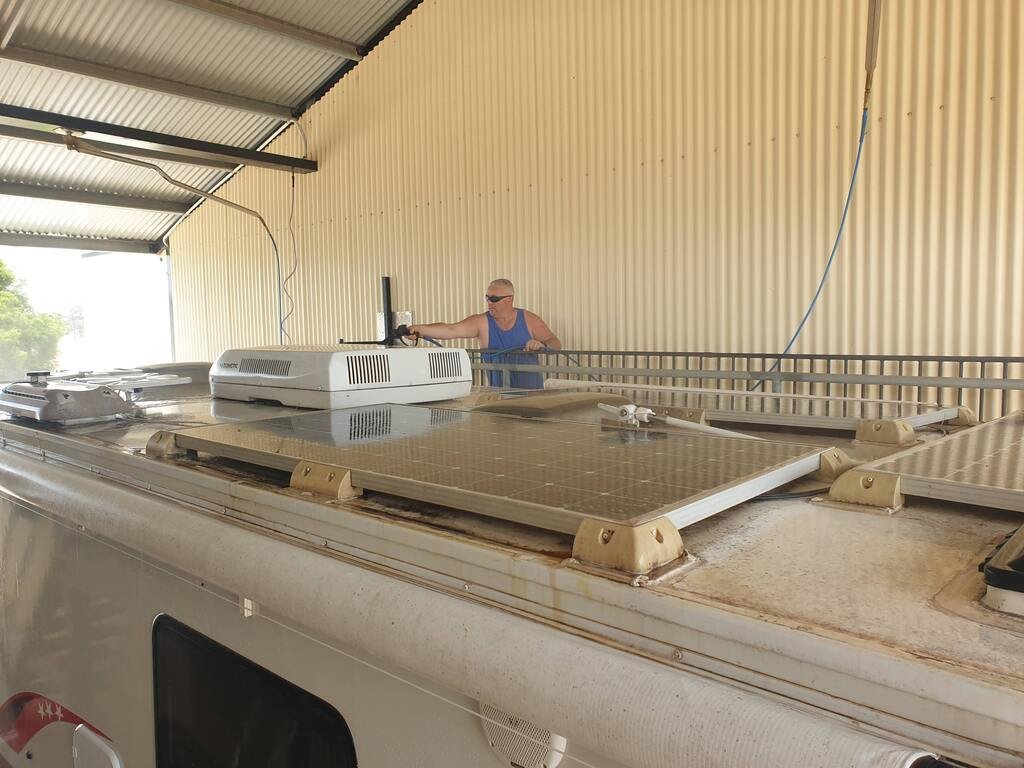
Photo: Larry Cleaning The Roof & Solar

Showground Amenities

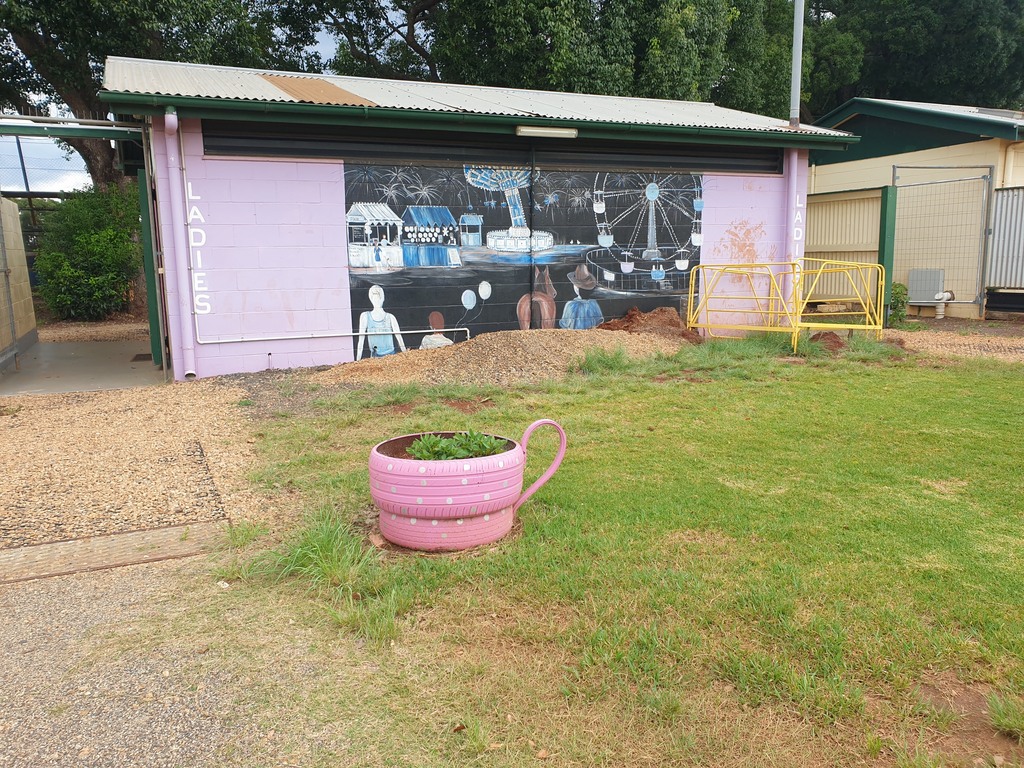
As per usual we use our own toilet and shower but if you don’t, they seem to have two amenity blocks. I had a wander through one as it looked so colourful. It also has some funky art on the outside. The inside was old but clean and brightly coloured indeed.

amenities and Caravan camping at Kingaroy Showground Qld
Photo: Outside The Older Amenities

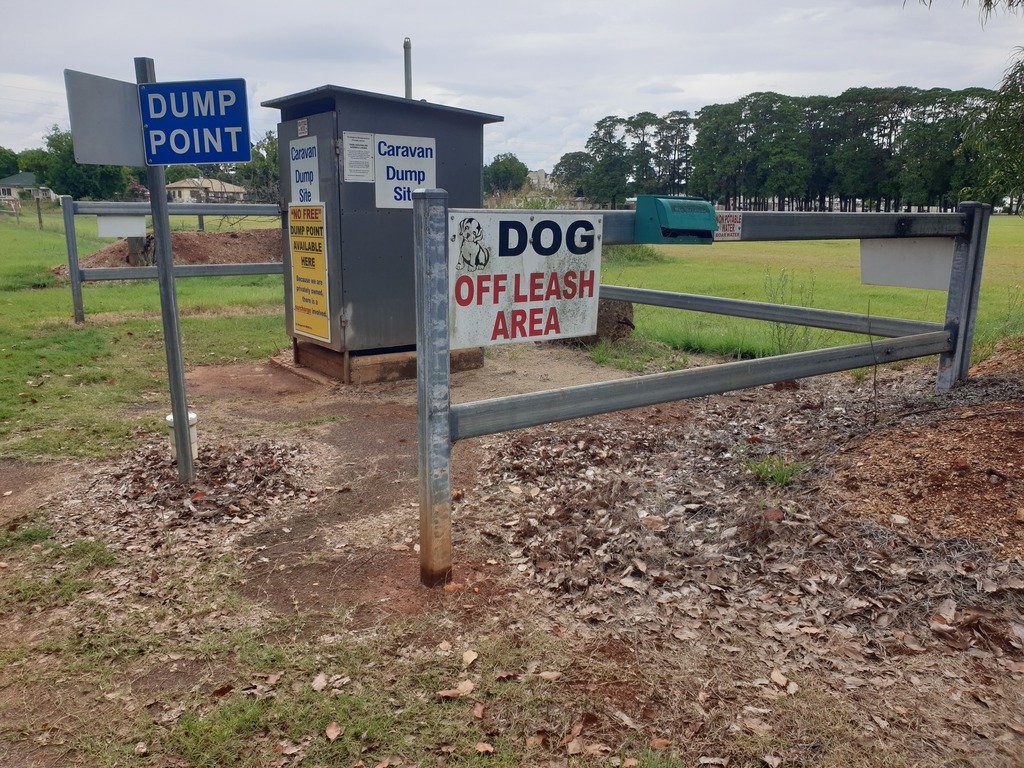
There is a dump point for those like us who like to use there own loo. This was a new looking dump point for us as it was kept in a kind of metal cupboard. Oh well it worked like any other 😀

Dump point for Caravans at Kingaroy Showground Qld
Photo: Dump Point & Off Lead Dog Area

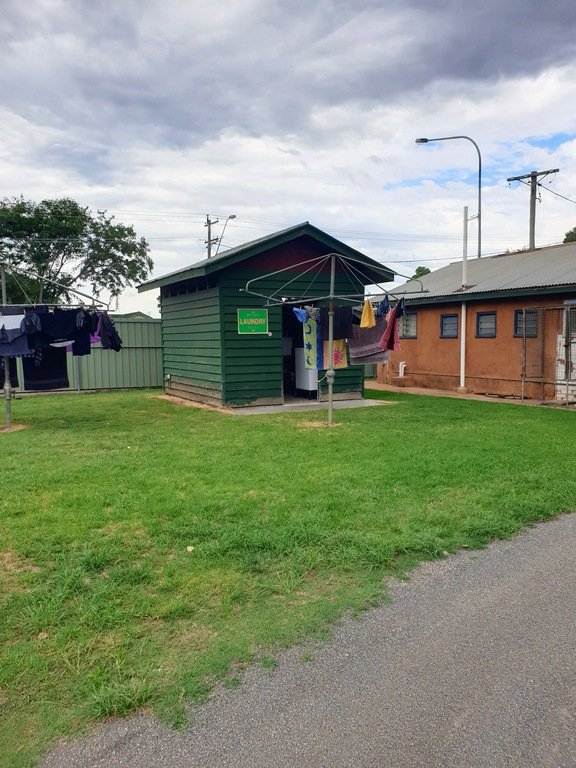
laundry room and clothes lines at kingaroy showground
Photo: Laundry

Kingaroy Showground laundry was small but has everything you need and has a couple of clothes line’s outside.

Other Kingaroy Showground Activities

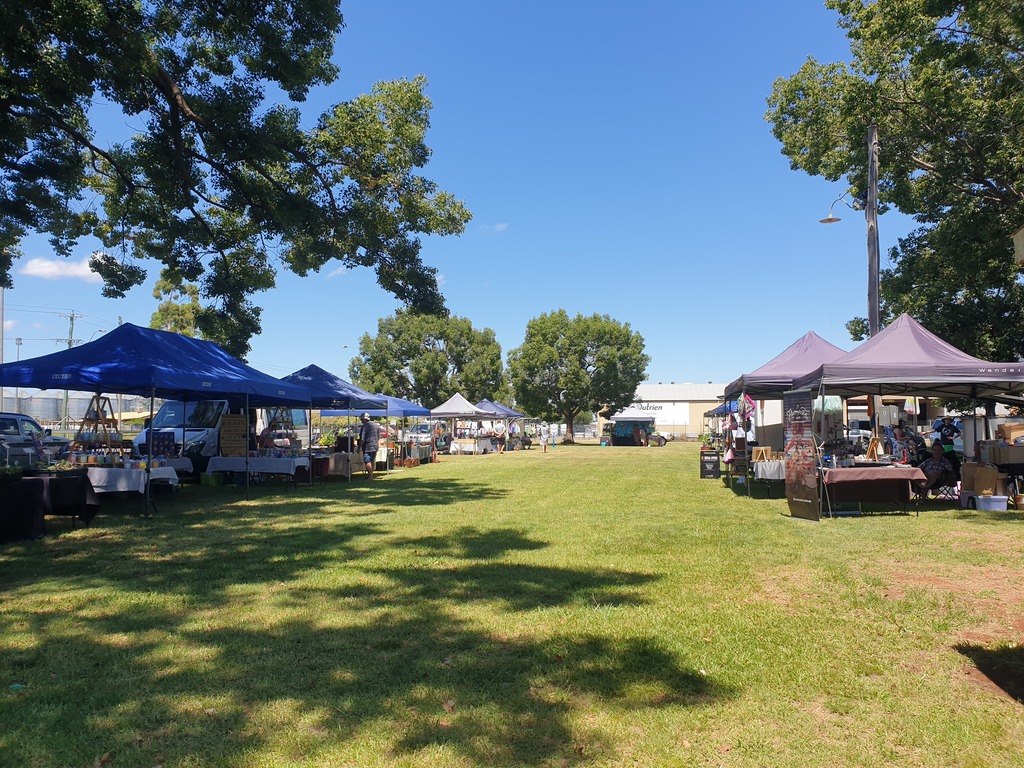
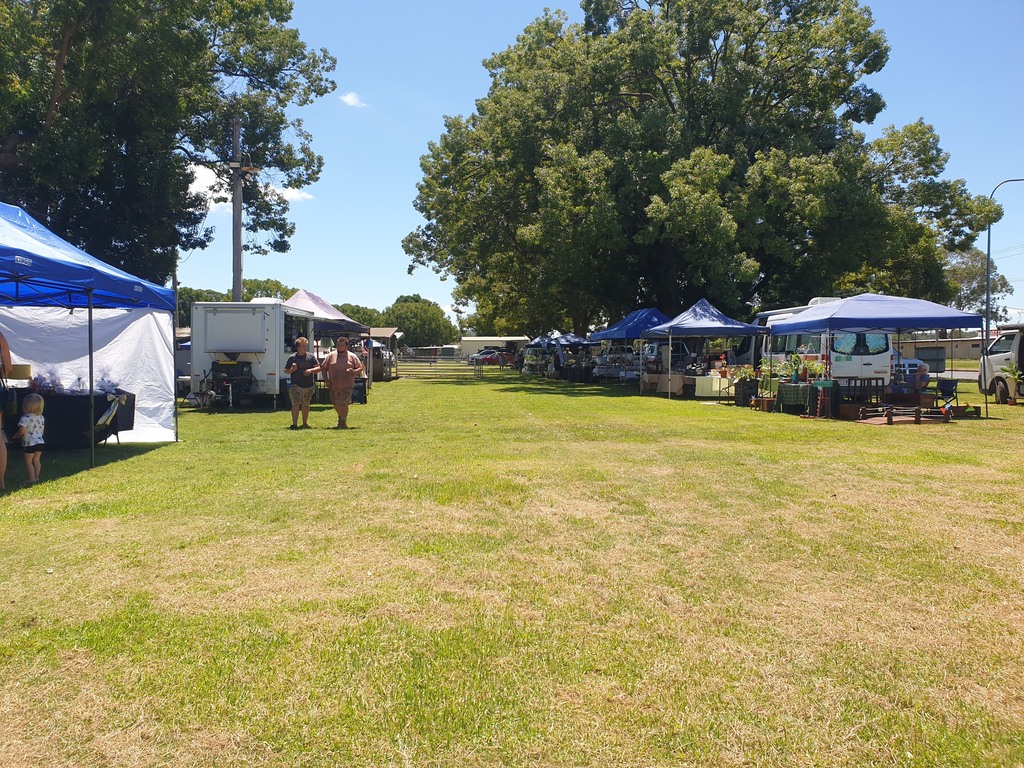
We had just missed the Kingaroy Speedway which was a shame but we had a stroll and checked out the raceway area. It looked like it would have been muddy and fun. The showground also has a market on the 3rd Saturday of the month.

Kingaroy Showground market Qld
Photo: Kingaroy Showground Market

Kingaroy Showground market Qld
Photo: Kingaroy Showground Market

Have A Walk Or A Drive

Aldi and a shopping centre with the likes of Big W, Woolies, a cafe’s and butcher are just over 1km away from the showground. I liked having a bite and a coffee at Hunter Gatherer Trader which is a cafe come clothes boutique.

You can also have a drive to the Peanut Van (Kingaroy is famous for it’s nuts) or Kingsley vineyard and Winery for lunch and wine tasting. The winery also has free camping!! 😀 Have a drive a little further to one of the many surrounding little towns like Bell. Bell has such a lovely yellow, cute, country church, coffee shop and garden to walk around. We also passed wind turbines heading there which Larry wanted to take a look at.

Kingaroy Showground is in a great location as it’s not far from town and from numerous other places and activities.

More Information

  • Location : Kingaroy
  • Click for Google map location
  • State: QLD
  • Pets: Yes
  • Camp type : Showground
  • Price : $ 30pn power and water at time of posting
  • Water ? : Yes
  • Power ? : Yes
  • Will suit: All sized vehicles
  • Is it on Wikicamps ?: Yes
  • Drive time to nearby shops: 1 minute
  • WIFI (tested with boost): Yes
  • Amenities : Toilets, Showers, Laundry
  • Other : seating, bins, dump point, market on 3rd Saturday of the month, Speedway when on, off leash dog area.

Aussie House Sitters are our choice of house sitting sites. Use our Coupon Code “AHS15%off” for 15% off your joining fee
Other Post You Might Like

Posted on

Boondooma Homestead – Qld

Historical Boondooma Homestead Qld

Boondooma Homestead, is in Boondooma Queensland, about 100km north west of Kingaroy or 130km north of Dalby

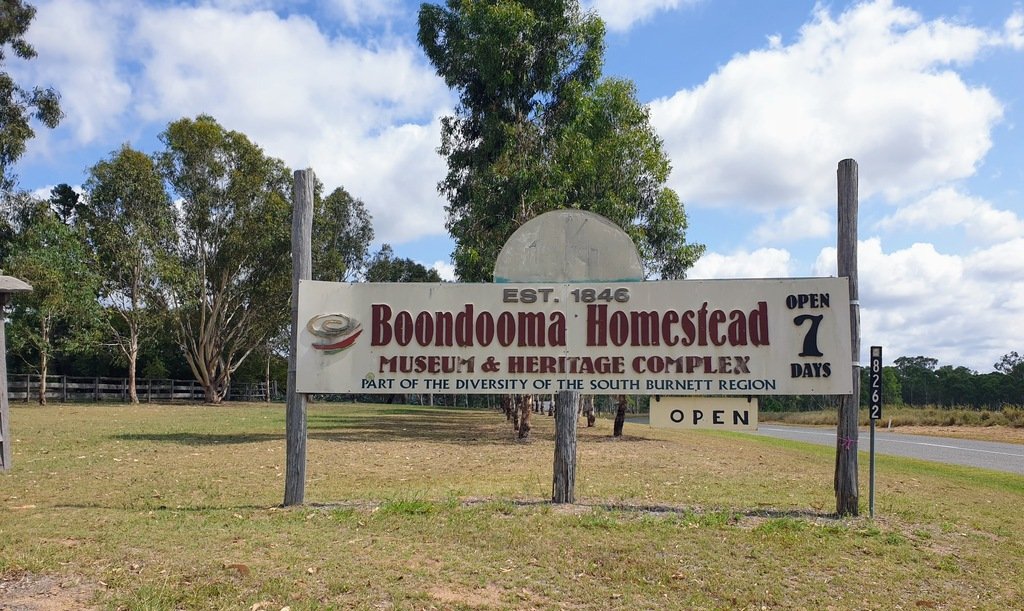
Entry sign to Historic Boondooma Homestead Qld
Photo: Entry To Boondooma Homestead

Arriving At Boondooma Homestead

Peter and Dianne, the friendly and informative caretakers, welcomed us when we arrived. Peter showing Larry where to park our van and Dianne taking payment for camping and getting our details. They also gave us a information book with all the details of the property and it’s gardens. Peter has such enthusiasm and knowledge about this place you can tell he’s bursting to tell you all about it.

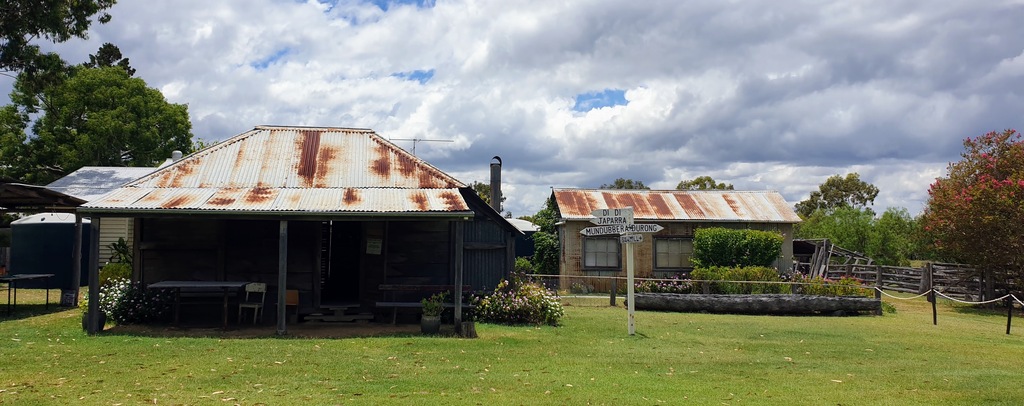
Historic Boondooma Homestead Qld
Photo: Some Of The Old Buildings You Can Walk Around

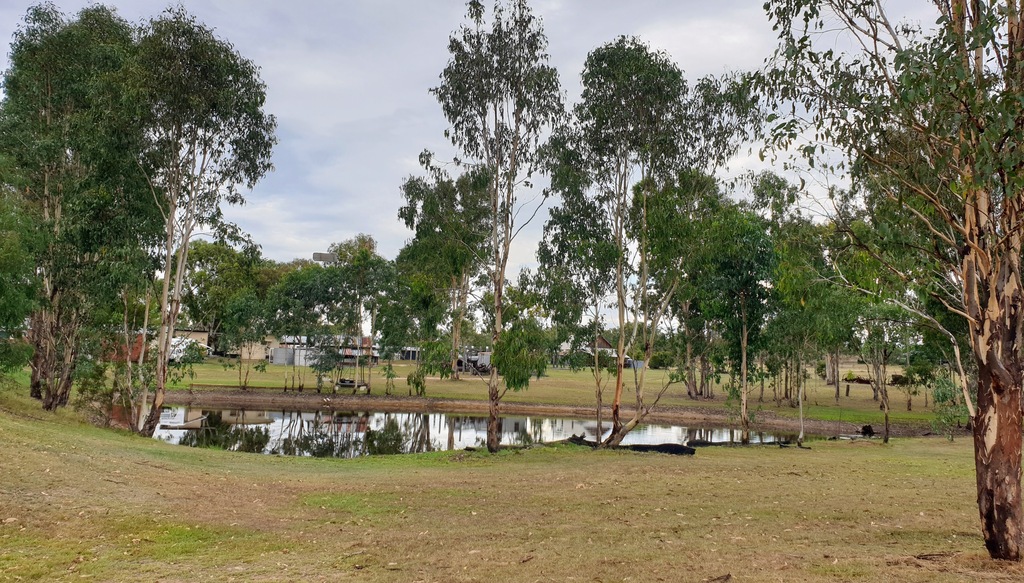
Boondooma Homestead Qld camping by the dam
Photo: Looking Over The Dam To The Camping & Homestead Complex

Once we had set up not far from the dam, Peter came over and told us a bit more about the homestead. He gave us a bit of history on the old buildings and said we were free to walk around at our leisure. He also said he would give us a tour that afternoon. As we planned to stay three days we chose to have a wander around ourselves and have the guided tour another day.

Camping At Boondooma Homestead

There are limited powered sites available, maybe 6 or 8, that I noticed. Alternatively there’s a huge amount of open space for un-powered camping. They have a few events on through the year that attracts a huge amount of camping and caravanners. With that in mind you’ll find many well kept grassed areas to camp on.

Boondooma Homestead Qld camping
Photo: Our Powered Site

Boondooma Homestead Qld camping
Photo: Heaps Of Un-powered sites

Boondooma Homestead Qld camping
Photo: More Un-powered Sites

Boondooma Homestead Qld camping by the dam
Photo: Looking Over The Dam To Un-powered Sites

Our grassed powered site was nice and flat with a nice view of the dam. They do encourage you to come with full water tanks as they have a limited water supply. We had two full fresh water tanks so this didn’t bother us.

Camp Kitchen

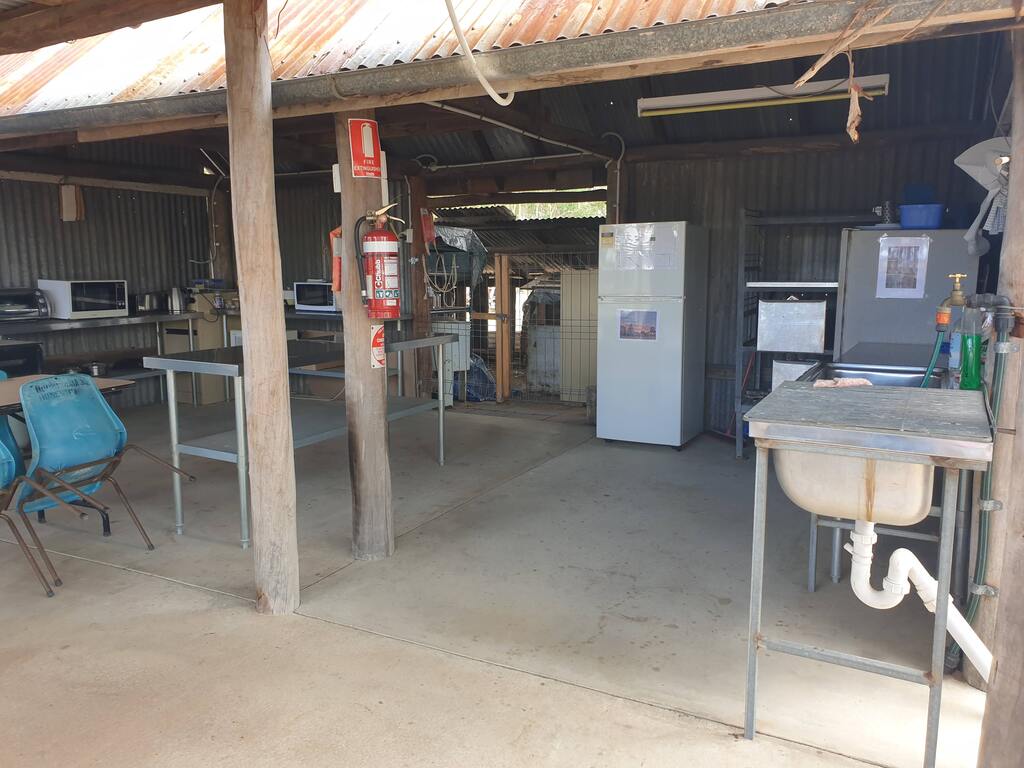
Near the firepit and stacks of wood is Boondooma Homestead large camp kitchen. Here you’ll find a BBQ, microwaves, sink, fridge, counter top oven and gas ring to name but a few.

Boondooma Homestead Qld camp kitchen
Photo: Firepit & Larry By The Camp Kitchen

Boondooma Homestead Qld camp kitchen
Photo: Camp Kitchen

Tent World

Boondooma Homestead Qld camp kitchen
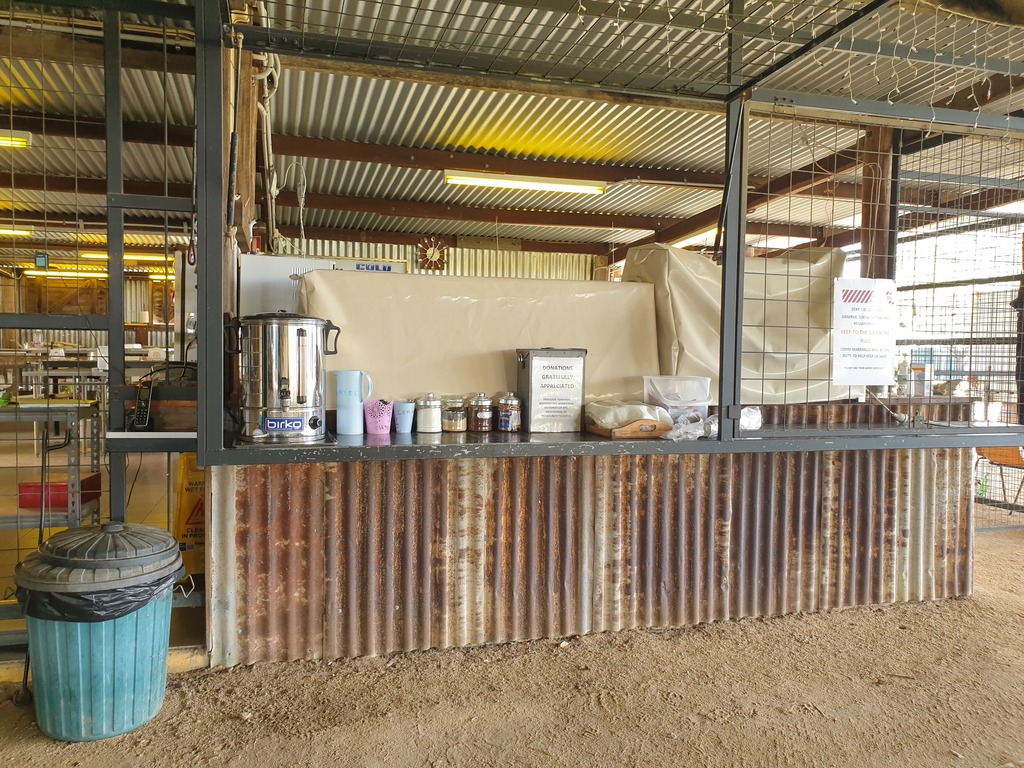
Photo: Tea & Coffee Available At Camp Kitchen & Reception Area

Tea and coffee are available here as well as near the reception area. A donation tin is next to them for your donation.

Amenities

As per our usual, we don’t normally use the amenities. At Boondooma Homestead they have toilets but I believe they don’t have showers. That is unless you are staying in one of their 6 rooms. They have a disability ensuite.

Walk Around Boondooma Homestead

If like me you like to walk around old or historic building, and imagining how things used to be, you will love this place.

To quote form Boondooma Homesteads website

The homestead was built from the 1850s to the 1870s and was added to the Queensland Heritage Register on 21st October 1992. The main surviving buildings in the complex include a stone building and timber house from the 1850s. Features include: a dining room (erected during the 1870s); a walkway between the house and the dining room; a cooling shed; cow bails (prior to 1939 used as stables); a structure which functioned as a postal receiving office from the 1860s; and a garage built in the 1950s.

See More On Boondooma Homestead Website
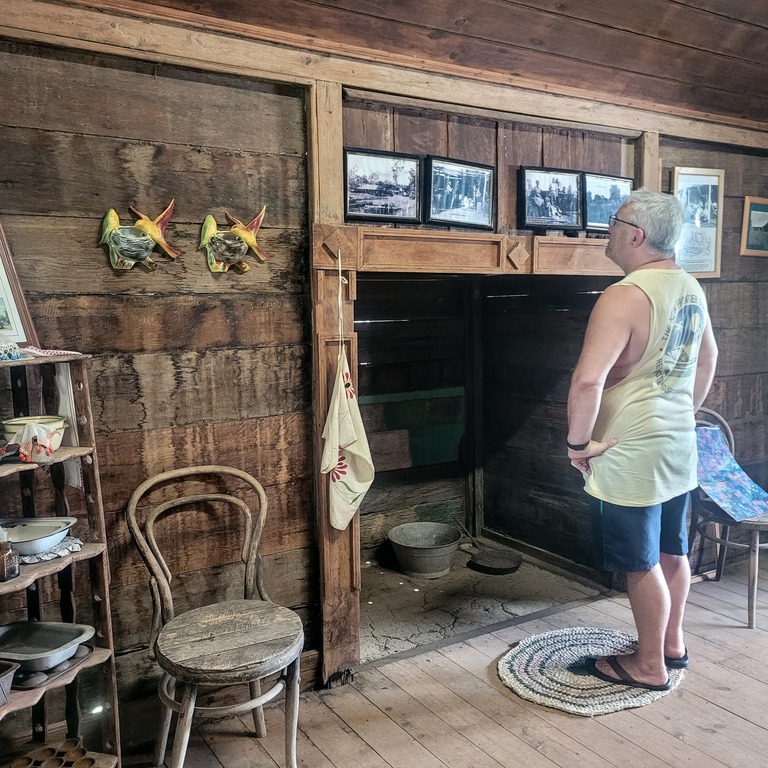
Man standing by Fire place at Historic Boondooma Homestead Qld
Photo: Larry Checking Out The Old Photos

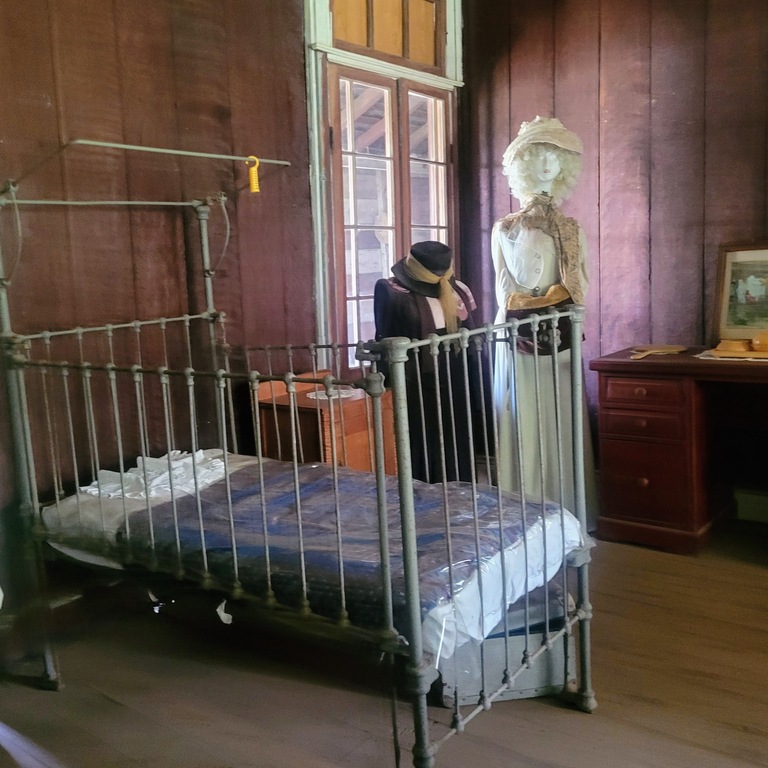
old bed and dummies in old fashioned dress at Historic Boondooma Homestead Qld
Photo: One Of The Bedrooms

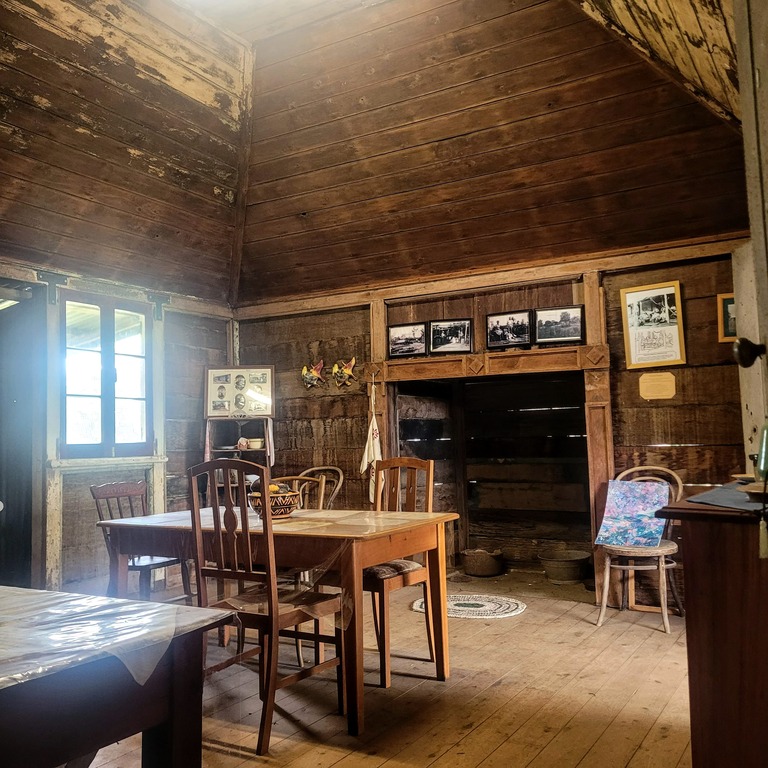
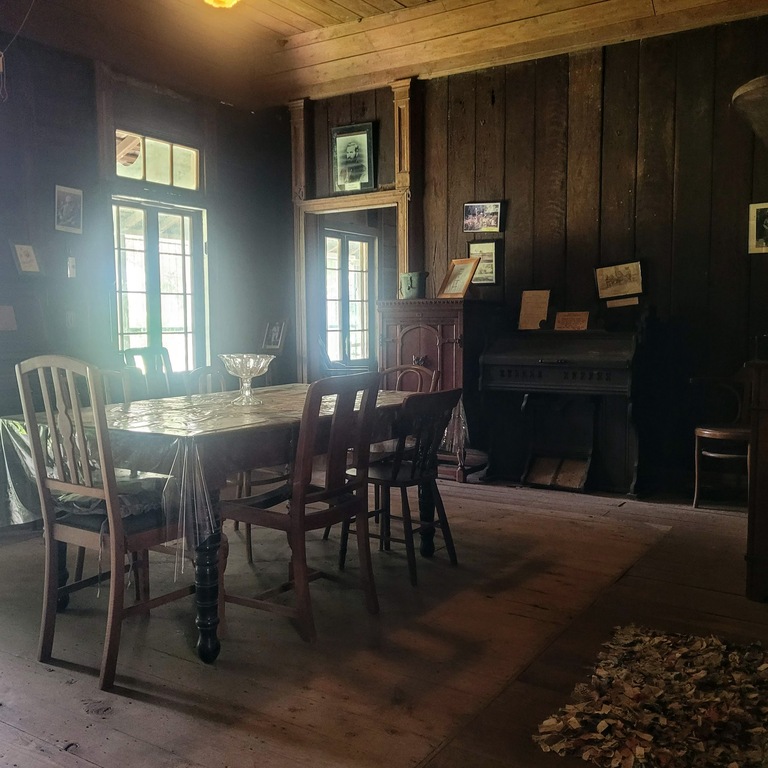
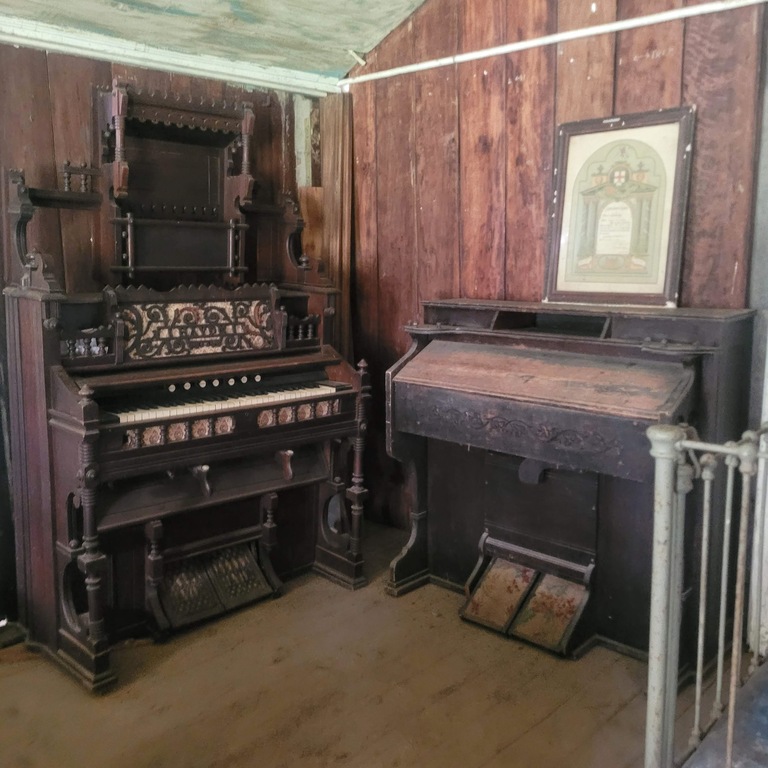
This old homestead has so much character and is thought to be haunted, so we were told by Peter. With it’s high ceiling in the dining room, fire places and tin roof, this homestead transports you back in time. Walking around you will see original beds, pianos and organs as they would have had back in the day. As well as photos and house hold objects from the 1800s.

Historical Boondooma Homestead Qld
Photo: Historical Boondooma Homestead

Historical Boondooma Homestead Qld
Photo: So much History In & On Those Walls

Historical Boondooma Homestead Qld
Photo: Musical History

Off from the main house there is the cookhouse. This housed the kitchen, the cook and his family. The cookhouse was separate from the homestead in case of a fire. They were however connected. Once cooked, the cook would transport the food by trolley to the dinning room. The trolley ran on wooden rails along a covered area to the dining room.

Historical Boondooma Homestead Qld kitchen trolley ran on wooden rails along a covered area to the dining room
Photo: The kitchen Trolley Ran Along Wooden Rails To The Dining Room

Historical Boondooma Homestead Qld kitchen trolley ran on wooden rails along a covered area to the dining room
Photo: The Food Trolley

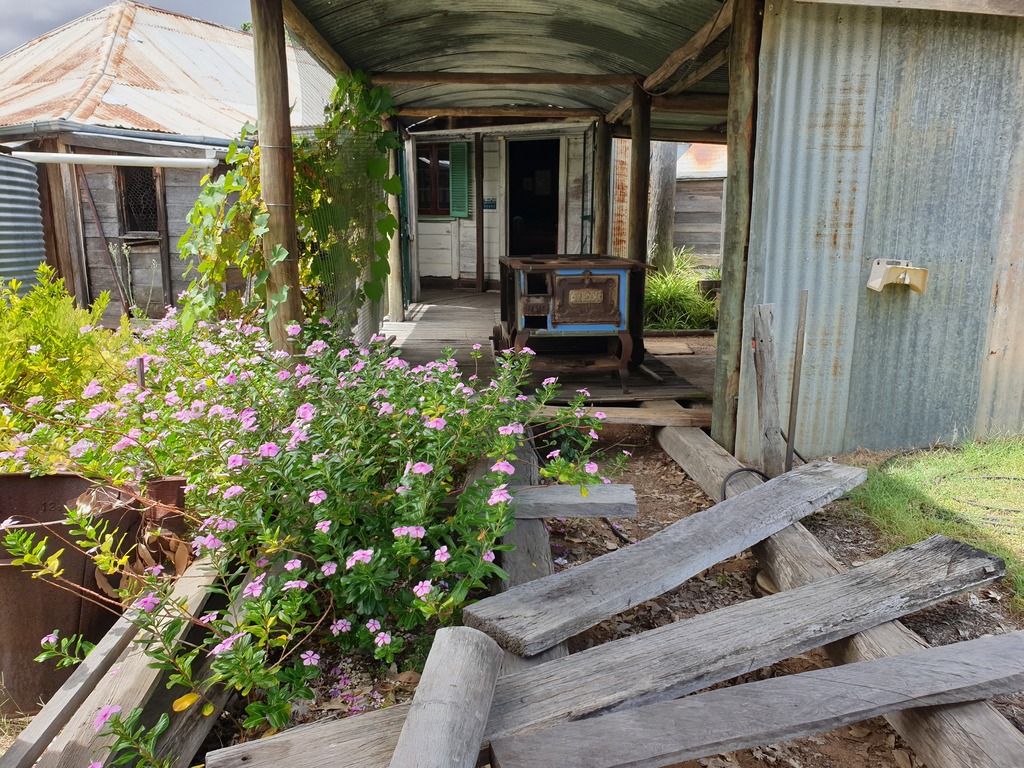
After a wild storm in 1927 destroyed the cookhouse, the lady of the house Jane Ann Thomson, chose to have a wood burning stove put in a recess in the main house. This stove is on the verandah awaiting restoration.

Buddy, Jane Ann’s grandson, comes to the homestead to do renovations on a multitude of things. He’s apparently in his 80’s but still likes to pop in and work on getting the place fixed up.

Other Boondooma Homestead Building

The post office was established in 1855. The pay for the mailman at the time was $450 a year, a large sum in those days. Walking around the complex you see the old Stone store, cool shed, meat shed and more.

Historic Boondooma Homestead Qld Historic gardens
Photo: One Of The Old Buildings

Boondooma Homestead Qld Historic buildings
Photo: Work Shop

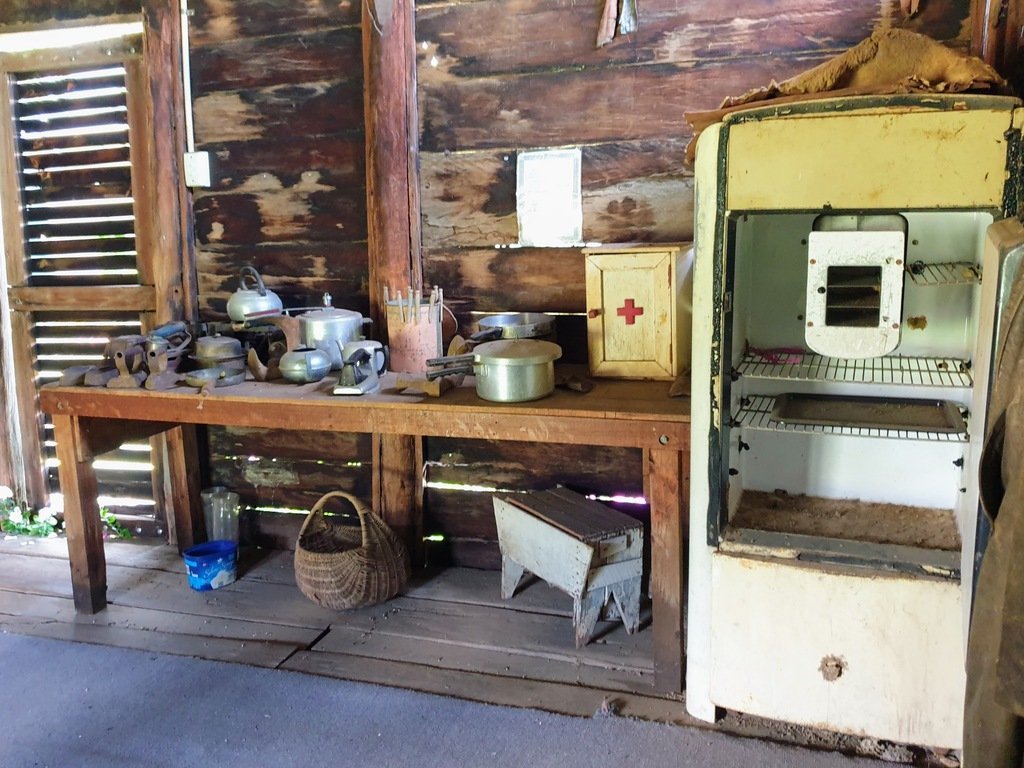
Boondooma Homestead Qld Historic building old fridge and kitchen implements
Photo: Inside One Of The Old Buildings

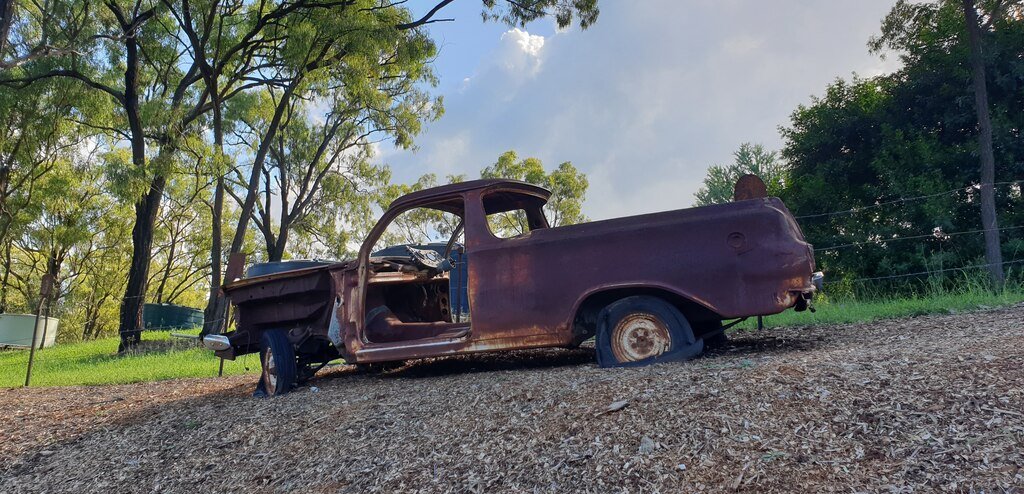
Old Machinery and cars can be found in the old historic wooden buildings as well as around the property. As you might have gathered from my Silver Wattle Caravan Park – Mount Morgan post, I like old rusty memorabilia at camp sites 😀

Boondooma Homestead Qld Old rusty ute and caravan
Photo: Cool Old Rusty Ute & Van

Boondooma Homestead Qld Old rusty ute car
Photo: History In It’s Cars

Wireless one

Boondooma Homestead Qld Old rusty car
Photo: Hidden History Everywhere

Boondooma Homestead Gardens

If you’re in to gardens or plants you might enjoy a walk around the grounds. Here, you will find grape vines, trees and plants that have been there since the 1850s.

Historic Boondooma Homestead Qld Historic gardens
Photo: The Homestead & Grape Vines

Historic Boondooma Homestead Qld Historic gardens
Photo: The Caretakers Can Show You Around The Gardens Or Walk Around At Your Leisure

Historic Boondooma Homestead Qld Historic gardens
Photo: More Vines By The Homestead

I found the Bottle Tree that was planted in 1930 interesting. In 2000 it appeared to be dying, after some research they found cement had been used successfully to save bottle trees (yes you read that right, Cement!). The inside was found to be rotting, so after cleaning it out, the hole in the tree was filled with concrete. Now, it’s doing well! Chickens are also kept in the gardens which was a nice surprise.

Boondooma Homestead Qld Historic post office building and bottle tree filled with cement to fix it from rotting
Photo: Old Post Office With The Bottle Tree On Left Of Picture

Boondooma Homestead Qld Gardens
Photo: Larry In The Gardens

Boondooma Homestead is the place you go to camp if you like to history, a quiet location, diconnecting from the outside world and star gazing. We paid to stay for 3 days but chose to leave after one night. This was because we had no internet and need it for work. We asked Peter and Dianne if we could pay it forward and let the next campers use our payment. Us leaving had nothing to do with the camp and would 100% stay again.

If you like camping at historical sites like this you might also like Wandoan’s Juandah historical site also in Queensland. Also Oakabella Homestead in WA has camping.

More Information

  • Location : Boondooma
  • Click for Google map location
  • State: QLD
  • Pets: Yes
  • Camp type : Historic Homestead
  • Price : Unpowered sites: single $8 or $15pn for two. Powered site $13 for single or $20pn for two. Cabin accommodation – single $40pn or $66pn twin share. Price correct as of February 2023
  • Water ? : Recommended to bring your own as there is no water to hook up to
  • Power ? : Yes
  • Will suit: All sized vehicles
  • Is it on Wikicamps ?: Yes
  • Drive time to nearby shops: 15 minutes south to Durong
  • WIFI (tested with boost): No reception at all unless near the reception I believe. Caretakers use radios to communicate.
  • Amenities : Toilets, Dump Point
  • Other : History, camp kitchen, dam, heaps of room, friendly caretakers, historic gardens

Aussie House Sitters are our choice of house sitting sites. Use our Coupon Code “AHS15%off” for 15% off your joining fee
Other Post You Might Like

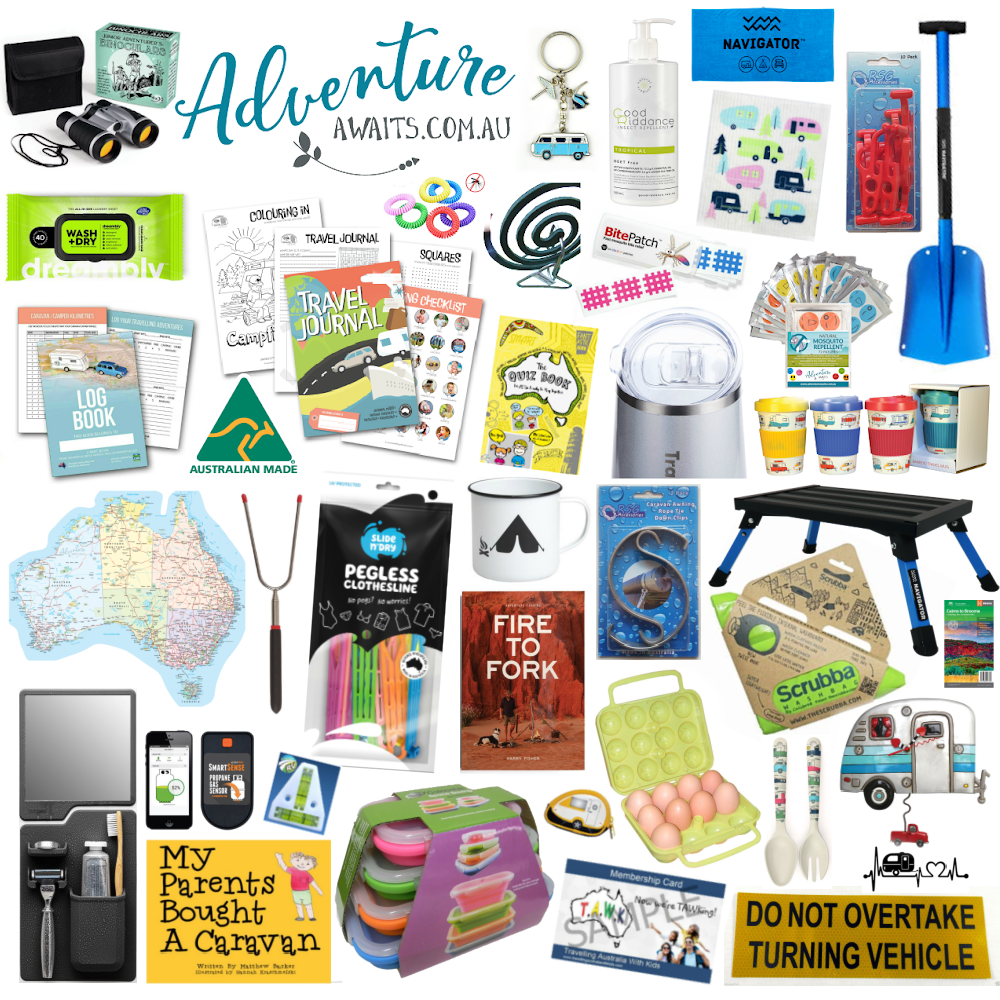
Adventure Awaits Has Heaps Of Camping ideas and fun gifts

Posted on 5 Comments

Silver Wattle Caravan Park – Mount Morgan – Qld

Mount Morgan Silver Wattle Caravan Park Queensland Camp Kitchen

Getting To Silver Wattle Caravan Park

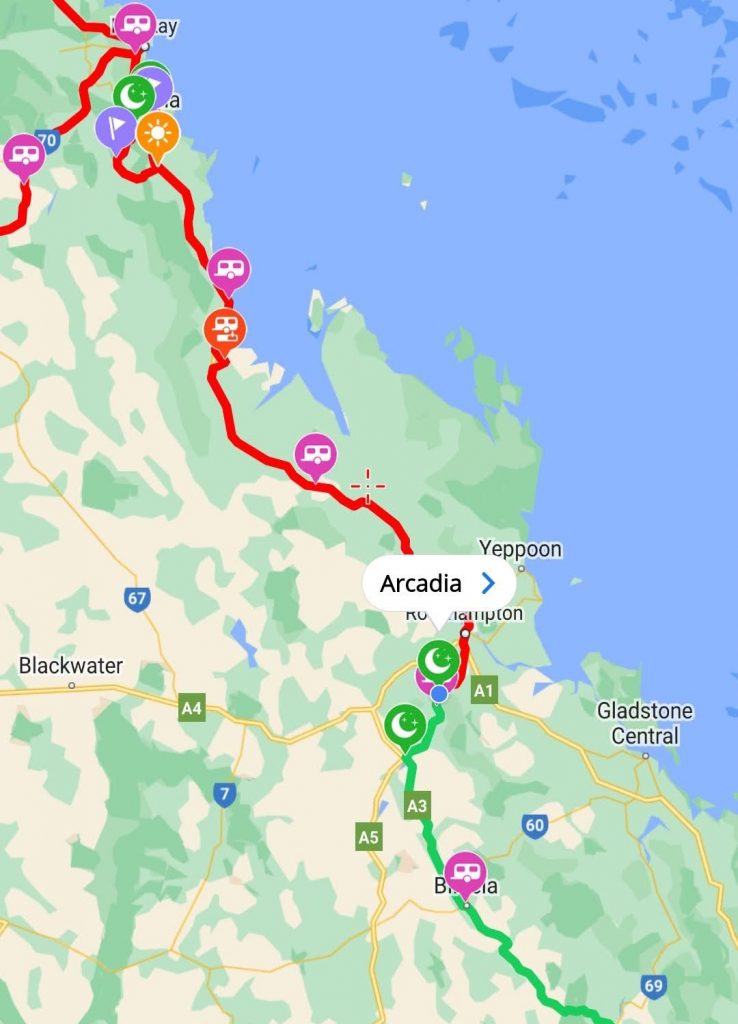
Mount Morgan is a small friendly country town 40km SW of Rockhampton and around 100km North of Biloela.

silver wattle caravan park mount morgan map
Photo: Silver Wattle Caravan Park Location

Silver Wattle Caravan Park

We found Silver Wattle Caravan Park has all positive reviews on WikiCamps. As we were already camping near by, at a Hipcamp called Arcadia. It seamed like a good opportunity to head over to Silver Wattle Caravan Park for a look around. Deb, one of the owners gave us a map of the park and invited us to take a look around to see where we might want to park when we came to stay.

Mount Morgan Silver Wattle Caravan Park Queensland
Photo: Silver Wattle Caravan Park Reception

Mount Morgan Silver Wattle Caravan Park Queensland old suitcase in the garden by caravan sites
Photo: Rusting Suitcase, Sign Of Whats To Come

OMG, forget it being a caravan park, I would have this place as our home. Needles to stay, when we went back we booked in for a week. And at just $192 for the week why wouldn’t you. You’re only a couple of minutes out of town but it doesn’t feel like it as it’s so green and lush.

Mount Morgan Silver Wattle Caravan Park Queensland old rustic garden garden art fuel pump
Photo: Old Fuel Pump Is Like Garden Art

Mount Morgan Silver Wattle Caravan Park Queensland joke spring water tap
Photo: So Much To Spot In The Gardens

Arriving at the park to stay, Deb and her husband Dave welcomed us before we chose a place to park. They have a choice of lovely green grass or slab sites. We opted for a grass site. All sites are a great size so you have no worries putting your awing out. Also you’re never that far from the amenities and amazing camp kitchen area. An extra bonus was Deb and Dave gave us some complimentary eggs on arrival, how nice is that!

Mount Morgan Silver Wattle Caravan Park Queensland caravan parked on grass site
Photo: Our Chosen Grass Site By Bath In The Garden

Tent World

Mount Morgan Silver Wattle Caravan Park Queensland rusty old memorabilia in the garden claw foot bath, tractor parts, oil can
Photo: So Many Great Items Placed Around The Gardens

Mount Morgan Silver Wattle Caravan Park Queensland caravans parked on grass sites
Photo: Large Grass Sites

Silver Wattle Caravan park Gardens

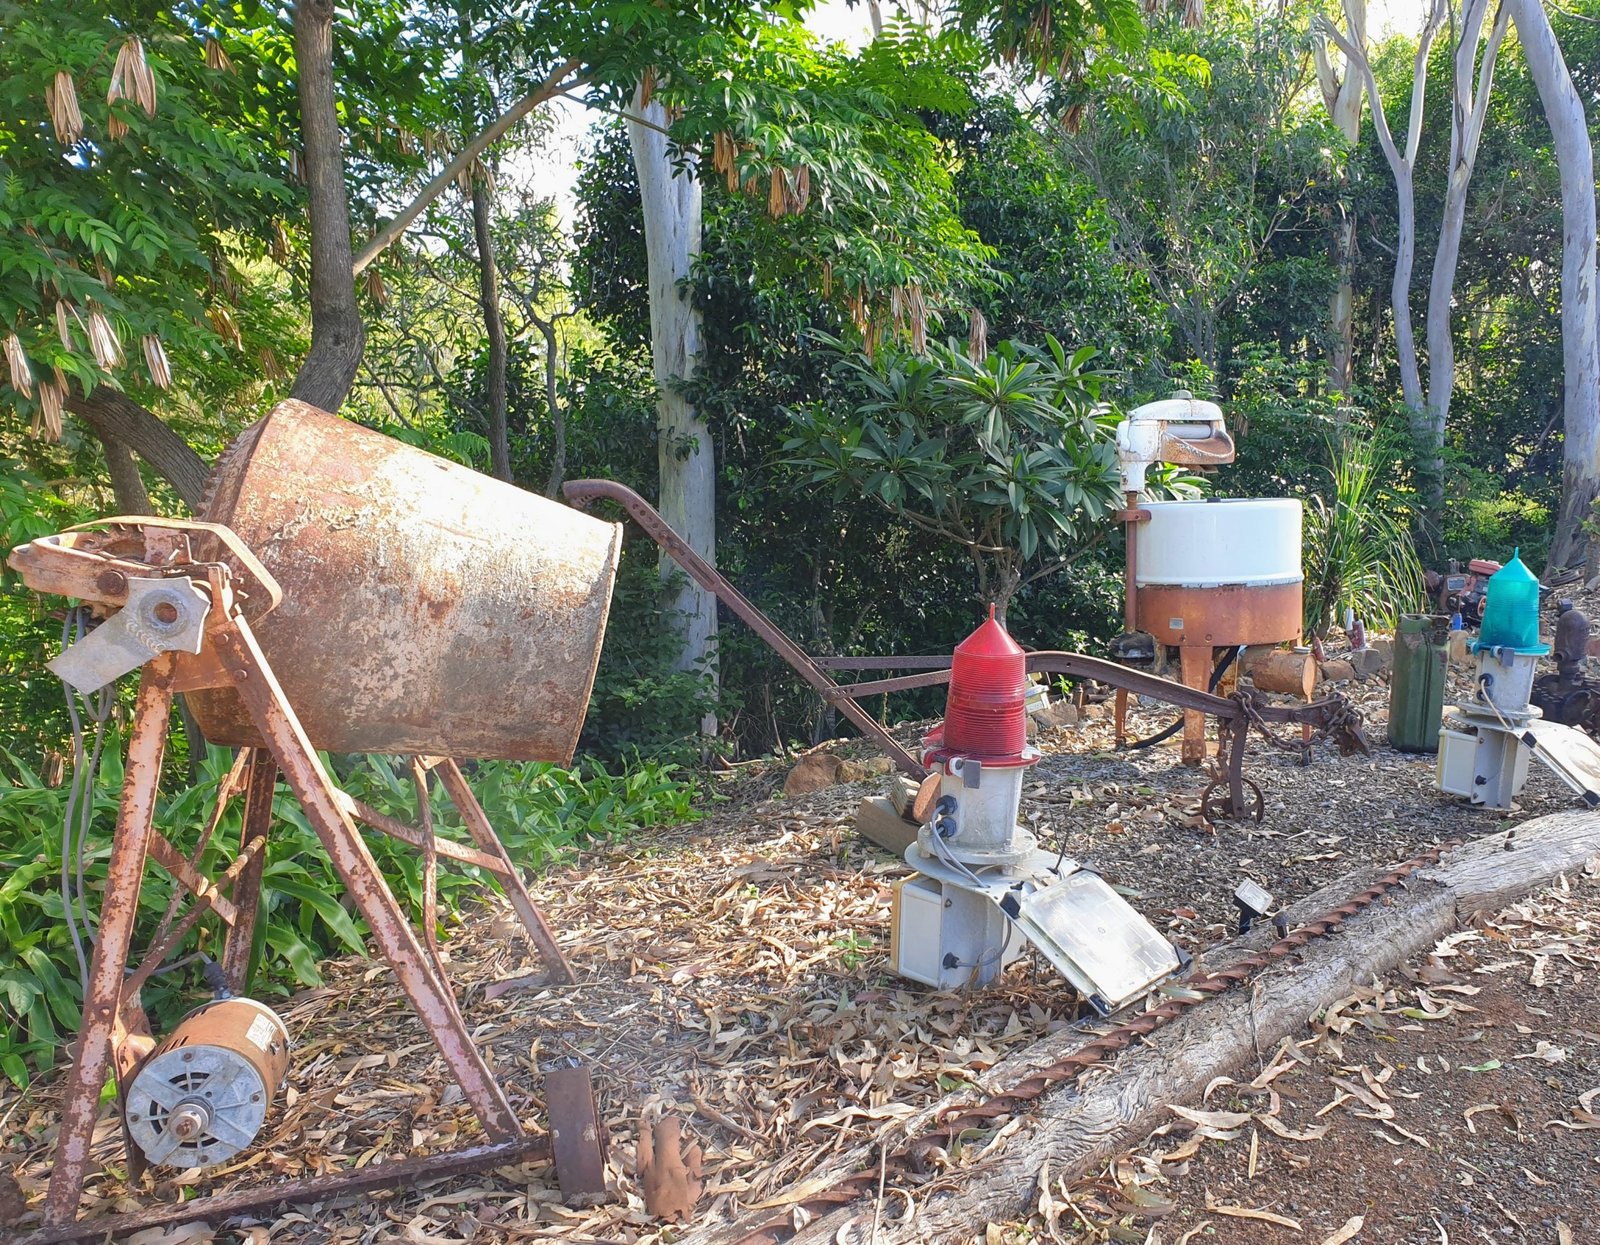
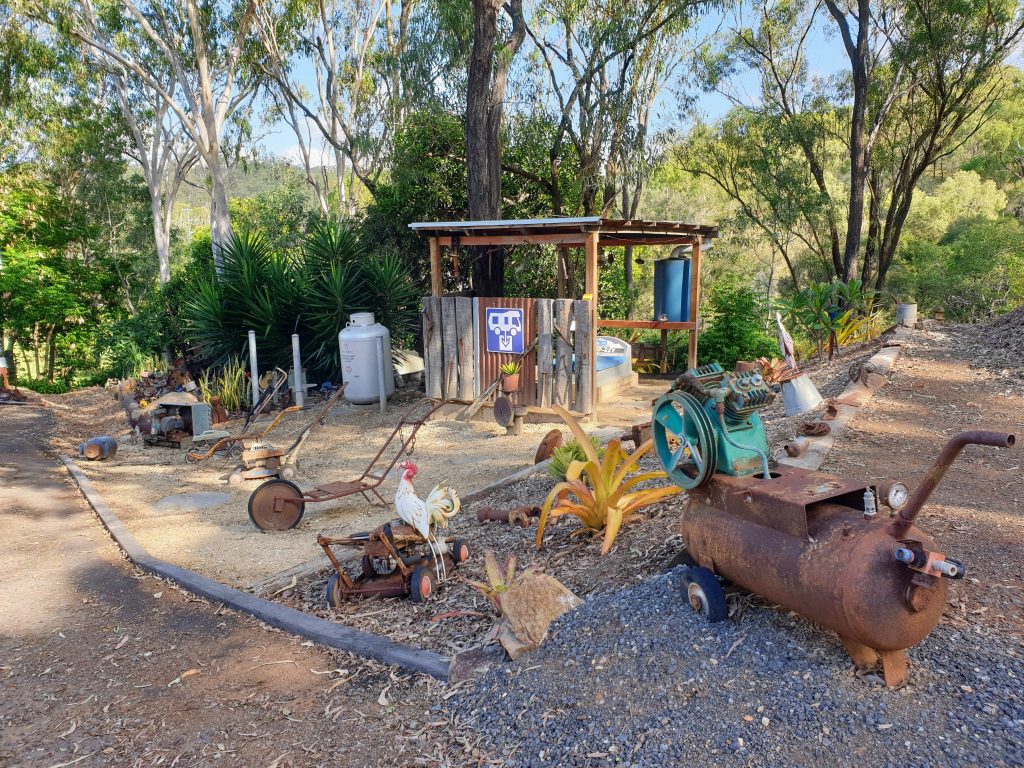
Any site you choose to park, you’ll see old rusty/rustic memorabilia. Whether that’s an old mangle washing machine, rusty old farm machinery, old gas pump or car.

Mount Morgan Silver Wattle Caravan Park Queensland rusty old memorabilia in the garden mangle washing machine
Photo: Memorabilia In The Garden- Mangle Washing Machine

Mount Morgan Silver Wattle Caravan Park Queensland rusty old memorabilia in the lovely green gardens
Photo: Lovely Gardens With Things To See Around Ever Corner

Our caravan site was near an old claw foot bath with plants growing in it. There was also a large piece of old farm machinery. I should also mention that the gardens are full of well maintained bushes, trees and plants. Many flowering at this time of year.

Mount Morgan Silver Wattle Caravan Park Queensland caravans parked on grass sites
Photo: Flowers Falling From The Trees

Mount Morgan Silver Wattle Caravan Park Queensland caravans parked on grass sites
Photo: A Little Rain And The flowers Bloom

As Silver Wattle Caravan Park is on a few levels. You can take a stroll up the path or up some steps for a bit of exercise and check out the other gardens. Also, the views over the hill make it feel like you’re in the middle of nowhere.

Mount Morgan Silver Wattle Caravan Park Queensland stairs up the gardens
Photo: Stairs Up Through The Gardens

Mount Morgan Silver Wattle Caravan Park Queensland grass site
Photo: Grass & Slab Sites Near Amenities

Mount Morgan Silver Wattle Caravan Park Queensland grass site
Photo: Another Level Of Grass Sites

Mount Morgan Silver Wattle Caravan Park Queensland old rusty car in garden
Photo: I Love This Old Rusty Ute

Silver Wattle Camp Kitchen

Can I say OMG again! This is no ordinary camp kitchen this has all the kitchen gear you will need and much much much more.

Mount Morgan Silver Wattle Caravan Park Queensland Camp Kitchen
Photo: Fabulous Camp Kitchen

Mount Morgan Silver Wattle Caravan Park Queensland Camp Kitchen
Photo: Camp Kitchen

Kitchen Appliances

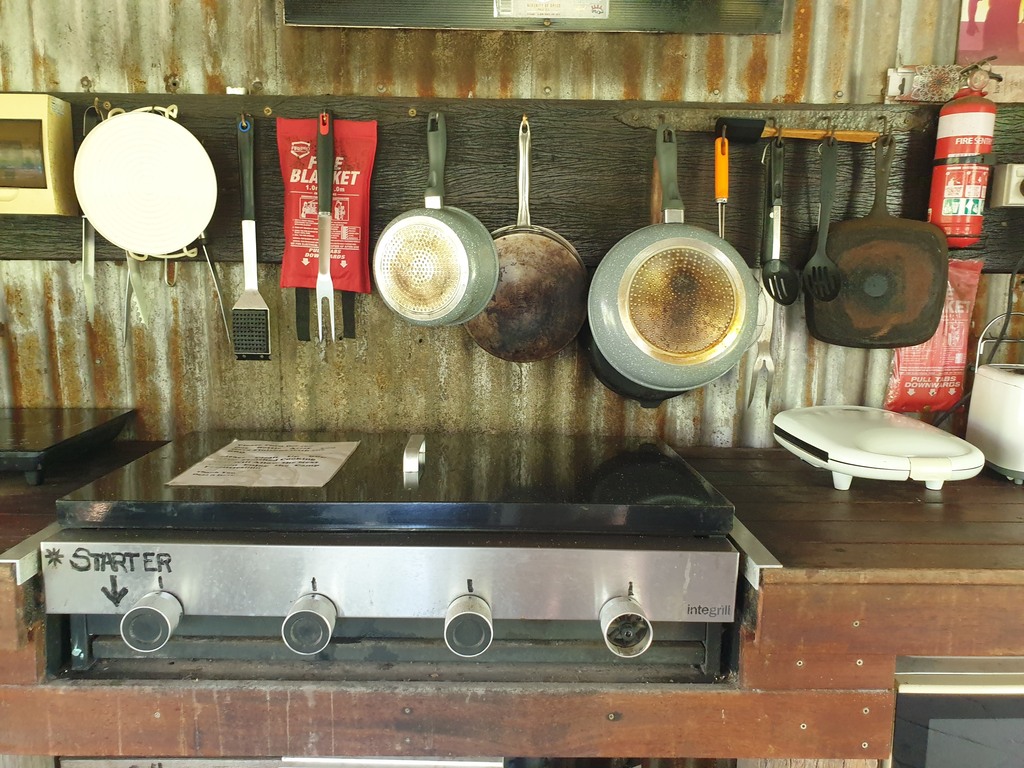
First lets mention the pizza oven, a pizza oven!! there is also a large BBQ plate, electric hot plate, toastie maker, small counter top oven, some pans, utensils and wine glasses. As well as the usual fridge, kettle, toaster, microwave and kitchen sink.

Mount Morgan Silver Wattle Caravan Park Queensland Camp Kitchen
Photo: Pizza Oven & Sink
Mount Morgan Silver Wattle Caravan Park Queensland Camp Kitchen bbq
Photo: BBQ

Entertainment Area

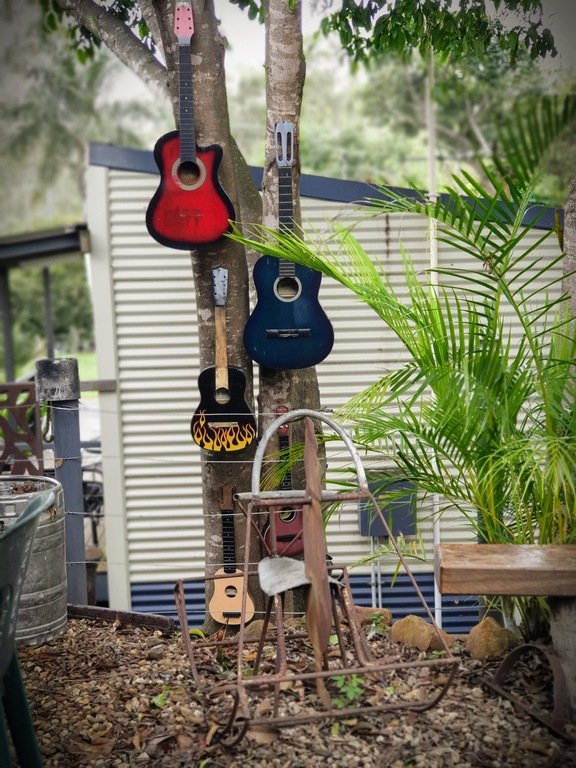
As part of the camp kitchen there is a couple of wooden tables and chairs as well as more table and chairs in separated area. Here you’ll also find beer kegs made into stools, as well as guitars attached to a tree and on the ceiling.

Mount Morgan Silver Wattle Caravan Park Queensland Camp Kitchen
Photo: Another Undercover Seating Area

Mount Morgan Silver Wattle Caravan Park Queensland Camp Kitchen guitars stuck to trees
Photo: Guitars In The Entertaining Camp Kitchen

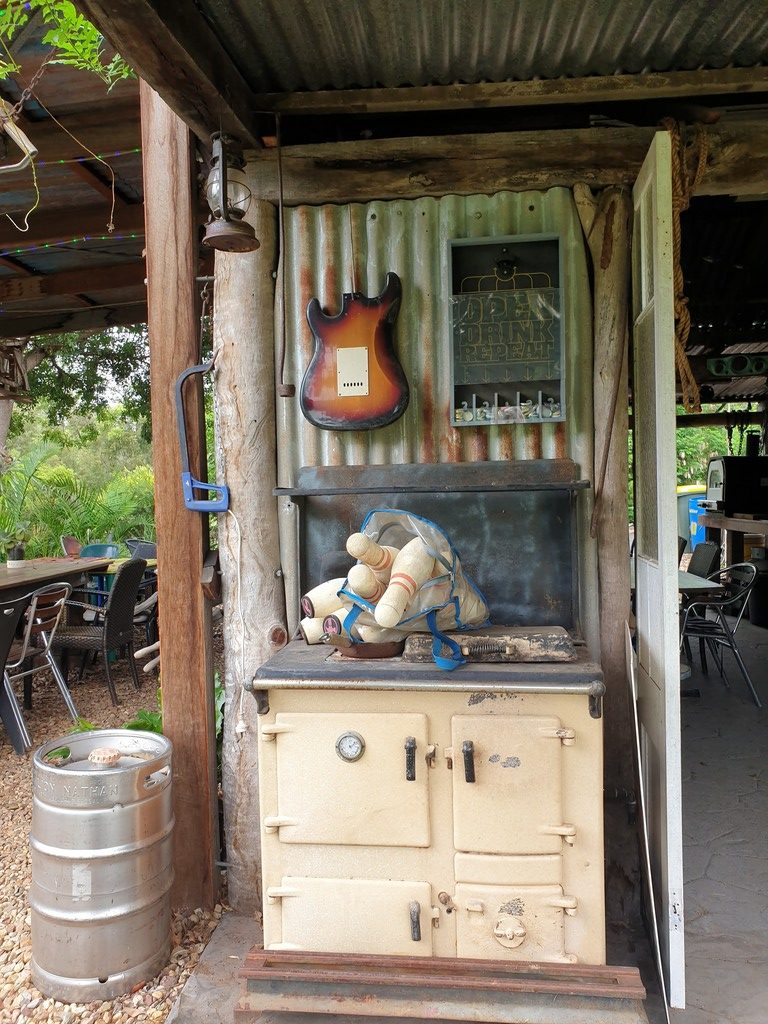
Also a stand out for me is the outside of the Silver Wattle Caravan Parks camp kitchen. Not only is there an old jukebox and rocking chair but also an old cooker, old tin roof and natural tree branches as posts. I want this whole area in my back yard. Oh wait, it kind of was for a week 😀

Mount Morgan Silver Wattle Caravan Park Queensland Camp Kitchen old jukebox and rocking chair
Photo: Old Jukebox & Rocking Chair
Mount Morgan Silver Wattle Caravan Park Queensland Camp Kitchen old cooker
Photo: A Touch Of Old Time Kitchen Memorabilia

Communal Firepit Area

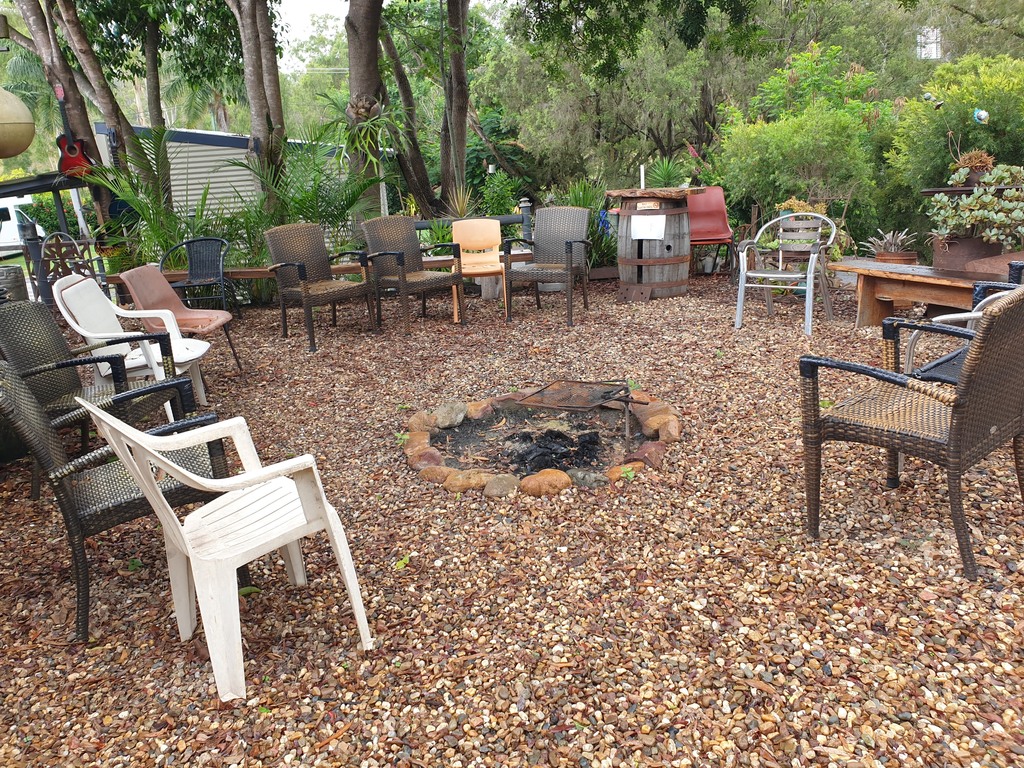
On the opposite side of the camp kitchen is the communal firepit. I believe this is a great spot to gather and meet fellow travellers in the cooler months. I would love to sit around the fire and listen to some of the musicians they have playing at times.

Mount Morgan Silver Wattle Caravan Park Queensland communal fire pit
Photo: Communal Firepit

Deb & Dave do a happy hours between 25th April through to September every day in the camp kitchen from 5.30. I read it’s a must do.

Herb Garden

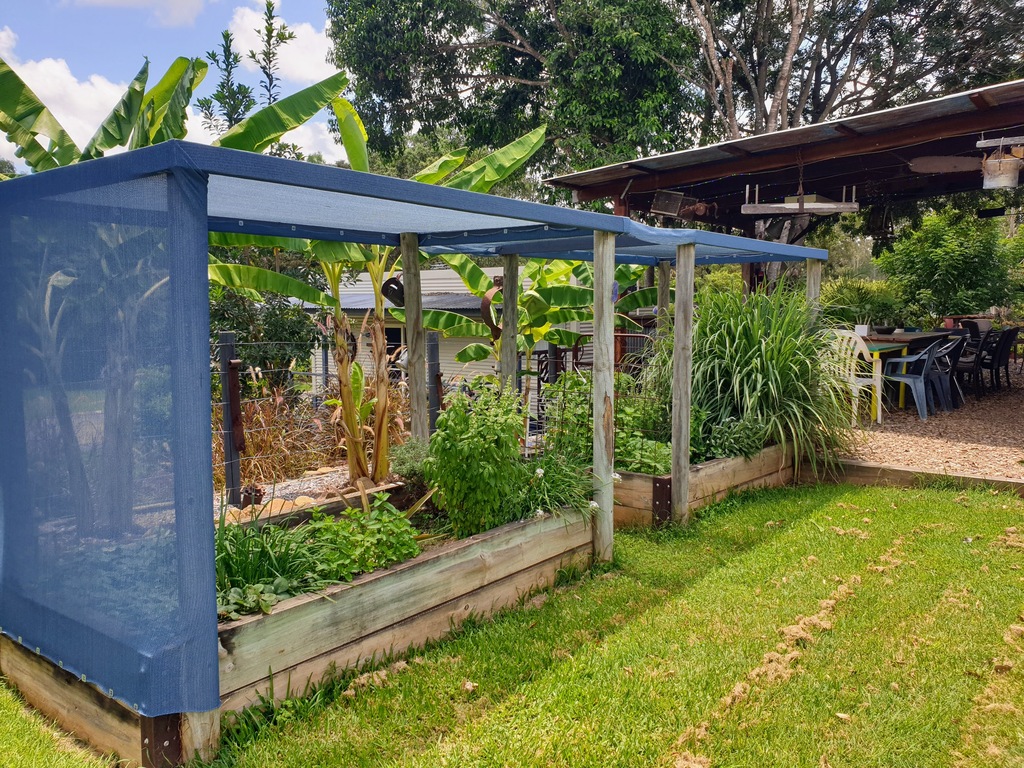
I’m not going to say OMG again BUT you get my drift 😉 Silver Wattle Caravan Park have a couple of herb gardens by the camp kitchen. And whats more, they have some banana trees and what I think was a lime tree. I love this park!

Mount Morgan Silver Wattle Caravan Park Queensland herb garden
Photo: Herb Gardens

Mount Morgan Silver Wattle Caravan Park Queensland banana trees
Photo: banana Trees

Silver Wattle Amenities & Laundry

Amenities

As with most caravan parks they have an amenities block with your usual showers and toilets. As usual I don’t have to much to say about this area as we use our own. It’s clean and has some fresh little flowers by the sinks.

The Laundry

The laundry, which again we don’t normally use, was huge and again full of stuff to do or look at. Lets start with the laundry doors. The bottom of each door has been up cycled with corrugated iron and old rusty saws. It’s another nod to that rustic bush camp feel.

Mount Morgan Silver Wattle Caravan Park Queensland saw on door
Photo: Even The Laundry Door Has A Rustic Touch

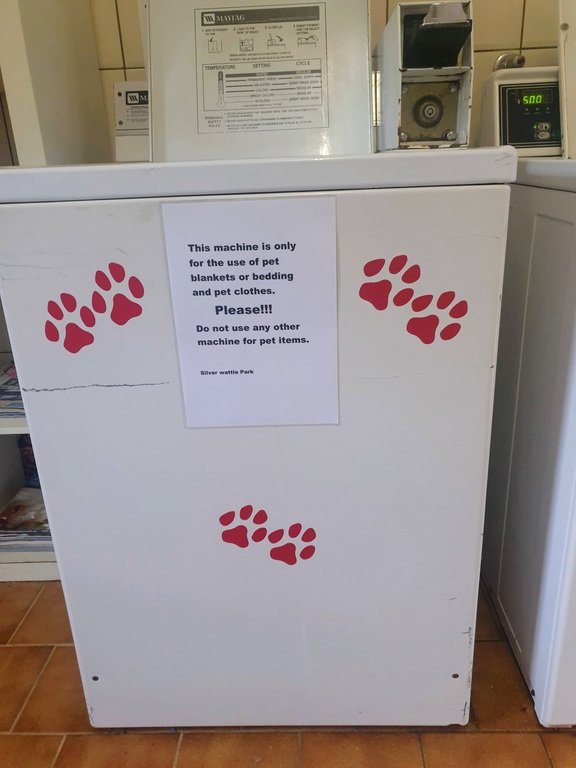
As well as the usual washers and dryers they have a dedicated pet laundry machine. You can see which is which by the paws 🐾🐾

Mount Morgan Silver Wattle Caravan Park Queensland dog bedding friendly washing machine
Photo: Washing Machine For Pet Bedding

Mount Morgan Silver Wattle Caravan Park Queensland washing machine laundry
Photo: Extras Like Ironing Board & Airer & Laundry Trolly

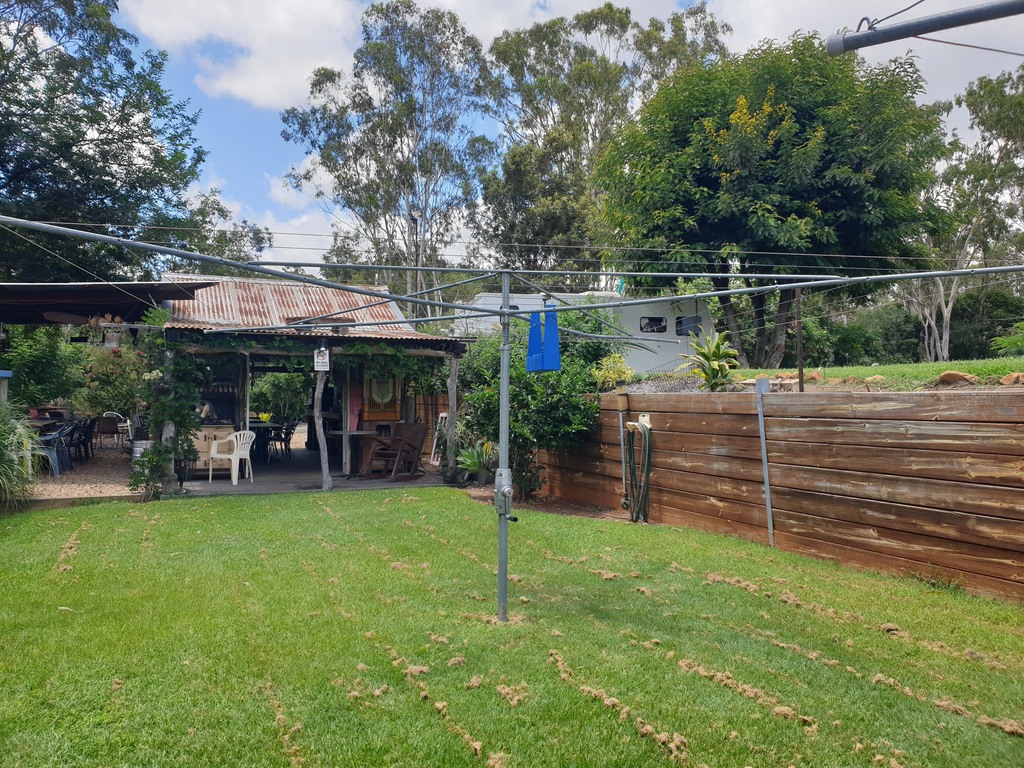
Drying racks are also in the laundry as well as an ironing board. A trolley is available for you to put your washing in to make it easier to take your washing to the three Hills Hoist washing lines. All of which have hand made peg holders full of pegs you can use.

Mount Morgan Silver Wattle Caravan Park Queensland washing lines
Photo: 4 Washing Lines Available & Peg Baskets On Every Line

Book Exchange/Games

After noticing a couple of games at the camp kitchen, I also noticed there is a large jigsaw collection and games in the laundry area. You’ll find them above the large book shelves which has large collection of magazines and books. They will keep you entertained while waiting for your washing or while relaxing in the park.

Mount Morgan Silver Wattle Caravan Park Queensland book exchange and games
Photo: Books, Games & Jigsaws

Mount Morgan Silver Wattle Caravan Park Queensland jigsaw on table
Photo: Do A Jigsaw While You Wait For Your Washing

Dump Point

Silver Wattle Caravan Park must have one of the best dump point areas we’ve ever seen. If you’re going to make whats a crapy job seem a little bit more interesting this is it. Walking to the dump point we passed heaps of rusty machine parts big and small, cement mixer and another washing machine relic. While on the other side of the path was a tree with anchors of different sizes hang in in a tree.

Mount Morgan Silver Wattle Caravan Park Queensland dump point
Photo: Dump Point Area

Arriving outside of the dump point, which looks like a mini shack, you see old lawnmowers that will take you back to your younger years. Inside the dump point area it was nice to see a sink to wash your hands. And of course more rustic memorabilia.

Have A Short Drive

Coffee & Shops

While in Mount Morgan, at Silver Wattle Caravan Park, we had a couple of minutes drive into the small country town for a coffee ☕️ Wattle Bee newsxpress cafe was a nice surprise. We had coffee and a muffin (yummy) in the funky window area. Wattle Bee also has heaps of gift ideas even caravanning ones.

This friendly place also has gifts, school stuff, jigsaws, small electrical appliances AND Caravan gifts to name a few. Oh and on a Wednesday they have amazing looking donuts 🍩😋 Unfortunately we didn’t get to try them. Next time! 😉

Mount Morgan great service at the local fuel station. Lady fills your tank for you
Photo: Service With A Smile At The Local Servo

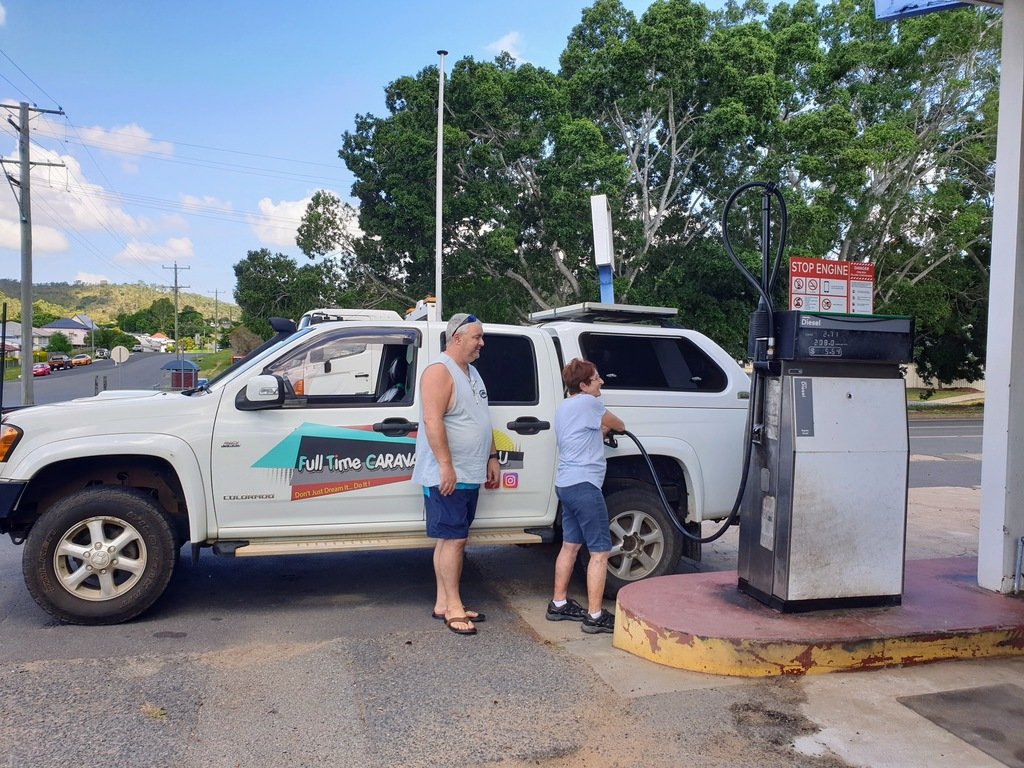
Mount Morgan also has and IGA, mitre 10, bakery, pharmacy, bottle shop, museum and more. Not forgetting the small local servo that still has service and a smile. This lady was outside our ute ready to help before we got out of the ute, fantastic service!

Lookout To History

Up one of the lookouts you can see over to the old Copper/Silver and Gold mine. This mine was active between 1882 and 1981, officially closing in 1990. Over those years they took out around 282 metric tons of Gold, 37 metric tons of silver as well as 387,000 metric ton of Copper. We had a drive to it to see if we could get close to it. Unfortunately we could only see the top of the chimney as well as some old buildings behind a fenced of area.

Mount Morgan lookout over the gold mine
Photo: Lookout Over To The Gold Mine

Mount Morgan gold mine
Photo: Old Gold Mine Building

Historic Rack Rail – Train Station

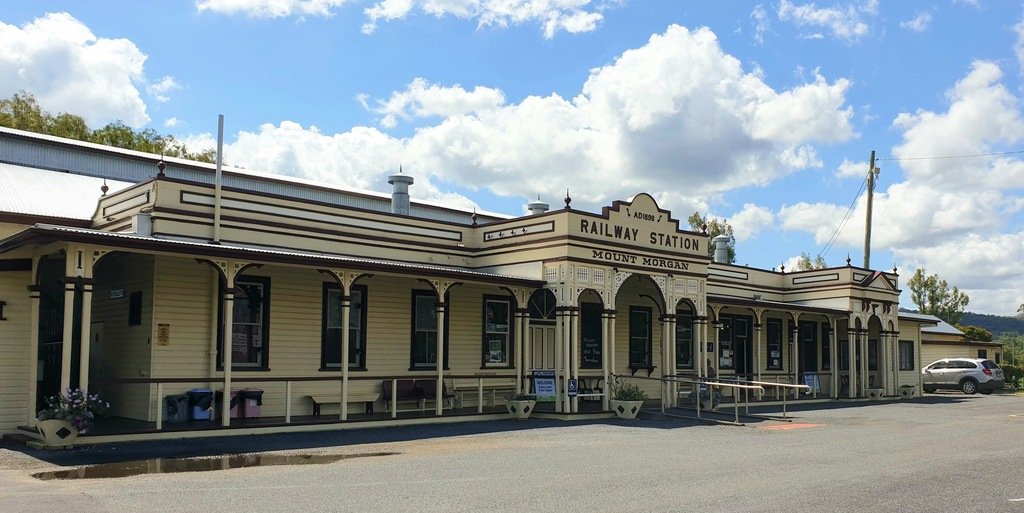
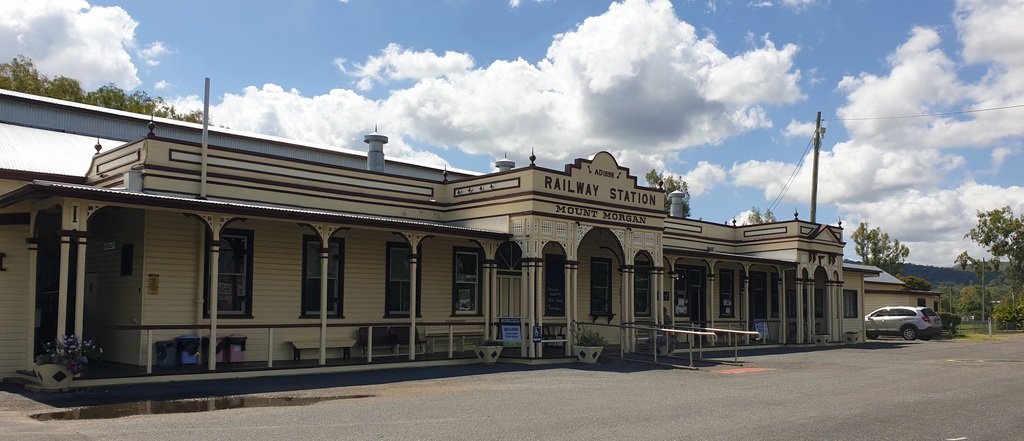
With the Gold mine getting bigger they needed better transport than the horse and bullock teams they were initially using. Maybe taking a leaf out Tasmania’s book. They built a Rack Railway system. Much like the one between Queenstown and Strahan in Tasmania. Mount Morgans Rack Railway was used between 1898 – 1952. Similarly it was open to passengers up until 1987.

Mount Morgan historic railway station
Photo: Mount Morgan Historic Railway Station

You can read all about the history of the Mount Morgan railway here. I would love to know what happened to the rail once it was removed? You can look around the gift shop or at a small cost look around the the railway museum.

To finish up. Our stay at Silver Wattle Caravan Park seemed to fly by. I kept finding new things to see in the gardens while walking around. Dave and Deb must have put so much work into the gardens and it shows. Silver Wattle Caravan Park must be their pride and passion.

Mount Morgan Silver Wattle Caravan Park Queensland cabins
Photo: Cabins And Rooms Also Available

Silver Wattle caravan Park is not just for camping and caravanning they also have cabins with up market BBQ kitchen areas outside on the varanders. We would very highly recommend a stay here. Hopefully we will visit again in the cooler months to enjoy the communal firepit . Visit Silver Wattle Caravan Park Website Here

More Information

  • Location : Mount Morgan
  • Click for Google map location
  • State: QLD
  • Pets: Yes
  • Camp type : Caravan Park
  • Price : $ 32pn or $192pw
  • Water ? : Yes
  • Power ? : Yes
  • Will suit: All sized vehicles
  • Is it on Wikicamps ?: Yes
  • Drive time to nearby shops: 2 minutes
  • WIFI (tested with boost): Yes
  • Amenities : Toilets, Showers, Laundry, Dump Point
  • Other : Books, games, fantastic camp kitchen, communal firepit, Funky old memorabilia, Lovely gardens, herb garden and fruit trees, complimentary eggs on arrival, quiet, green, nice hosts.

Aussie House Sitters are our choice of house sitting sites. Use our Coupon Code “AHS15%off” for 15% off your joining fee
Other Post You Might Like

Posted on

Moongan Hipcamp – Qld

Moongan Hipcamp Arcadia Mount Morgan Qld caravan parking

Getting To Moongan Hipcamp

This Moongan Hipcamp is located near Mt Morgan. The property is called Arcadia and is around 110km north of Biloela and 25km south of Rockhampton. We drove from Rockhampton down the A3 which was windy, and a bit of a butt clencher. In saying that, it was nothing like some of the roads we had traveled and Elephant pass in Tasmania. It’s definitely doable.

Moongan Hipcamp Arcadia Mount Morgan Qld
Photo: Moongan Hipcamp “Arcadia”

Whats Hipcamp?

Not familiar with Hipcamp? Hipcamp’s website shows you lots of unique camps on private land. Like the one here at Arcadia Moongan. Some examples of others we’ve stayed at are:

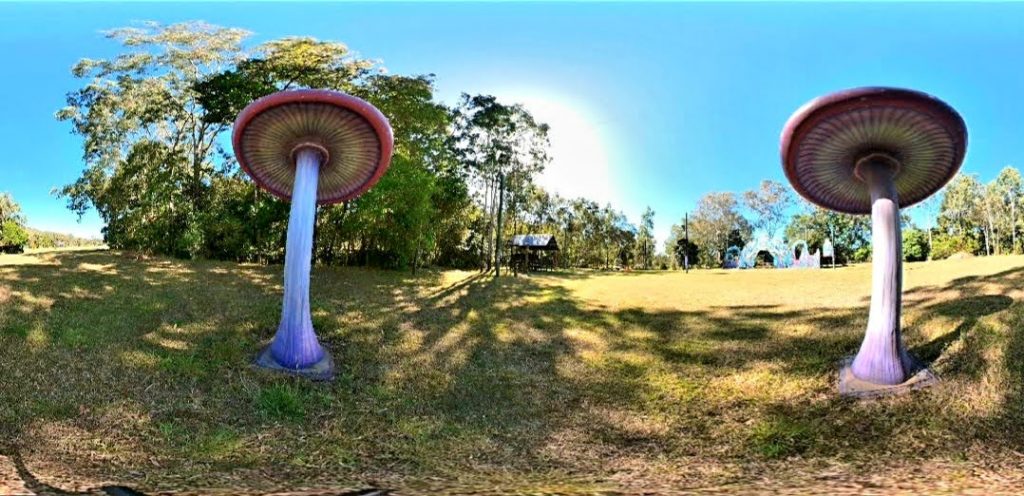
  • Mushroom Valley Eco Camp in North Queensland is a camp with a difference. Located between Mackay and Proserpine in the Whitsundays. This is also the location for the Mushroom Valley Festival. Consequently it has lots of funky installation art and it’s stage for you to check out. The river is an added bonus.
  • Spending Christmas & New Years on Farm On Franklin in Tasmania. That camp is a regenerative environmentally sustainable family farm by the river.
  • Also, Meralda Station in Cobar NSW, another great Hipcamp. This is a bush camp on part of a 400 acre property. As well as seeing heaps of stars and having a big communal fire you can do additional activities. Resin workshops, art classes and woman’s circle to name a few.

Hipcamp mushroom valley eco camp Qld
Photo: Mushroom Vally Eco Camp

Arriving At Moongan Hipcamp

Driving into this Hipcamp we arrived at the large paddock at the front of a property. The house is set back away from the paddock and behind a gate. You can pick where ever you would like to park, depending on if you would like to connect to power or not.

Moongan Hipcamp Arcadia Mount Morgan Qld caravan parking
Photo: Driveway in is 2wd

Moongan Hipcamp Arcadia Mount Morgan Qld caravan parking
Photo: Loads Of Room To Park

After we chose a spot we were warmly greeted and told to let them know if we needed anything. We hooked up to one of the two power points available next to where we parked. At this stage you do need an ampfibian as it is 10amp power. But this might change down the track.

This Is A New Campsite

Angie, the owner, mentioned we were only the second campers to have stayed at this brand new Moongan Hipcamp. She was also interested if we had any suggestions for the new camp. Adding, she was thinking of making an undercover area for people to get together and a communal fire pit.

Moongan Hipcamp Arcadia Mount Morgan Qld caravan parking
Photo: Nice Flat Grassy areas

Moongan Hipcamp Arcadia Mount Morgan Qld caravan parking
Photo: We’re Parked Next To The Power Box

It rained the days we were there so we spent them at the property. Only leaving once to drive to the nearby town of Mount Morgan for shopping. Although it rained constantly the ground was not soggy.

Nature All Around

While sitting out under our awning we watched the simple pleasures of nature. A couple of horses in the next paddock who came by a couple of times a day. While the confusion of guinea foul were a funny bunch, calling out to each other as they came around the van. A chorus of frogs could also be heard in the rain.

Moongan Hipcamp Arcadia Mount Morgan Qld caravan parking dogs and horses
Photo: Next-doors Horses & A Visit From One Of Arcadias Dogs

Moongan Hipcamp Arcadia Mount Morgan Qld caravan parking horses
Photo: Next-doors Horses Just Outside Our Van

The family have a couple of friendly dogs who came over and said hello. Your pets are also welcome here. One of the points of difference with Moongan Hipcamp is that you can camp with your horses! How goods that!

Moongan Hipcamp Arcadia Mount Morgan Qld caravan parking dogs and horses
Photo: Arcadia’s Dogs Visiting

Moongan Hipcamp Arcadia Mount Morgan Qld caravan parking guinea foul
Photo: These Guinea Foul Are so Funny To Watch Passing The Van

A Permaculture Hipcamp

Another reason I liked the sound of this camp, is that this Moongan Hipcamp is in the infancy of a permaculture makeover. Also, they are a home school family. I’m not entirely sure why, but something resinated with me when reading about this place. Talking to Angie you can see she has a passion for permaculture. In fact longer stays may be possible in exchange for farm work for like minded campers. Angie also has a great knowledge about the local history. Have a chat with her about ether subject, it’s all so interesting!

Moongan Hipcamp Arcadia Mount Morgan Qld caravan parking
Photo: Arcadia Homestead In The Background

Here’s What The Owner Angie Says …

We are at the very start of a permaculture makeover, with the design phase still in progress. Our business is named Moonrise Organixs and we have a produce stall at the front gate with an ever increasing range of chemical-free products. We have an infant orchard, mandala veggie patch, tea garden, poultry and a small grass arena. We are a kid, dog and horse friendly property!”

Hipcamp Au – Angie “Arcadia” Mt Morgan Qld

Have A Drive Or A Ride

Mount Morgan is an old gold mining town just 5km away from the Moongan Hipcamp. Here you can pop in to the IGA, Mitre 10 or have a coffee at the “Wattle Bee Next Coffee” or check out the museum a short stroll away. There are a couple of lookouts, one you can see the old gold mine in the distance. You can also look at the old railway museum, which is also a driver reviver. You’ll find heaps of room to park your caravan and have a break.

Angie told us there is an unofficial rail trail near by. Also, lots of tracks for horse riding, hiking, riding your bike, rock climbing and motorbike riding.

mount morgan railway station qld
Photo: Mount Morgan Railway Museum

Some might see this camp as “just a paddock with power” but look a little deeper and have a chat to Angie and you’ll notice the beauty of the simple things. I can’t wait to see how this camp and place evolves. Thank you Angie and your lovely family for opening up your property to others.

I’ll end with a quote from Angie –Come in peace, stay in harmony, leave with a full heart”

More Information

  • Location : Moongan – Near Mount Morgan
  • Click for Google map location
  • State: QLD
  • Pets: Yes – Horses also ok
  • Camp type : Hipcamp
  • Price : $ 20 plus Hipcamp booking fee – Check Moogan Hipcamp out here
  • Water ? : No – BYO
  • Power ? : Yes
  • Will suit: All sized vehicles
  • Is it on Wikicamps ?: Yes
  • Drive time to nearby shops: 5 minutes
  • WIFI (tested with boost): Yes
  • Amenities : None at present you need to be self contained with shower, toilet, water – Grey water ok on the ground
  • Other : Bring your horse, learn about permaculture and local history, visit nearby trails

Aussie House Sitters are our choice of house sitting sites. Use our Coupon Code “AHS15%off” for 15% off your joining fee
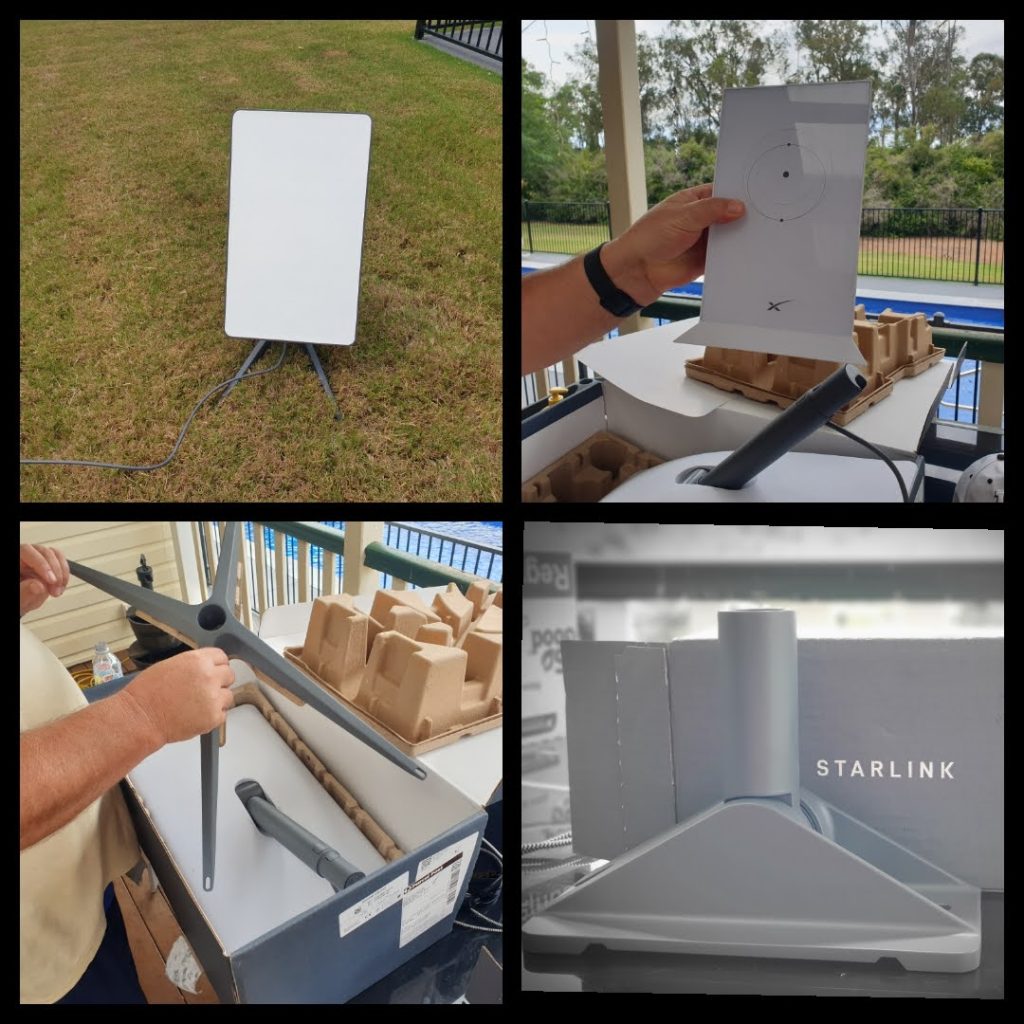
Other Post You Might Like

Posted on 2 Comments

House Sit Around Australia

house sit around Australia farm sit with a caravan Aussie House Sitters full time caravanning

It’s been a while since we did a house sit around Australia. Actually, we normally do farm sitting as we like the space, the animals and of course Larry likes to help out using the farm equipment.

Aussie House Sitters is the place we have no problem finding a house sit around Australia. Having just finished a fantastic farm sit through Aussie House sitters, I thought I’d recap on some of the ones we’ve done, before telling you about our most recent.

House Sit Around Australia – Previous Sits

Our first was a Farm in NSW – looking after painted horses and chickens. This was our first farm sit as well as our first time looking after horses. Arriving a couple of days before she went away, Carol, the industrious owner, showed us how to move the horses from one paddock to another while she was away.

house sit around Australia farm sit horses with a caravan Aussie House Sitters full time caravanning
Photo: Looking After Horses At Our First Farm Sit

house sit around Australia farm sit horses with a caravan Aussie House Sitters full time caravanning
Photo: Our First House Sit Around Australia

The chickens were just a case of letting them out in the morning to wander, feeding and putting them away in the arvo. We had fresh eggs every morning. While there, Larry fixed a water leak, knocked up a trellis for some tomatoes and fixed a door. He wasn’t asked to do this but Carol mentioned them in passing and Larry loves a project.

Lake Bathurst was another farm in NSW – This was taking care of an off grid property. Again, another first for us. In saying that Larry has made our van off grid and he’s worked with battery and generator power as well as RO plants and water tanks etc.

This property had stunning sunsets, chickens, cat’s and a horse. This was the first time the lovely owners had people house sitting and asked us to do more house sits since.

horse Feeding time on the farm  house sit around Australia farm sit  with a caravan Aussie House Sitters full time caravanning
Photo: Larry Feeding The Horse On A House Sit Around Australia

house sit around Australia farm sit horses with a caravan Aussie House Sitters full time caravanning
Photo: No Experience Needed To Look After This Horse

Lake Bathurst house sit around Australia farm sit horses with a caravan Aussie House Sitters full time caravanning
Photo: Stunning Sunsets At Our Farm sit

Another house sit around Australia was at an old olive farm in Victoria. Our farm Sit in Victoria was set above Lake Hume, it had spectacular views. Here we looked after a friendly dog, chooks, a couple of ponies, fruit trees and veggie patch. Now, we normally prefer to stay in our home on the road but if required we do stay in the property itself.

mind a dog with Aussie house sitters full time caravanning Farm sit house sit around Australia with a caravan Lake Hume
Photo: Larry & Our House Sit Do
Looking Down On Lake Hume From The Farm

mind a dog with Aussie house sitters full time caravanning Farm sit house sit around Australia with a caravan
Photo: We Watered & Eat The Fruit & Veg

Pizza oven in the garden house sit around Australia Aussie House Sitters farm sit
Photo: So Lucky To Be Able To Use The Pizza Oven In The garden

Apart from the micro bat and huntsman spiders we loved the pizza oven in the garden and the movie room. The owners even left us fresh home made pizza bases and let us have some of their home made preserves. Obviously those things are added bonuses that we don’t expect but which make the the stay more memorable.

In Queensland we took care of a beautiful old dog, rescue cat and kept an eye on some friendly cows. I (Sue) got to catch up with my Mum while in the area. Catching up with friends and family can be an added bonuses of finding a house sit around Australia.

house sit around Australia Aussie House Sitters farm sit sunset
Photo: Sunset Over Our Farm Sit

house sit around Australia Aussie House Sitters farm sit sunset and fire pit
Photo: We Got To Catch Up With Sue’s Mum Thanks To The Farm Owners

We had drinks around the firepit with Lysa, the very considerate owner, and her family, when they returned. Getting to know property owners and there family’s is something else we have been lucky enough to do while on Aussie House Sitters.

Also in Queensland, we looked after another off grid property. As well as looking after the most energetic dog we had ever met, there was a veggie garden to look after. The owners left us a car to take Zephyr (the energiser bunny dog) to the beach, as he loved the water.

Wireless one

House sit around Australua with Aussie House sitters Sunshine coast collage beach big pineapple and hinterland glass house mountains
Photo: We Got To See So Much Of The Sunshine Coast
While House Sitting

This house sit was on the Sunshine Coast, so it was an absolute pleasure to be asked to take the dog to the beach. Larry’s auntie and uncle lived nearby so we got to spend some quality time with his auntie before she passed away.

Our Latest House sit Around Australia

Over this Christmas and New Year 2022/23, we had a fantastic farm sit from Aussie House Sitters. This one was in a rural town, in the Mackay region of Queensland. On arrival we were greeted by the friendly owners. One of whom was called Larry! This was the first time my Larry, had ever met another Larry in his life, we all thought it was pretty funny.

Parking at  house sit around Australia Aussie House Sitters farm sit
Photo: Our Perfect Parking Spot At This Farm Sit

house sit around Australia Aussie House Sitters cows
Photo: You Can Look After Cows When You
House Sit Around Australia

Tent World

house sit around Australia Aussie House Sitters farm sit
Photo: Our Farm Sit With Aussie House Sitters

After being introduced to the gorgeous dog, Titan, we had a short drive to see the cows. While there, Larry showed Larry the water troughs and tanks. Later in the day, their cat, Tommy Tigger, came out to eat. This was Tommy Tigger standard for most of our stay. Sleep all day and pop up in the arvo for some tucker.

The owners made us dinner the night before they left, we were having such a good chat we all forgot the time. It didn’t matter is was a great night.

house sit around Australia Aussie House Sitters farm sit dog and cat gif
Photo: Tommy Tigger & Titan
Our Beautiful Farm Sit Animals

House sit around Australia Aussie House Sitters full time caravanning sitting with dog and cows
Photo: This Aussie House Sit Was Very Chilled Out
For Everyone!

After accepting this house sit on Aussie House Sitters, we had a call from the owners letting us know that Titan had had stitches. They wanted to know if we were still happy to do the sit and was happy for someone to come and remove the stitches while we were there. They gave us the chance to back out. It was good of them to be open and honest, but we were happy to go ahead with the sit. Titan is the sweetest dog and looks even more cute with his bucket on his head at night to stop him licking his stitches.

Until Titan got his stitches out, we didn’t want to walk him to much or take him to the dam on the property. Once the lovely neighbour came and removed the stitches, we were happy for him to play around a bit more. One of the many things we love about farm sitting is the open spaces and being able to go on walks without leaving the property.

dog at  house sit around Australia Aussie House Sitters farm sit
Photo: Walking On The Property With Titan

Aussie House Sitters are our choice of house sitting sites. Use our Coupon Code “AHS15%off” for 15% off your joining fee
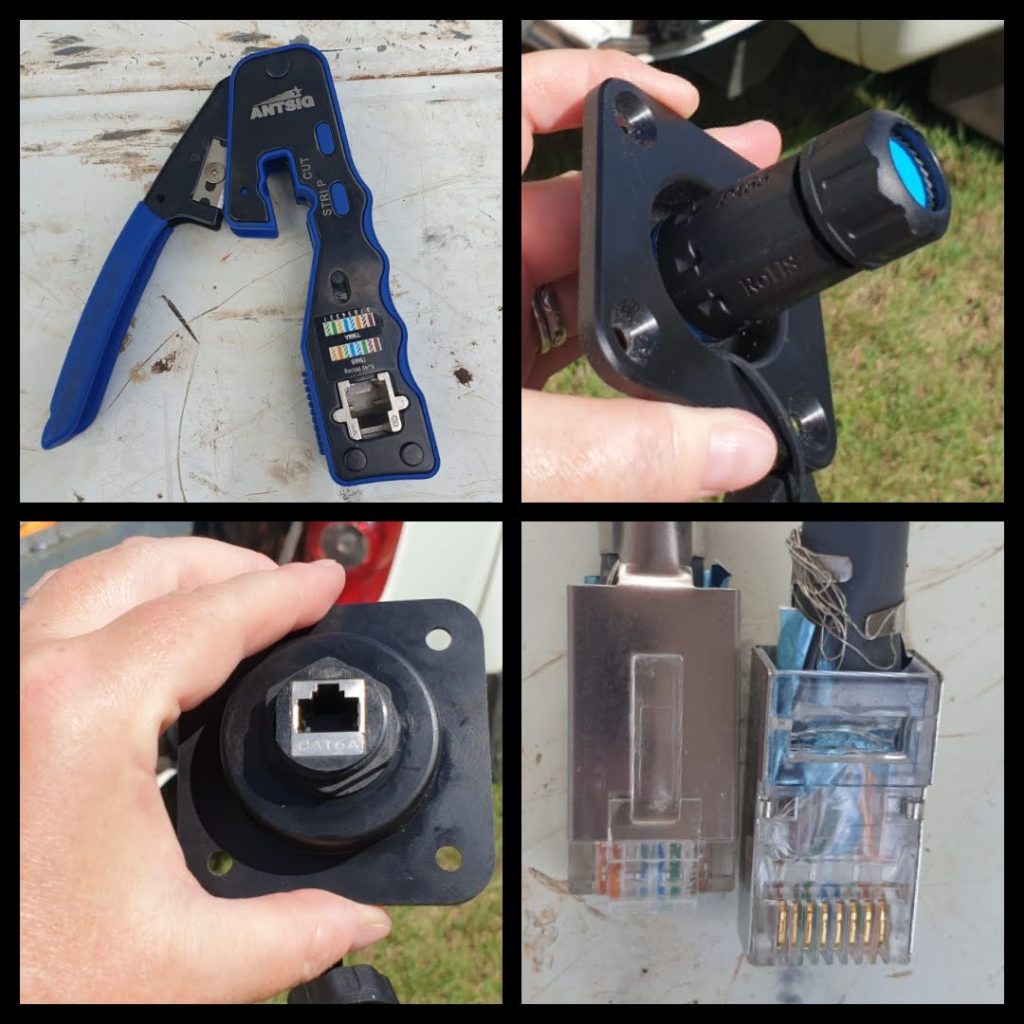
Dam at  house sit around Australia Aussie House Sitters farm sit
Photo: The Dam – Great for a swim and a kayak

In the evening Tommy Tigger, the affectionate cat, would come and find us. Me-owing to let us know it was dinner time. After some TLC and a bit of nudging by Titan (as he didn’t want to miss out on the attention) we served them their food.

The cows basically looked after themselves. We just had to make sure they were all accounted for and had water. At times they would come and sit near the house a little weary at first as they didn’t know us.

As with other house sits, there was some watering of plants. At this place they were on the large deck. You could even hear green tree frogs ribbiting behind some of them when it rained. Around the property we sore rainbow lorikeets, friendly butcher birds and magpies coming for a feed and some water. Not forgetting the large mobs of roos that scattered when we turned up. And we can’t forget the Monitor Lizard trying to hide up the tree from those birds.

Monitor Lizard in tree at house sit around Australia Aussie House Sitters farm sit
Photo: Monitor Lizard In Tree Near Van

house sit around Australia Aussie House Sitters farm sit
Photo:This Aussie House Sit Is A Paradise For Wildlife

Parking at  house sit around Australia Aussie House Sitters farm sit
Photo: A Magical Time At Dusk

house sit around Australia Aussie House Sitters farm sit dog
Photo: A Little Bit Of TLC Is Priceless

Taking the rubbish out on a farm sit can be interesting. On one farm they didn’t have council rubbish collectors. We separated things we could burn, crush cans in a separate bin and took other rubbish away from the property. Here Larry rode the quad bike the short distance to the bins at the end of the drive. You know he loved it!

house sit around Australia Aussie House Sitters farm sit
Photo: Coming Back From Taking The Rubbish Out

As it was Christmas, the owners, left us something under the Christmas tree, how amazing is that! No wonder we didn’t need to leave the property for over a week it was to good to leave 😀

house sit around Australia Aussie House Sitters farm sit
Photo: The Home Owners Left Us Presents Under The Christmas Tree – #SO-LUCKY

The night the owners got back we all had a great chat over dinner and drinks. The next day we said our goodbyes to our new friends and lovely Titan. This will certainly be one of our most memorable sits from Aussie House Sitters

Why House Sit Around Australia?

  • Joining Aussie House Sitters has given us the chance to park and stay for free around Australia.
  • Rent free, free power and water. This means we can save money and travel for longer.
  • We get to discover the surrounding areas, such as beaches and small country towns.
  • As mentioned, we also have the opportunity to catch up with family and friends.
  • Not having pets ourselves we love looking after a multitude of different animals.
  • Meeting the home and pet owners is pretty special as well.

If you have ever thought about doing a farm or house sit around Australia we would highly recommend it. House sits can be in any state or territory, a city, a suburb or in the middle of nowhere. They can be for a couple of nights, a few weeks or months. If you do choose to join Aussie House Sitters, follow one of our links to Aussie House Sitters as we have a discount code that gives you 15% off the normal price, use AHS15%off at the checkout

To finish, have a smile at this video of Larry & Titan having a boogie 😀

Video: Larry & Titan Having A Dance

If You Like Our House Sit Around Australia Post You Might Also Like:

Aussie House Sitters are our choice of house sitting sites. Use our Coupon Code “AHS15%off” for 15% off your joining fee
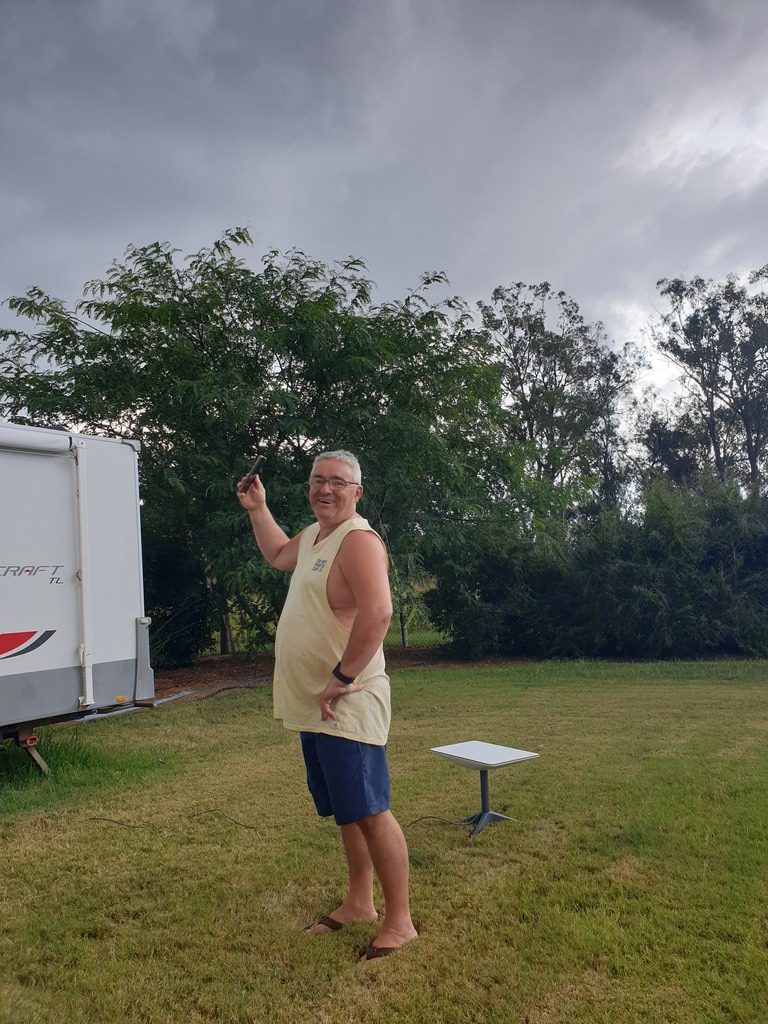
Posted on 3 Comments

Tropicana Caravan Park – Sarina – Qld

Tropicana Caravan Park Sarina Qld art painted on on-site vans

Tropicana Caravan Park came up on my radar when we were looking for a place to camp in Sarina. As we had a farm sit to go to, this park ticked all the boxes. WikiCamp reviews were all positive and I loved the photos with the extra touches of flowers in the amenities and the painted caravans.

entrance to Tropicana Caravan Park Sarina Qld
Photo: Entrance To Tropicana Caravan Park

Wireless one

Tropicana Caravan Park Sarina Qld
Photo: The Sign Is The First Of Many Paintings In The Park

Tropicana Caravan Park

On arrival at reception you’ll see they have handmade candles for sale as well as ice cream fridge, perfect on those hot days.

Sierra, the friendly owner walked me to our drive through site as Larry followed with the van. Sierra gave me a run down of the parks amenities, dump point, pool etc while Larry pulled up on our large drive through site. It was a level site surrounded by palm trees and grass.

Large drive through sites at  Tropicana Caravan Park Sarina Qld
Photo: Large Drive Through Sites

Large drive through sites at  Tropicana Caravan Park Sarina Qld
Photo: Large Drive Through Sites

Family owned and run for 20 years, Tropicana Caravan Park in Sarina is a smaller park. In saying that, big rigs have heaps of room to park. Whether that’s a drive through site or on the large grassed areas. Not only that but they have cabins available. One of which is accessible to all, having a ramp up to the entrance.

Large drive through sites at  Tropicana Caravan Park Sarina Qld
Photo: Well kept Grass & Gardens

Large drive through sites at  Tropicana Caravan Park Sarina Qld
Photo: Cabins Available

Walking around you can see why they call it Tropicana caravan park. The palm trees, coconuts, banana trees, green grass and bushes give it that tropical feel. In the evening kookaburras can be heard in the surrounding trees while in the day time we noticed bush turkeys. Not forgetting the resident chickens, who wander around scratching and foraging. Speaking of chickens, Sierra came around with some complimentary fresh eggs in the afternoon, how good is that! It’s another thumbs up from us 😀

free range chickens at  Tropicana Caravan Park Sarina Qld
Photo: Free Range Cooks

Tent World

tropical gardens Tropicana caravan park Sarina
Photo: I Do Love Stag-horn Looking Plants

Large drive through sites at Tropicana Caravan Park Sarina Qld
Photo: Green Everywhere You Look

The pool is a little tropical oasis on those hot summer days. Next to which is the camp kitchen and bbq area. You’ll find the usual fridge, microwave, toaster, kettle and seating.

the pool at Tropicana Caravan Park Sarina Qld
Photo: Pool At Tropicana Caravan Park

Camp kitchen and BBQ area by the pool at Tropicana Caravan Park Sarina Qld
Photo: Camp Kitchen & BBQ Area By The Pool

Caravans At Tropicana Caravan Park

As you enter and leave the park, you’ll notice some older on-site caravans that have been painted by Gwada Murals. They have a tropical theme. A nice little point of difference from other caravan parks. Some have rainbow lorikeets others kookaburras and others frangipani and birds of paradise. All of of them done by a talented artist. I believe some of these caravans are available to rent.

caravan art work at Tropicana Caravan Park Sarina Qld
Photo: Painted On-site Caravans

Tropicana Caravan Park Sarina Qld art painted on on-site vans
Photo: The Amazing On-site Painted Caravans

For those that work as they travel, like us, this park and these caravans would be a great option when it comes to working the sugar cane season. Check out Gwada Murals on Facebook for more of their art.

Park Amenities

Normally, I use our own on-suite rather than a parks amenities but as we were parked right by them I gave them a go. When I headed in to the Tropicana Caravan Parks amenities I noticed one of the sinks had a mix of beautiful fresh flowers in water. What a lovely way to brighten up a place that can be so boring.

beautiful fresh flower arrangement in the sink at Tropicana Caravan Park Sarina Qld
Photo: Fresh Flowers In The Amenities Block

Amenities at Tropicana Caravan Park Sarina Qld
Photo: Amenities Block

The showers have everything travellers want. A large cubical with bench space, heaps of hooks and a place to put your body wash and shampoo. Each day they write the thought for the day on a chalkboard outside the amenities. It’s just nice to see the owners show they care about there guests.

Chalk board with message at Tropicana Caravan Park Sarina Qld
Photo: A Morning Mantra Maybe

Have A Drive

Sarina Sugar Shed is a couple of minutes down the road. We didn’t do the tour but I wanted to check out the shop and cafe. As well as schnapps they make ice cream. We had the cookies and cream, it was very nice to. They also have fancy chocolate, fudge, sauces and jams etc. As for the cafe, it has light lunch items like toasted sandwiches and cheese platters, scones, coffee and milkshakes.

As well as the regular tour you can do a rum distillery tour and tasting sessions are available.

Sarina beach was a little wild and woolly so we didn’t go for a walk. However the Palms Restaurant opposite the beach was a nice place to go for lunch. They also do breakfast and dinner if you don’t mind the short 15km drive. A bonus for those with dogs is this beach also has a dog off leash area.

Serina Beach is just a 15 minuet drive from Tropicana caravan park Sarina
Photo: Sarina Beach

Palms Restaurant at Serina Beach is just a 15 minuet drive from Tropicana caravan park Sarina
Photo: Palms Restaurant At Sarina Beach

Tropicana Caravan Park is a two minute drive to Sarinas main street which has all your usual basics. They include woolies, chemist, bakery, Miter 10 etc. not forgetting the big cane toad.

the big cane toad sarina queensland
Photo: The Big Cane Toad

After taking over the Tropicana Caravan Parks, after the passing of a family member, Sierra has been updating the park. If you have stayed before, it’s worth checking it out again. On the other hand if you haven’t stayed here, this family owned park it’s worth staying at. You won’t find jumping pillows, water slides etc. However, you will find a friendly, quiet, neat family run park.

  • Give them a call to ask about weekly rates, Budget cabins, on-site vans and long term rates.
  • Phone: 07 4956 1480
  • Address: 4 Greetham St, Sarina, Queensland

More Information

  • Location : Sarina
  • Click for Google map location
  • State: QLD
  • Pets: Yes
  • Camp type : Caravan Park
  • Price : $ 35pn for two people – Give them a call to ask about weekly rates, cabins, on-site vans and long term rates.
  • Water ? : Yes
  • Power ? : Yes
  • Will suit: all sized vehicles
  • Is it on Wikicamps ?: Yes
  • Drive time to nearby shops: 2 minutes
  • WIFI (tested with boost): Yes
  • Amenities : Showers, toilets, laundry
  • Other : Wheelchair friendly cabin, camp kitchen, swimming pool, BBQ’s, gas bottle exchange, ice cream, candles, dump point

Aussie House Sitters are our choice of house sitting sites. Use our Coupon Code “AHS15%off” for 15% off your joining fee
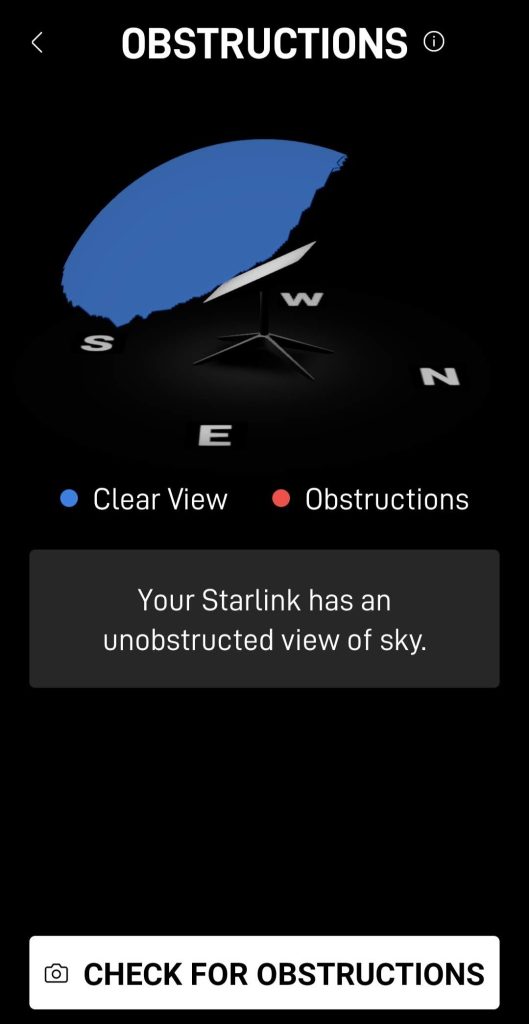
You Might Also Like

Posted on 3 Comments

Taking Our Caravan Washing Machine Out

Taking Our Caravan Washing Machine Out in Jayco Starcraft caravan. new Sphere 3.3kg washing machine in on-suite full time caravanning

Something we had been dreading since we got our van was taking our caravan washing machine out. We knew it was going to be a big job if it broke or needed replacing. Those who have the same set up know the struggle is real.

For us, our washing machine is used as you would in any household. I would rather wash my smalls and sheets in my own machine. Also, when we’re out in woop woop and Larry’s working on a station there isn’t a launderette for km.

taking our caravan washing machine out jayco starcraft 2016 21 foot caravan.
Photo: Our Washing Machine Stuck In The Corner

In our Jayco Starcraft 2016 the washing machine is located in the corner of our on-suite next to the toilet. Tightly stuck behind a wood surround and has a cupboard above it. Not being able to take it out forward or upwards.

Up until now we had had little glitches, like the spin cycle not kicking in when it should. That is until we turned it on and off again as you seem to have to do with electronics these days. Until now, that old chestnut had worked for us. No more!

Taking Our Caravan Washing Machine Out – Questions

After turning our machine on and off several times and it still not spinning, it was obvious to us we had to take it out. We had so many questions. How do we go about taking our caravan washing machine out ? Do we have to take out the whole vanity or the top cupboard? Can we take the toilet out and do it that way? Do we try and fix it or do we buy a new one? How long do we have to wait for a new one to arrive? If we take it out and put a new one in, will we have the same issues taking it out next time? All these questions and more ran through our heads.

Taking Our Caravan Washing Machine Out new Jayco starcraft on-suite Sphere 3.3kg washing machine full time caravanning

My photo above is of our on-suite and is actually the finished look, once we dismantled the cabinet and put it back. Can you see the cut we made and new screws? I can’t 🙂

Looking at the photo below, you can see the new 2022 Jayco caravan, they have left the front section off. They must have learned how inconvenient it is. Personally I think it looks unfinished and they could do much better. Keep reading to see how we did it & check out our full video at the end.

Just to note: The Sphere 3.3kg operation manual actually says “Step 1: The machine must be installed in a serviceable area, this must not be mounted or installed within a concealed cupboard or in a hard to service location. Should a service under warranty be required this cost of accessing the machine is not covered by the warranty terms”.

Jayco washing machine 2022 easier to remove than taking our caravan washing machine out in a Jayco starcraft 2016
Photo: What The 2022 Version Looks Like

Deciding To Buy A New One

Taking our caravan washing machine out, I could see how disgusting it had got over the years. Working on outback stations with dirt, dust and dirty uniforms the poor machine looked sad. I couldn’t clean the front of the the washing machine or get to the underneath of it. As someone who likes things clean and tidy I feel embarrassed that it looked like that.

taking our caravan washing machine out jayco starcraft
Photo: Once Out, We Could See How Dirty It was

taking our caravan washing machine out jayco starcraft
Photo: Broken Pieces & Dirt At The Bottom As You’re Not Being Able To Get To It

After lifting the machine out, we noticed broken bits of plastic under it. Larry took it outside and pulled it apart to see if he could see an issue. He thought it might have been the belt but that looked ok. Larry being an ex-mechanic can and has fixed a multitude of machines, big and small. But, not wanting to go through the rigmarole again and it being a bit touchy, we decided to plunge for a new one.

Another Sphere 3.3Kg Washing Machine

Looking online for the same machine as we knew it would fit back in the hole, we chose another 3.3Kg Sphere caravan washing machine. It had worked well for us over several years, until recent times. This machine was roughly the same price wherever we looked. Postage however differed greatly from site to site. Larry found one on Outback Equipment with free delivery. I had a google for a discount code for them and found one for 5% off. In the end the total price was around $385 including delivery.

I thought our caravan renovations were over once we re-upholstered our caravan club lounge and did a makeover on our caravan cupboard doors. I was wrong!

Taking Our Caravan Washing Machine Out

The biggest dilemma, was that with no door in the front of the bathroom cabinetry and no screws on the outside, taking it out was not so easy.

First step in taking our caravan washing machine out was removing the lid in the bathroom bench. The same with the top of the bench. This part also had to be prised off as it had been stapled to the back wall and bathroom vanity. From the looks of it, the machine was put in before the back wall was put in place.

taking our caravan washing machine out jayco starcraft
Photo: First We Removed The Lid To So We Could See Better

taking our caravan washing machine out jayco starcraft
Photo: Prising The Staples Off In The Corner

Now we could see more clearly how hard it was going to be, taking our caravan washing machine out. The front of the machine was jammed hard against the electric point, meaning, lifting the washing machine and leaning it forward to lift it out was not an option. Moreover, the cupboard above was also in the way.

taking our caravan washing machine out jayco starcraft cupboard above is in the way
Photo: Looking How Tight Our Caravan Washing Machine Is Fitted

taking our caravan washing machine out jayco starcraft cupboard above is in the way
Photo: Not Much Movement Room

Tent World

Looking more closely, a bracket was holding together the two sides of the cabinetry as well as brackets holding the cabinet to the floor, all of which had screws accessible from inside the cabinet area. This meant, too remove the cabinet one has to remove the washing machine first.

taking our caravan washing machine out jayco starcraft 
screws on the inside you cant get to
Photo: Inconvenient, Inside Bracket Holding Sides Together

I did ask on our Full Time Caravanning Facebook page if anyone had taken one out in similer circumstances. A few people said to take the toilet out. Even if we had taken our toilet out, as well as the back toilet wall, the surrounding cabinetry would still be attached to the sink vanity from the inside.

Taking out the above bathroom cabinet and lifting the washing machine out was our only option. And that wasn’t as easy as we thought. After removing all the screws we could see, the cupboard still didn’t want to come down.

Prising the trim off the ceiling was also a bit of an issue, as it broke in half. Not a big deal though as it could be replaced easy enough. In the end, one sneaky screw was still in the corner of the ceiling, which we could feel, but not see. The trim was glued back in place and you can’t see the join.

taking our caravan washing machine out jayco starcraft cupboard above is in the way
Photo: Removing Cupboard To Get The Washing Machine Out

taking our caravan washing machine out jayco starcraft
Photo: Trim Broken Off Too Get A Better View

Future Proofing – Taking Our Caravan Washing Machine Out

Taking our caravan washing machine out, I wondered if we would have the same issues taking it out next time? To right we would!! That’s why Larry made it future proof. In short, cutting the front of the washing machine cabinetry away with a jigsaw. Then putting it back in place with an easier option to remove it in the future.

How the?… What the?… Well… we thought it best to saw as near as possible to the attached bathroom sink vanity. Taking the nearest vanity door off and hoping the cut would ultimately be hidden behind it.

taking our caravan washing machine out jayco starcraft cutting the Cabinet away to get it out
Photo: Vanity Door Removed To Saw Down Cabinet

taking our caravan washing machine out jayco starcraft cutting the Cabinet away to get it out
Photo: Cut As Close To The Vanity As Possible

To attach the vanity side of the cabinet back on, Larry decided to screw a piece of wood on the inside. This was to attach the side of the washing machine cabinet back on to the bathroom sink vanity. After attaching the wood to the vanity on the inside, the washing machine cabinetry could be put back in to place.

Then, when we’re ready to put it all back together, Larry can attach the washing machine cabinetry to the wood from the outside. This way, we only have to remove a few screws, “that we can actually get to”! And, they will also be hidden behind the vanity door.

taking our caravan washing machine out jayco starcraft cutting the Cabinet away to get it out
Photo: Larry Cut The Cabinet So We Can Remove It Easier In Future

taking our caravan washing machine out jayco starcraft cutting the Cabinet away to get it out
Photo: Wood Added To Attach Cabinet Back On

Re-attaching the side to the back of the toilet and outside wall was a different story. Here we got some wood and cut it to fit down the outside wall and on the floor. The washing machine cabinetry would slide between the back of the toilet and this wood, keeping it in place. Ultimately, we would not have to use any screws to attach this side again.

In the below photo, you can also see that the existing wiring has been redirected from around the front cabinet panel to around the side and back wall. This also allows us to remove the washing machine without cables being in the way. However it does mean the front power point is no longer connected, but that’s a small price to pay.

taking our caravan washing machine out jayco starcraft cutting the Cabinet away to get it out Sphere washing machine full time caravanning
Photo: Clean & New Wood In Place

taking our caravan washing machine out jayco starcraft cutting the Cabinet away to get it out
Photo: The Side Of The Front Of The Cabinet Will Slide Between The New Wood

taking our caravan washing machine out jayco starcraft cutting the Cabinet away to get it out. Making it easier to remove in future
Photo: Cabinet Slid Back In To Place, No Screws Needed At The Side

The wood that was cut for the bottom, would be used to attach a couple of screws on the outside. Again, easier for taking our caravan washing machine out, if we needed to remove it again. Note: our washing machine area has an extra piece of wood above the floor, that the machine sites on.

Putting A New Caravan Washing Machine Back In

Our 3.3Kg Sphere caravan washing machine arrived in about a week. To be exact, it arrived at our near by post office, which is where we picked it up from. On a side note, Australia Post is great for full time travellers who need to order things online or to receive mail. Just get them to send the item to your designated post office at your designated destination.

Unboxing our new machine, it seemed so small and clean compared to the old one. In fact it was perfect.

Taking Our Caravan Washing Machine Out Jayco Starcraft new Sphere 3.3kg washng machine full time caravanning
Photo: Our New Sphere Washing Machine

Taking our caravan washing machine out and preparing the space made it easier for us to bung the new one in. In saying that, we still needed to prepare the new washing machine. The new one came with a base cover, which Larry attached. Maybe that’s what was broken at the bottom of the old one?

Taking Our Caravan Washing Machine Out Jayco Starcraft new Sphere 3.3kg washng machine base plate full time caravanning
Photo: Attaching Base Plate To The New Sphere Caravan Washing Machine

Larry then attached the old metal bracket to the back of the new machine. This is to keep the machine in place and to stop the washing machine rattling to much.

Taking Our Caravan Washing Machine Out Jayco Starcraft new Sphere 3.3kg washing machine attaching bracket  full time caravanning
Photo: Gap Attaining Bracket To Wall

Taking Our Caravan Washing Machine Out Jayco Starcraft new Sphere 3.3kg washing machine attaching bracket full time caravanning
Photo: Adding Wood To The Back Of The Bracket To Stabilise The Machine

When putting the new Sphere washing machine in and adjusting the foot to make it level, the bracket didn’t touch the wall. Larry added a spacer in the form of a piece of wood which filled the gap nicely.

After the machine was placed in to it’s new home I could see what a great idea it was to add the wood to the floor and to the vanity Cabinet. It was going to be so much easier to re-attach the frame.

Taking Our Caravan Washing Machine Out Jayco Starcraft new Sphere 3.3kg washing machine full time caravanning
Photo: Larry Putting Our New Sphere Washing Machine In

Taking Our Caravan Washing Machine Out Jayco Starcraft new Sphere 3.3kg washing machine full time caravanning
Photo: A Perfect Fit

Larry slid the front of the washing machine Cabinet back in to place. The side by the wall fitted nicely between the wood Larry had attached and the back of the toilet. And, the front and vanity side, matched nicely to the wood he had attached.

Holes were drilled in the bottom of the Cabinet as this was going to screw in to the new wood on the floor. After removing this and taking our caravan washing machine out, it could now get put back in to place.

taking our caravan washing machine out jayco starcraft cutting the Cabinet away to get it out Sphere washing machine
Photo: Measuring Where The New Holes Are Going To Be

taking our caravan washing machine out jayco starcraft cutting the Cabinet away to get it out Sphere washing machine
Photo: Sliding The Cabinet In To Place

Larry screwed one side to the vanity with the new piece of wood he had put in place. He had placed the screws as near as possible to the vanity so they would be hidden behind the door we had taken off. Once that was in place Larry added a few screws in to the bottom making it secure.

Taking Our Caravan Washing Machine Out new Sphere 3.3kg washing machine full time caravanning
Photo: The Wood Connecting The Vanity To The Cabinet & Attaching In The Bottom

As you can see, once the vanity door was put back on, you can barely see the screws behind the door. Much like the floor screws.

Taking Our Caravan Washing Machine Out new Sphere 3.3kg washing machine full time caravanning
Photo: You Would Never Know It Was Taken Off

Lastly, we re-attached the top of the washing machine vanity and the lid.

Photo: Better Than New!

To wrap this post up. Next time we have to take our washing machine out, it will be 100% easier. All we have to do is:

  1. Take the top off the the washing machine vanity
  2. Unscrew the bottom of the cabinet
  3. Unscrew the side of the cabinet
  4. Pull the cabinet out

That’s it!!

Our Full YouTube Video – Taking Out Our Caravan Washing Machine & Putting Our New Sphere In

If you like our “taking our caravan washing machine out” post you might also like

Aussie House Sitters are our choice of house sitting sites. Use our Coupon Code “AHS15%off” for 15% off your joining fee
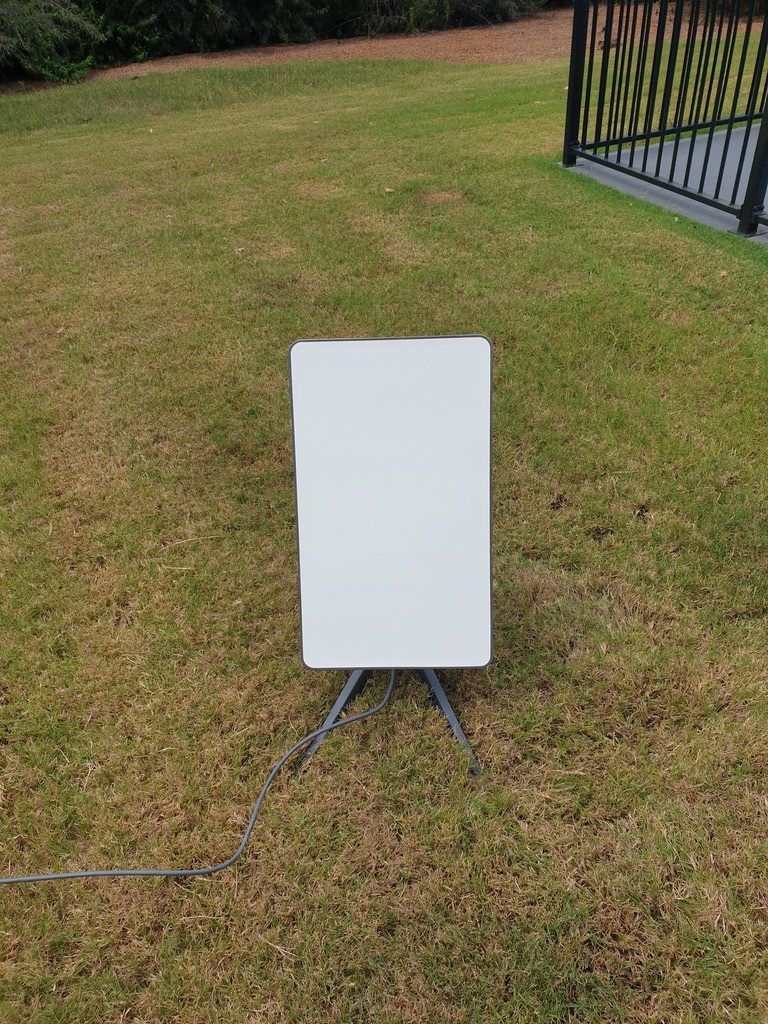
Posted on 4 Comments

Upholstering Our Caravan Lounge

Upholstering our caravan lounge club lounge full time caravanning caravan makeover

Upholstering our caravan lounge is part of our caravan makeover. I’ve been wanting to change the material for a long time. After several years of full time use, travelling in dusty areas and Larry working in dirty jobs, our club lounge was looking a bit worst for wear.

Upholstering our caravan lounge club lounge pilling. full time caravanning
Photo: Pilling in part of our club lounge

Upholstering Our Caravan Lounge – Why?

Over the years, our club lounge couch has had a few spills, like tomato sauce over the seats. Also, parts had become loose, as well as pilling with little balls of lint. I had taken the bottom seat covers off to be washed at one stage but they still looked dishevelled.

Upholstering our caravan lounge. Club lounge fabric loose. full time caravanning
Photo: Old couch material becoming loose

When we first bought the van it was meant to come with leather seats. They would have been great to wipe down anything that landed on them. Although, having had leather couches before, I knew they would be to hot in the summer. Especially when we’re off grid with no air-con.

new caravan club lounge upholstering
Photo: How our caravan club lounge looked originally

We had a chat about what new colour and what fabric to buy and decided on sticking with black. Black hides a multitude of sins which is good for (shall we say) the laid back approach our couch puts up with.

Items For Upholstering Our Caravan Lounge

  • A Good Staple Gun – Larry already had a great stapler from adding carpet to a box he made for one of our inverters.
  • Loads Of Staples – We had a few hundred staples but bought a thousand more just in case.
  • Upholstery Material – Our fabric is from Spotlight. After looking for upholstery fabric in store on two separate occasions, we chose our upholstery fabric. I had joined the Spotlight VIP club online for free, as you can get big discounts as a member. I think they also had a sale on at the time. AND I received another $10 welcome discount for my first purchase. At the checkout the price was reduced to $189, saving us $103. Upholstering our caravan lounge was cheaper than I thought it would be!
  • Wading/Stuffing – Was also bought from Spotlight to fill out our bottom seats
  • Stretched Wire– for added security. To put between the cushions and keep them in place in case the staples came out. We should have more faith in ourselves, I don’t think we needed to add it.
  • Ply Wood – for bottom seats as we were not using zipped cushions any more. We purchased a 2440 X 1220 X 3MM Piece of Ply wood from Bunnings.
  • Jigsaw – To cut the wood for the bottom seats (Larry already had one).
  • Sand Paper – To rub down the wood once cut.
  • Fabric Protector – to help keep it nicer for longer
  • Space To Work – Our bed was our workshop for doing this project. You might have a better option.
Upholstering our caravan lounge. Club lounge fabric from Spotlight. full time caravanning
Photo: Black upholstory fabric, fabric protection spray and stretch wire from Spotlight

Upholstering our caravan lounge. Club lounge. 3mm ply wood from Bunnings. full time caravanning
Photo: 3mm ply wood for the bottom cushions

Upholstering Our Caravan Lounge – Back

We started with the back cushions of our club lounge as we thought they would be the easiest. They already have wooden backs which we could just staple the fabric to. Starting with one of the side back cushions, we striped the old black material off. This took more time than I thought as it had literally hundreds of staples we had to remove.

Upholstering our caravan lounge. Club lounge. Removing staples. full time caravanning
Photo: Removing the hundreds of staples from the old backing and material

Upholstering our caravan lounge. Club lounge. Removing staples. full time caravanning
Photo: Using a staple remover is a little easier than a screwdriver

After removing the old fabric the two cushions could be separated. Then stapling began to attach the new fabric to the top of the wood. The top cushion was then stapled in place under the new material, followed by the bottom cushion.

Upholstering our caravan lounge. Club lounge cushions with fabric removed. full time caravanning
Photo: Club lounge back cushions

Upholstering our caravan lounge. Club lounge cushions stapling fabric on. full time caravanning
Photo: Stapling the new fabric on top of back cushion

Upholstering our caravan lounge seat. back of Club lounge makeover full time caravanning before and after
Photo: putting fabric over the back bottom cushion

The sides/corners were the hardest parts to do while upholstering our caravan lounge. Trying to get no creases was a challenge. A few staples we had put in, got taken out, until we were happy with it. At the end of the day, you can’t actually see most of the corners of our club lounge. The other corners are out of site, behind framing or hidden next to other corners.
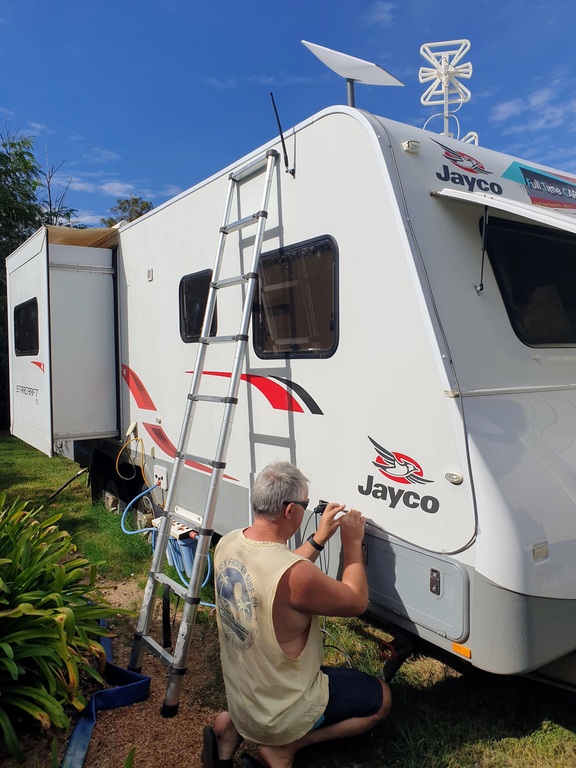
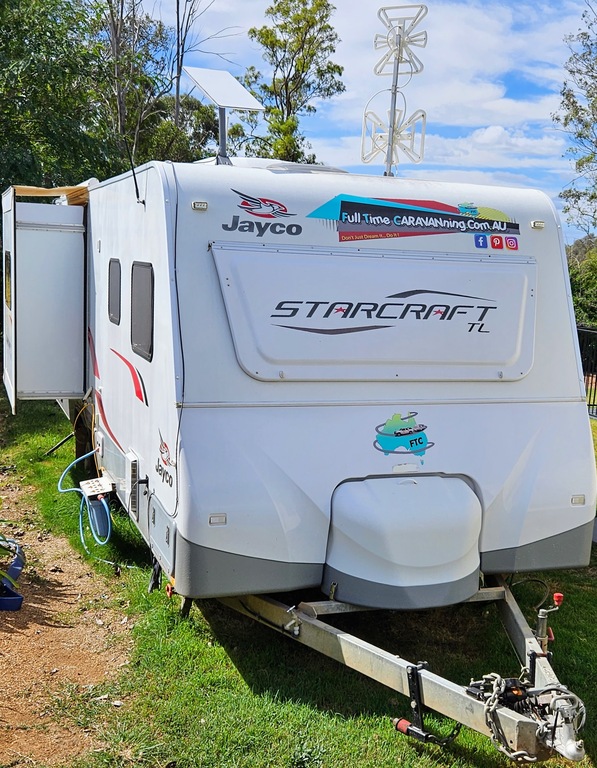
Upholstering our caravan lounge. Club lounge cushion corners stapling fabric on. full time caravanning
Photo: Stapling one of the couch corners

Upholstering our caravan lounge. Club lounge cushion corners stapling fabric on. full time caravanning
Photo: Finished corners of back cushion of club lounge

Larry wanted to add some stretch wire (kind of like washing line wire) between the two cushions, to make sure it was secure. Previously the material had become loose in this section and he thought this would be a second layer of protection after adding the staples.

Upholstering our caravan lounge. Club lounge makeover full time caravanning
Photo: Back cushions finished & corners hidden

Lastly, the back of the wood was re covered in the backing material and had Velcro it originally had. Once we finished the three back cushions it was on to the seats.
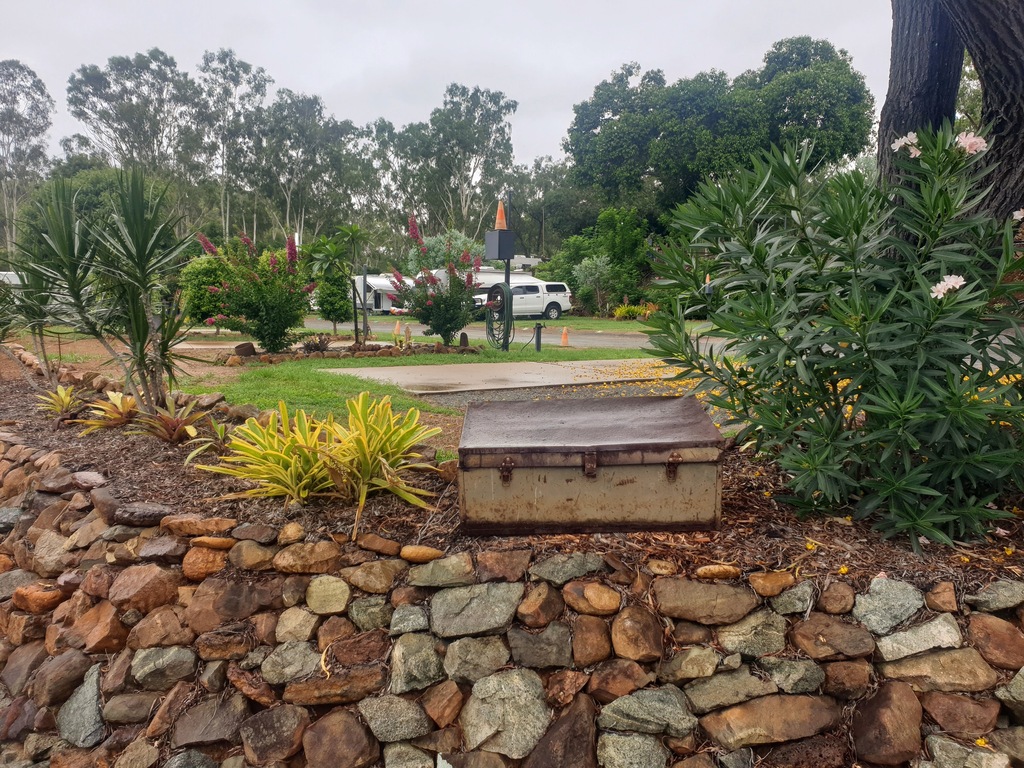
replacing backing and Velcro while Upholstering our caravan lounge. Club lounge makeover full time caravanning
Photo: Replacing backing material and Velcro

Upholstering Our Caravan Lounge – Seat’s

As mentioned, our bottom seats had zips on. Not having a sawing machine and not wanting to pay someone to make cushion covers, we came up with a cunning plan 😉 Deciding to buy some 3mm ply wood from Bunnings and repeat what we had done to the back cushions. The amazing owners at Gunna Go Caravan Park were heading to Bunnings and brought the long piece of wood back for us.

Upholstering our Club lounge makeover. No zip cushion, wooden back. full time caravanning
Photo: 3mm ply wood for Upholstering our caravan lounge

Tent World

Upholstering our caravan lounge. Club lounge makeover zip cushion removed full time caravanning
Photo: The original zip on the bottom cushions

Under our awning we put the wood on top of a couple of small tables. I held the wood still and Larry made light work of cutting it in half with his saw. One long piece was used for the back bottom seat of the club lounge. The other half was cut for the two bottom sides.

Jayco club lounge makeover. Upholstering our Club lounge. side bottom cushion
Photo: One of the well worn side cushions

Stuffing The Bottom Seats

One of the main reasons for upholstering our caravan lounge was the fact it was lacking in padding in some spots. After sitting in the same spots for several years we decided to stuff it and add some wadding. Considering caravan couches are not meant for full time use it had done well.

An afterthought was that we could have gone to Clark Rubber and got some foam cut to size. Oh’ well maybe next time.

Upholstering our caravan lounge. Club lounge makeover full time caravanning
Photo: Checking to see how much wadding we needed

wadding used for Upholstering our caravan lounge. Club lounge makeover full time caravanning
Photos: We used wadding to fill out sections most used

Wadding was placed in parts we sit most. Stuffing from an old pillow was also used between the wadding. Then we stapled the new fabric to the new wood, as we did with the back seats. At first it didn’t look so good as the cushions looked like they had humps. However, once they were put back in place, they look great and the humps are not seen 🙂

Photo: A lot more wadding than we thought there was from Spotlight

Upholstering our caravan lounge. finished bottom seat Club lounge makeover full time caravanning
Photo: One of the finished bottom cushions stapled to wood

Measuring The Wood

Being our first time upholstering our caravan lounge, we had to learn along the way. Cutting the length of the wood needed was fine, but cutting the angles was a case of trial and error. First, we put the seat cushion on top of the wood and marking where we wanted to cut it. After laying the old cushion on top of the wood, both ends were marked and cut at an angle.

Upholstering our Club lounge makeover. No zip cushion, wooden back. full time caravanning
Photo: Roughly drawing the angles of the Bottom cushions

Upholstering our Club lounge makeover. No zip cushion, wooden back. full time caravanning
Photo: Cutting the wood to Upholstering our caravan lounge

Then, after cutting the wood, we put each piece of wood in place to see if they fit. A couple of pieces of wood overlapped a little when putting them in place so we cut more off until it was right.

Upholstering our caravan lounge. sanding wood to staple fabric to
Photo: Sanding the edges once cut to size

Upholstering our Caravan lounge makeover. No zip needed for cushion cover. wooden back. full time caravanning
Photo: Placing the three wooden bottoms in place to see if they fit before adding cushions

Upholstering Our Caravan Lounge – Tips

  • Buy upholstery material as this should last longer then other fabrics.
  • Get extra fabric if you can, in case your measurements are a bit off.
  • Buying plain black fabric meant we didn’t need to match a pattern. Therefore making it easier to do. As well as costing less as we didn’t need extra material to match a pattern.
  • Buy a good staple gun and a couple of packs of staples for it.
  • We bought a staple remover tool to help remove the hundreds of staples holding the original fabric on. A small screwdriver did the same job.
  • Be prepared to be sweeping/vacuuming up bits of cotton that you find everywhere when finished.
  • Think about how you’re going to fold the corners as this can be the hardest part.
Upholstering our caravan lounge seat. Club lounge makeover full time caravanning
Photo: You need space to cut the fabric to size

Upholstering our caravan lounge seat. Club lounge makeover full time caravanning
Photo: Some of the finished cushions

Upholstering our caravan lounge club lounge full time caravanning caravan makeover
Photo: Our finished DIY upholstery job on our caravan lounge

To conclude, would we recommend doing it yourself? Heck yes! We gave it a go and are extremely happy with it. Much like Our Caravan Makeover, we’ll see how it wears over time.

If you liked this Upholstering our caravan lounge post, you might also like:

Aussie House Sitters are our choice of house sitting sites. Use our Coupon Code “AHS15%off” for 15% off your joining fee